
Welcome to Part 2 of our Water series and Blog Takeover – The Power of Water. In this week’s blog we’re going to cover slightly more complicated concepts including the water cycle, water resistance, rain clouds, using water power in machines, and exploring liquid densities.
Thank you so much to all of the weeSTEMers for completing the activities this week! You did such an incredible job and I hope you managed to have some fun learning along the way. Your photos have blown me away – and it’s so wonderful to see how many families are involved in the weeSTEMs family! So thank you for sharing your time and photos with us. It really means the world!
As always, all of these tasks can easily be edited to cater for any age group (often simply by the amount of input you as the adult gives). If you’re ever unsure, please do contact me and I’ll be happy to help!
Water Facts
- Water can dissolve more substances than any other liquid
- The water you drink now could have been dinosaur pee (because it’s all the same water going around in the same water cycle for billions of years)
- Through exhaling (breathing out) we lose about 1 cup of water a day
- Buying a bottle of water from a shop in equivalent in cost to filling that same-size bottle of water 1,742 times from your tap
- It takes more than twice the amount of water to produce coffee than it does tea
- Water regulates the Earth’s temperature
- If the entire world’s water fitted into a 4-litre jug, the freshwater available to us would be just 1 teaspoon
- Generally, water boils at 100°C, but this is relative to the barometric pressure – so for example on the top of Mount Everest it actually boils at 68°C
- Water expands as it cools from 4°C to 0°C
- Water can appear ‘sticky’ – and thus climb things and defy gravity
- 1 apple requires 18 gallons of water to grow
Activity 1
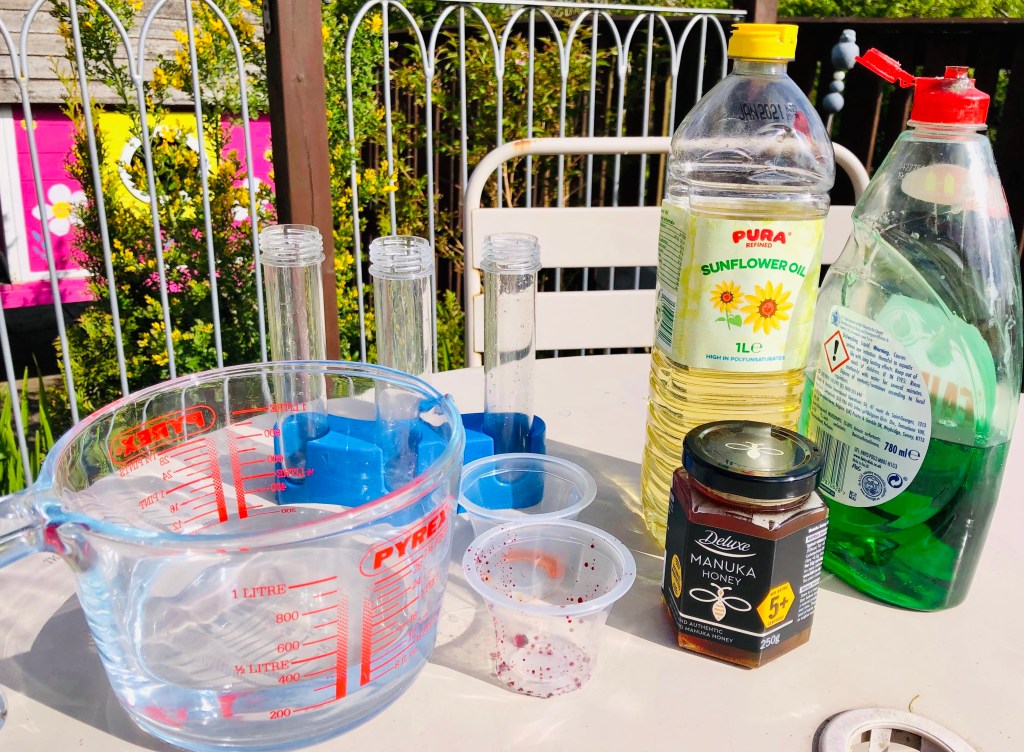
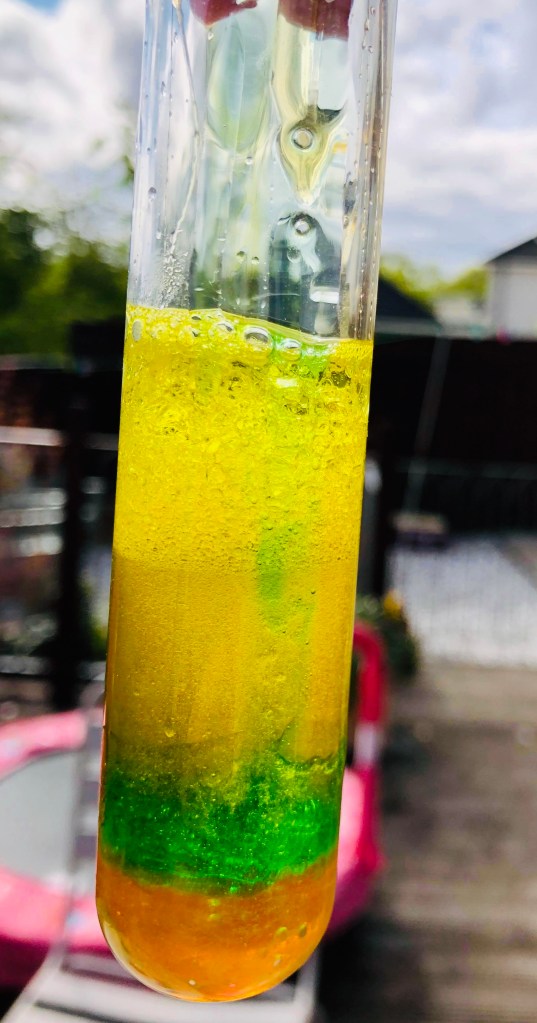
Liquid Densities
How many different combinations can you make?
You will need:
- Clear container (e.g. a jar/tall vase/clear plastic bottle)
- Different liquids (i.e. oil, water, fruit juice, dish soap, honey/syrup)
- Food dye (optional)
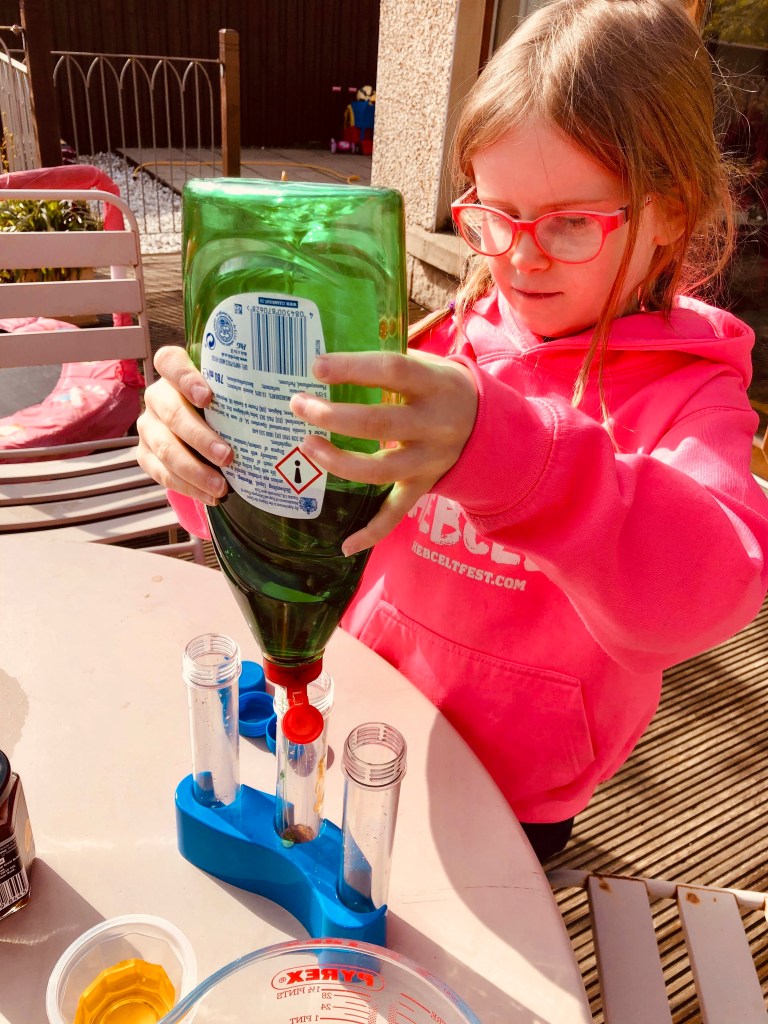
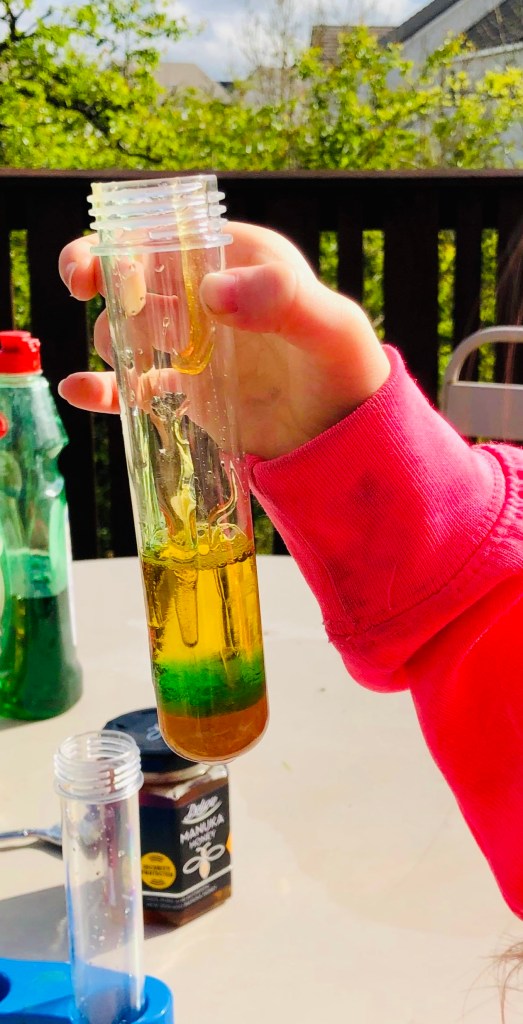
Instructions
Slowly pour the syrup/honey into the clear container, next slowly add the soap. After that, add the coloured water and then finally add the oil.
If you have several containers/glasses you could do different combinations in each (eg syrup-blue dyed water-olive oil and in another honey-red dyed water-vegetable oil).
The combinations are endless – and if you have bottles/jars they are great for allowing kids to shake the mixtures and observe what happens when they’re mixed.
If you pour them all in carefully enough you’ll notice the liquids don’t mix – this is because they have different densities. A liquid that is more dense is heavier and therefore will sit at the bottom whereas lighter liquids will happily balance on top since they’re lighter.
Emma says: “My daughter loved seeing the thick honey gloop in and sit at the bottom of the tube – she definitely thought it was much heavier than the other liquids! She ‘wow’d’ at the lava lamp we made as the liquids mixed and wanted to try the different liquids in a different order!”


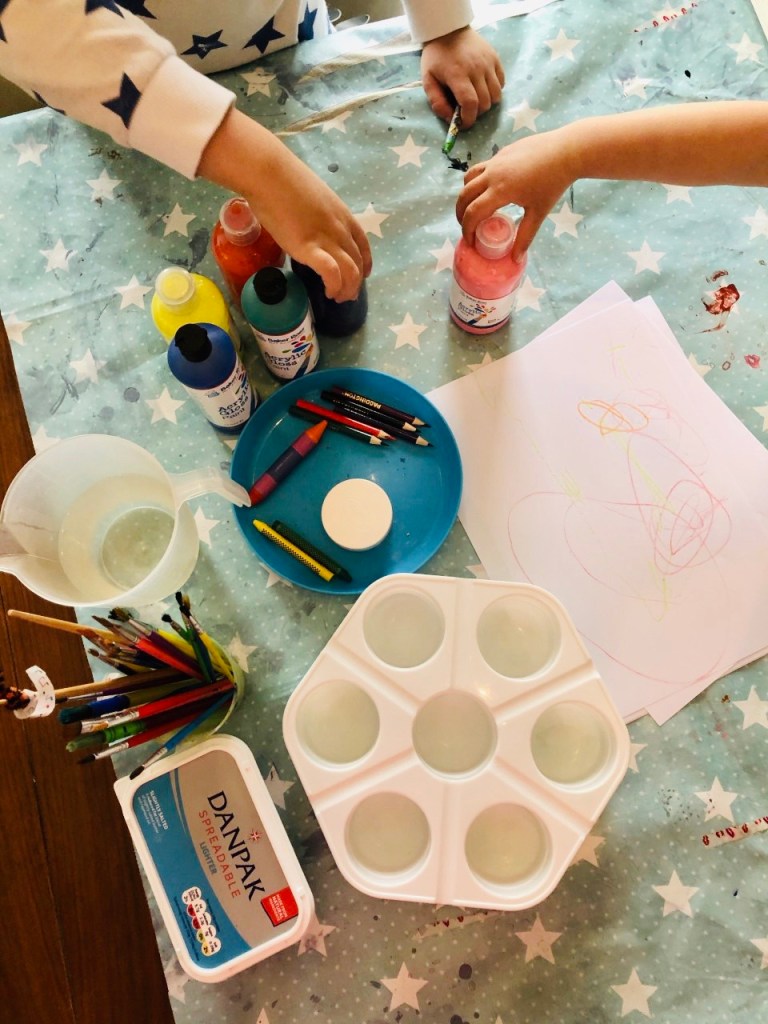
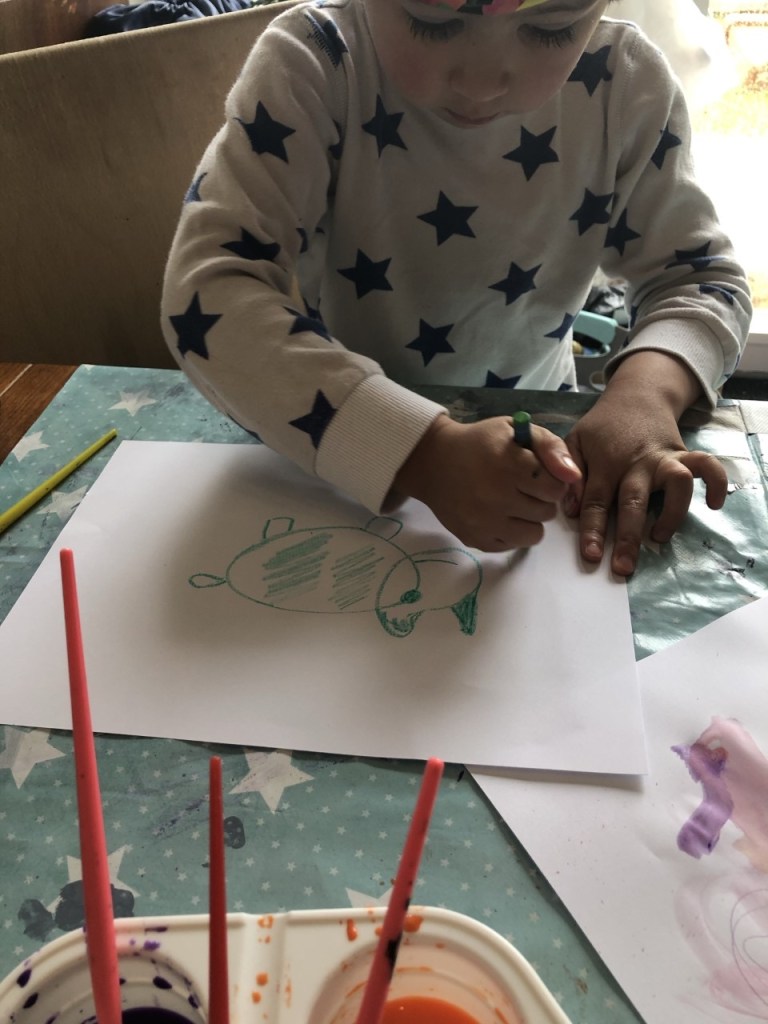
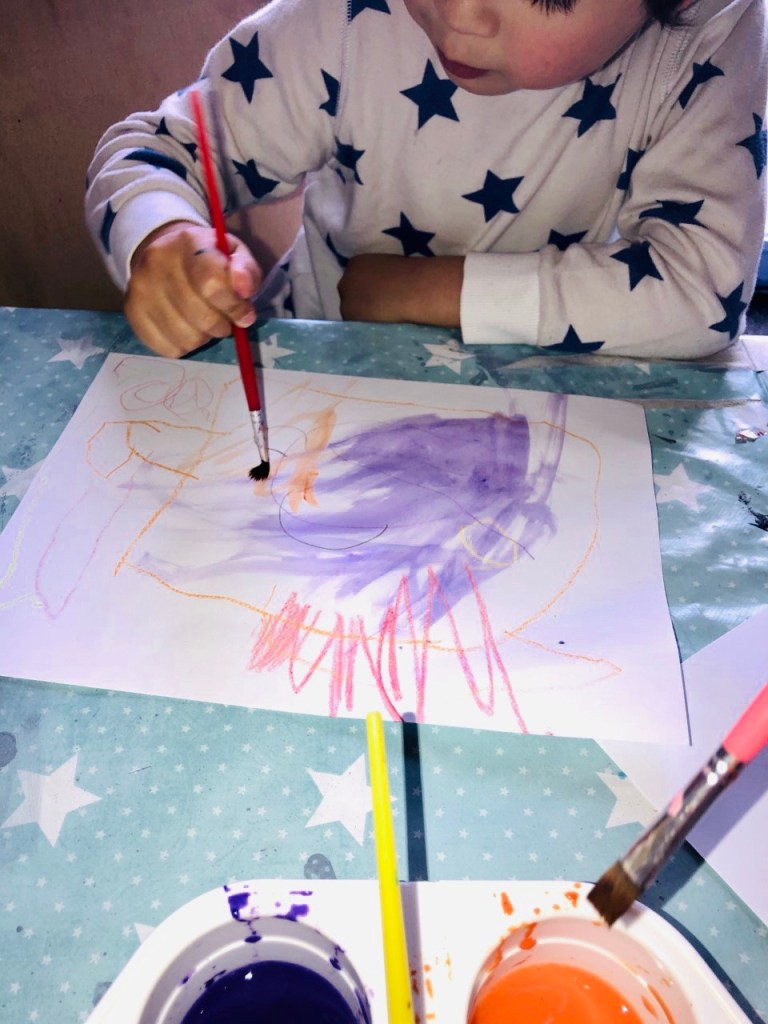
Activity 2
Water Resistance
Which substance resists the paint the best?
You will need:
- Wax crayon
- Lip balm
- Margarine
- Thick paper
- Paint (watered down with water)
Instructions
This is a really fun activity to further explore different substances and how water interacts with them.
Use your crayons to draw shapes onto your paper and then brush thin, watery paint over the paper. What happens?
What happens if you use thick paint?
Repeat the drawings with lip balm and also margarine (you could make fingerprints with the margarine). Lightly brush over them with the watery paint. What happens? Does one substance resist the coloured water better than the others?
Mabel says: “We did very much [enjoy the activity]! I’m looking at your blog today to plan some more experiments for the coming week – thank you!”


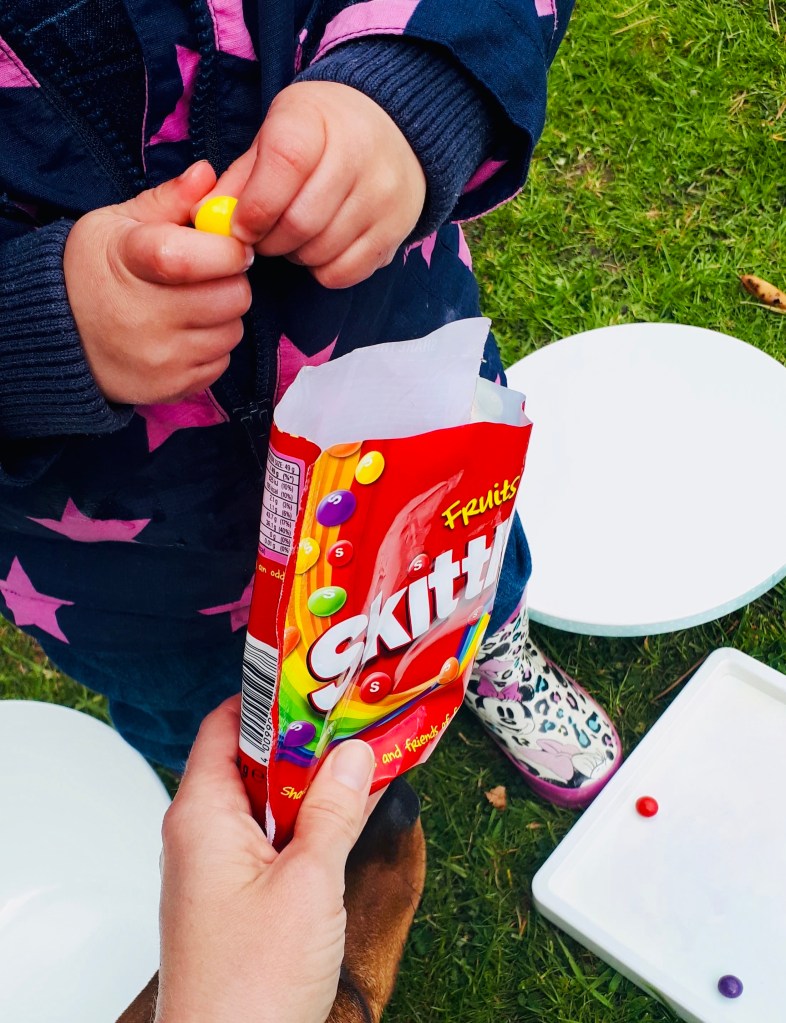
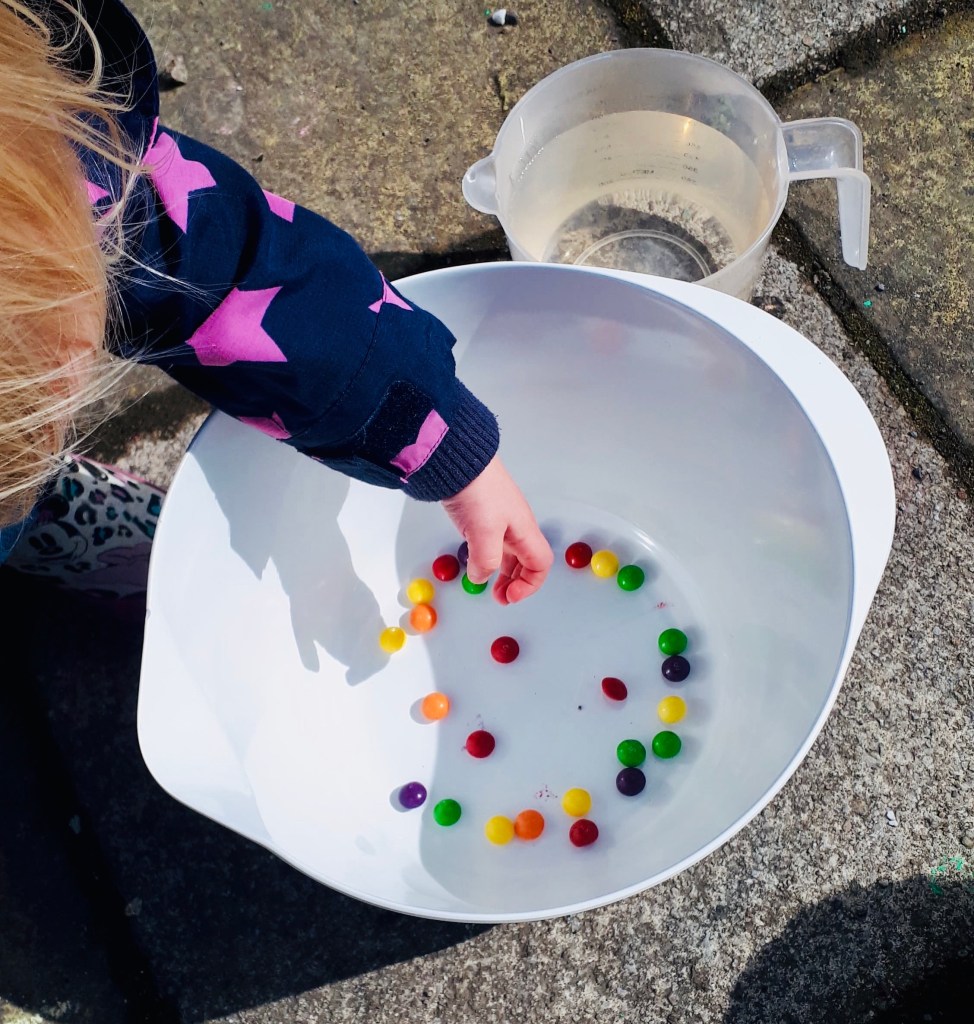
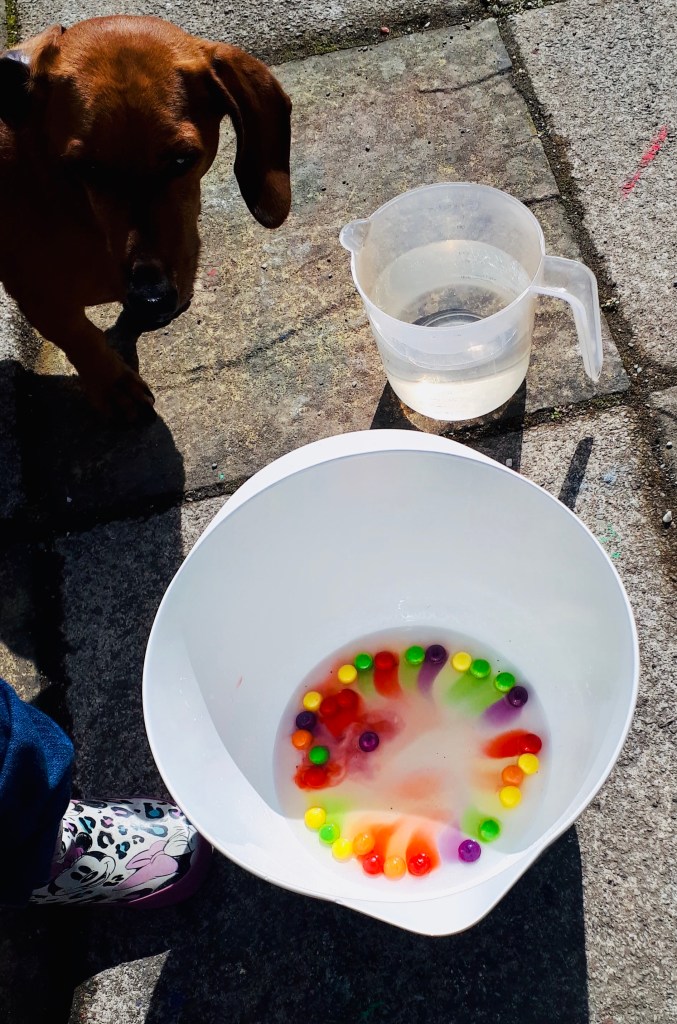
Activity 3
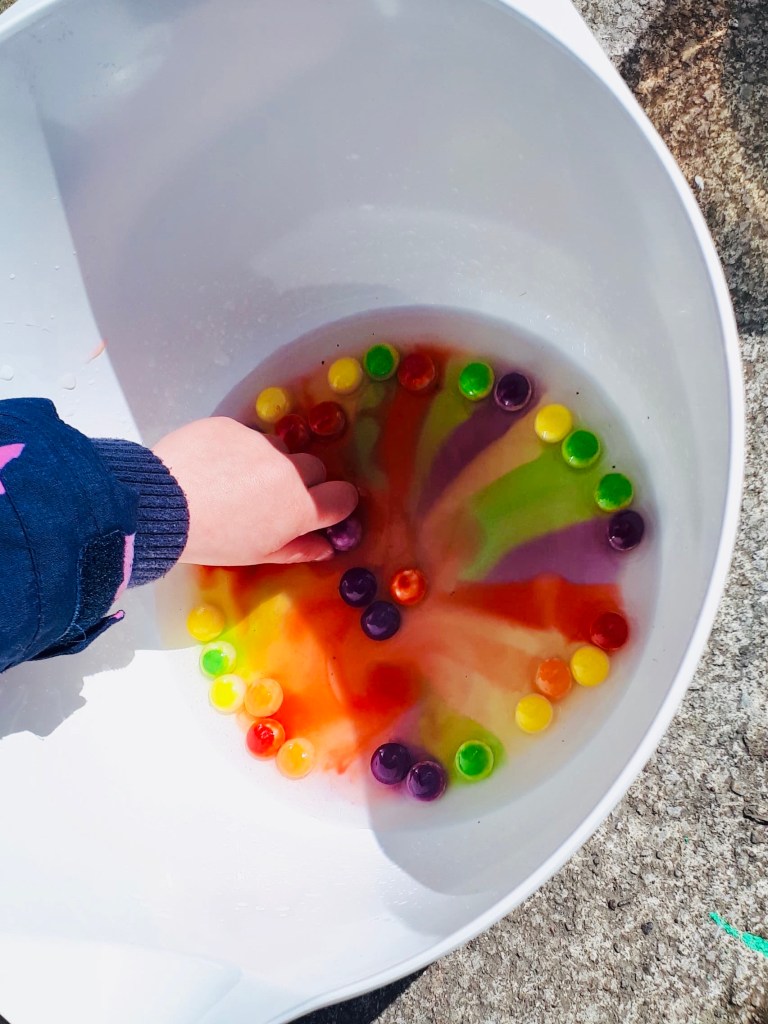
Skittles Rainbow
A beautiful rainbow science experiment!
You will need:
- Skittles
- White plate
- Warm water

Instructions
Simply place the skittles around the perimeter of the plate and then slowly pour the warm water into the middle of the plate until it reaches all the skittles. Watch what happens. Enjoy eating the skittles afterwards!
You could experiment with different shapes and see if they have any different outcomes.
Sarah says: “We didn’t have any dinner plates (ours are already rainbows!). So I gathered some different white items we could try it on. We tried the paint tray first. It didn’t work well but I think it’s because we were on uneven ground so the water was running in one direction. We moved onto the patio and tried in the bowl and on the cake stand. The cake stand didn’t work at all as the water just ran off the edge! The bowl would have been successful and we started to get a result but little one didn’t understand the experiment and kept shoving Skittles in the middle of the water. I think she’s a wee bit too young although she did enjoy putting the skittles on the surfaces and so it was a good fine-motor exercise for her!”

Activity 4
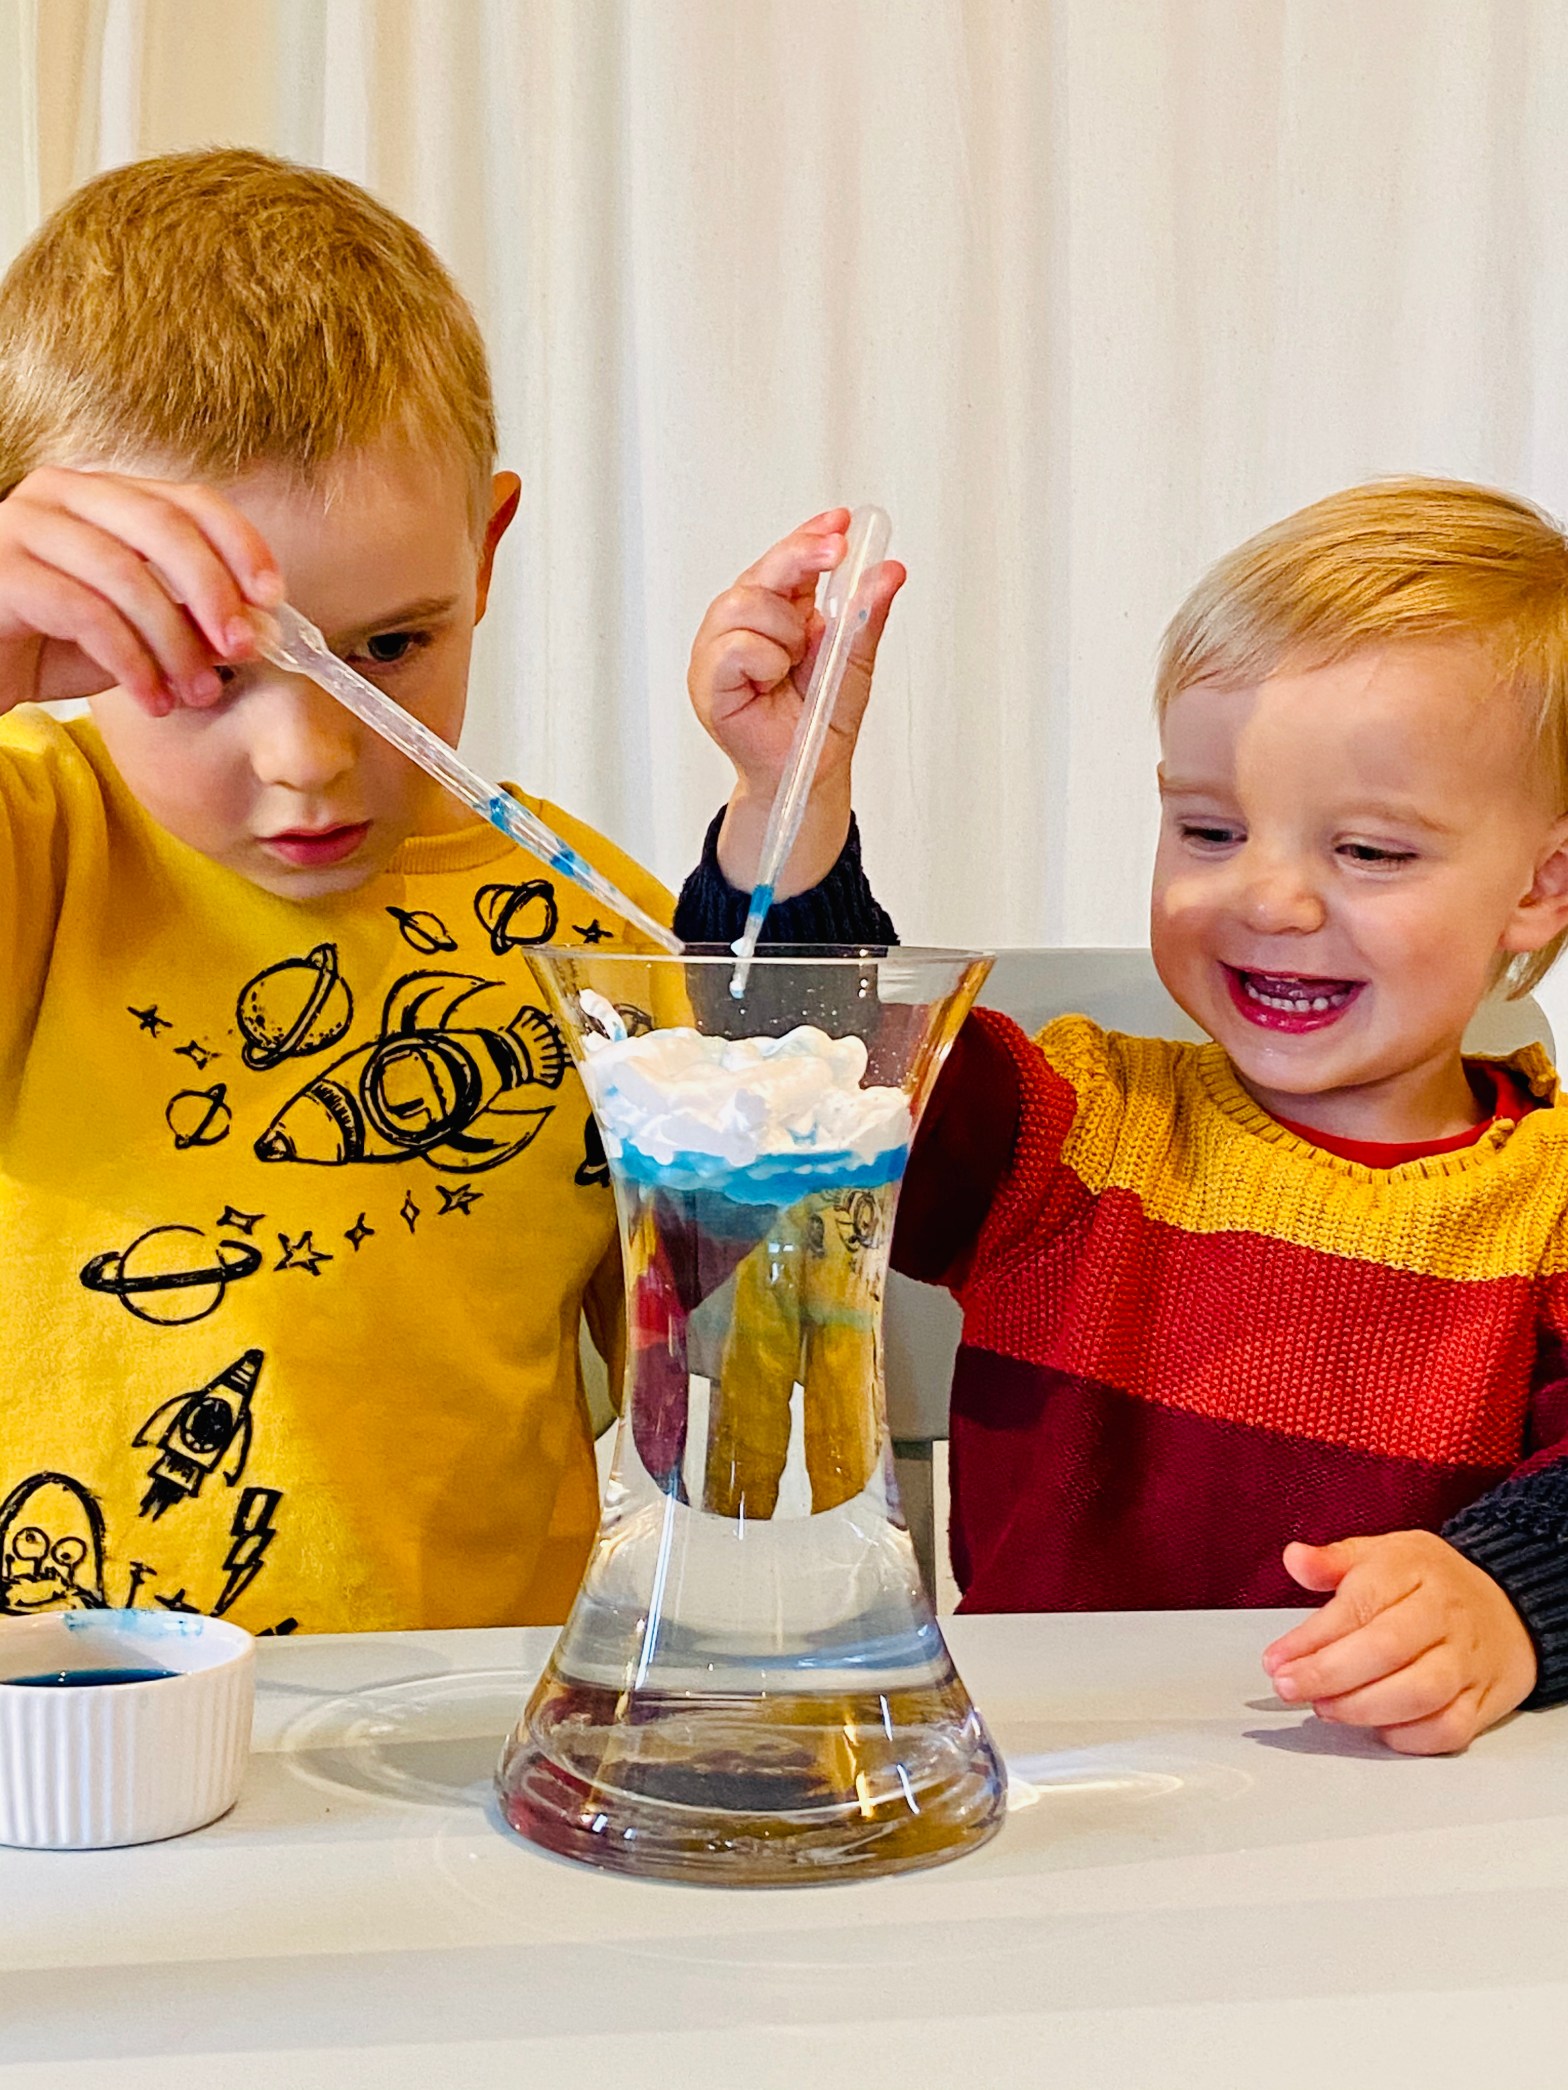
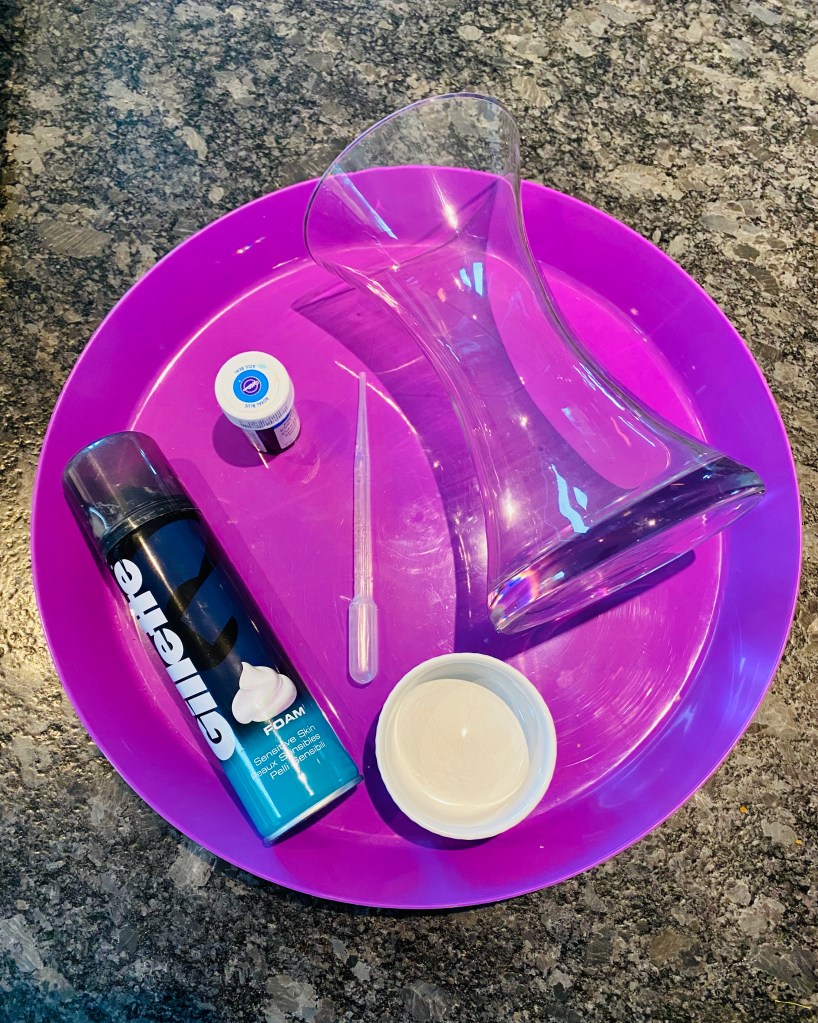
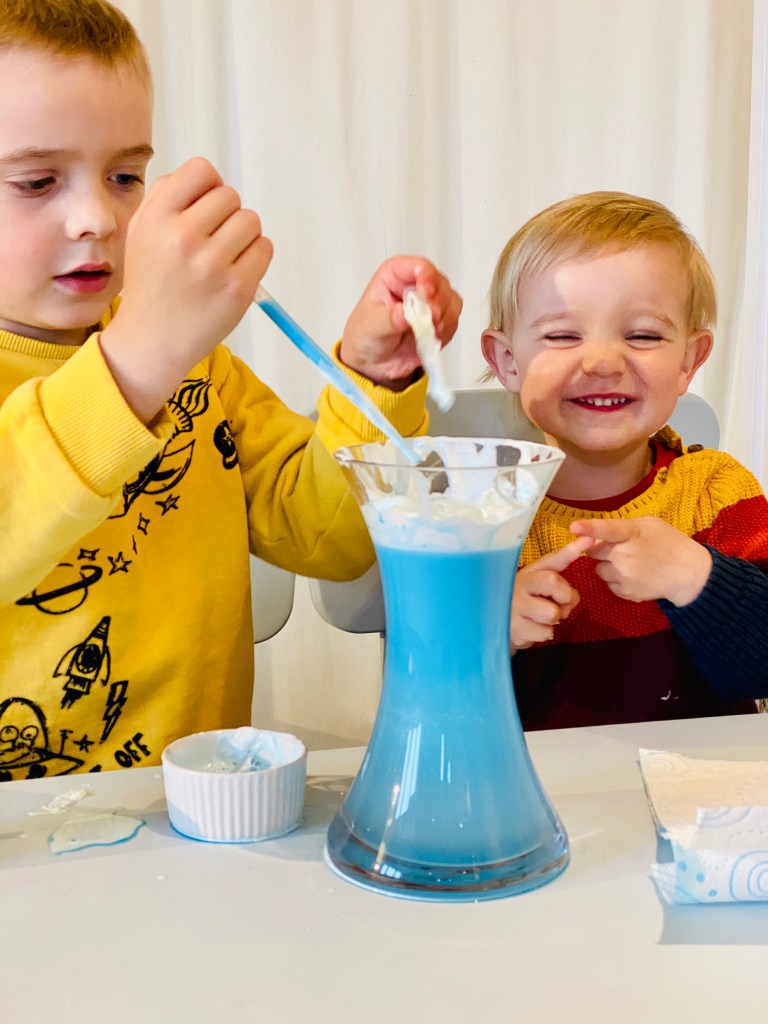
Rain Cloud in a Jar
Why does it rain?
You will need:
- Jar/vase
- Pipette
- Shaving foam (not gel)
- Blue food dye (or range of colours)
- Bowl for food dye
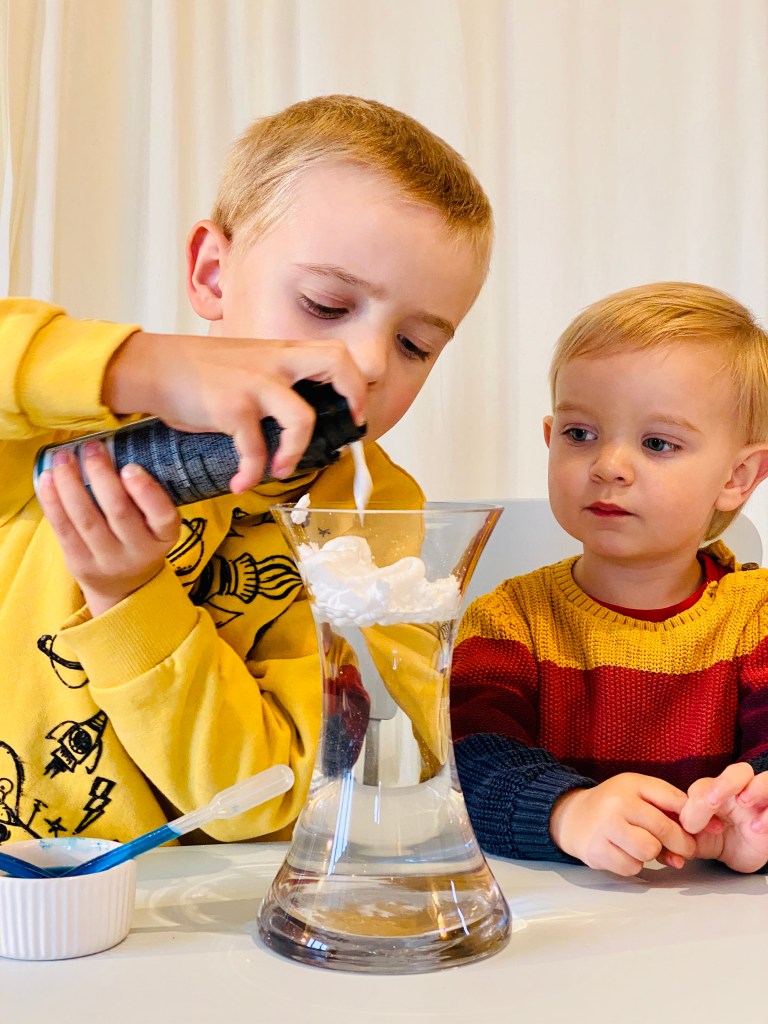
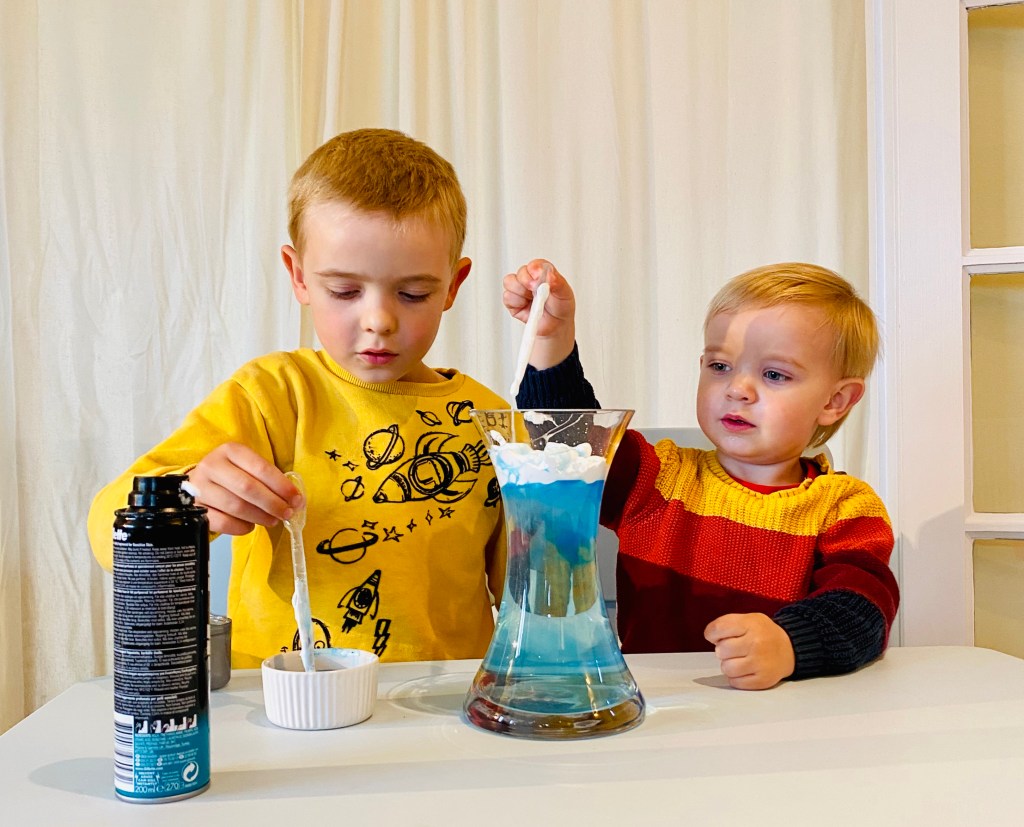
When clouds get heavy enough with water droplets it starts to rain – and we’ll take a more in-depth look at the water cycle in Activity 5.
Simply fill you jar/jug 3/4 full with water and then skoosh the shaving foam over the top. Using a dropper/pipette drip blue-dyed water onto the foam cloud.
Try dripping the blue water on slowly- and if you’ve got the patience you could wait to watch them work their way through the cloud. Alternatively, skoosh water until your heart’s content and they will work their way through much more quickly!
In this experiment the clear water represents air, the foam represents fluffy clouds, and the blue water represents rain droplets.
What happens when you skoosh more water into the cloud? You could also use a variety of colours to see what different results you get.
Here’s a video of us doing the experiment.


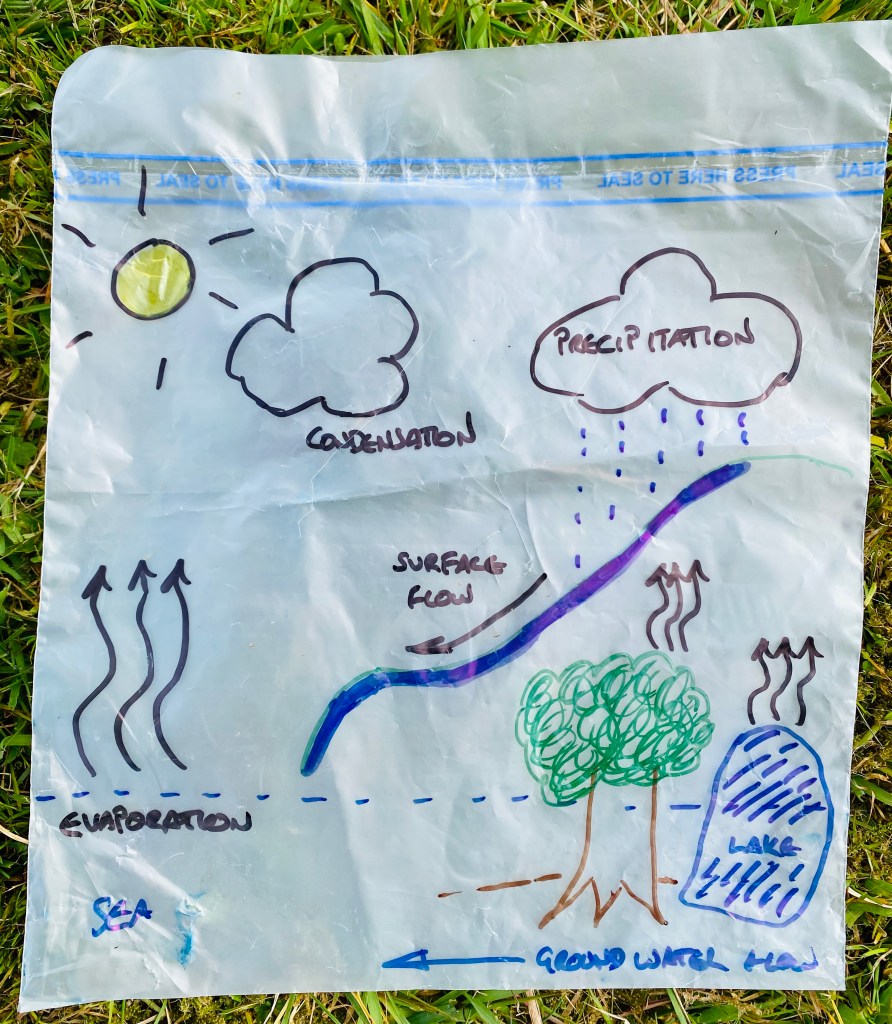
Activity 5
The Water Cycle
Where does rain come from and where does it go?
You will need:
- Clear ziploc bag
- Blue dyed water
- Pens

Instructions
Have a watch of this water cycle video and see if you can create a water cycle in a bag.
We drew the cycle on (you can make this as simple or complicated as you like) and then added blue-dyed water to represent the sea (this helped to make it a sensory activity for the little one).
What elements did you draw on to your water cycle bag? Which part of the water cycle process is the easiest to see in the real world? Why do you think that is?

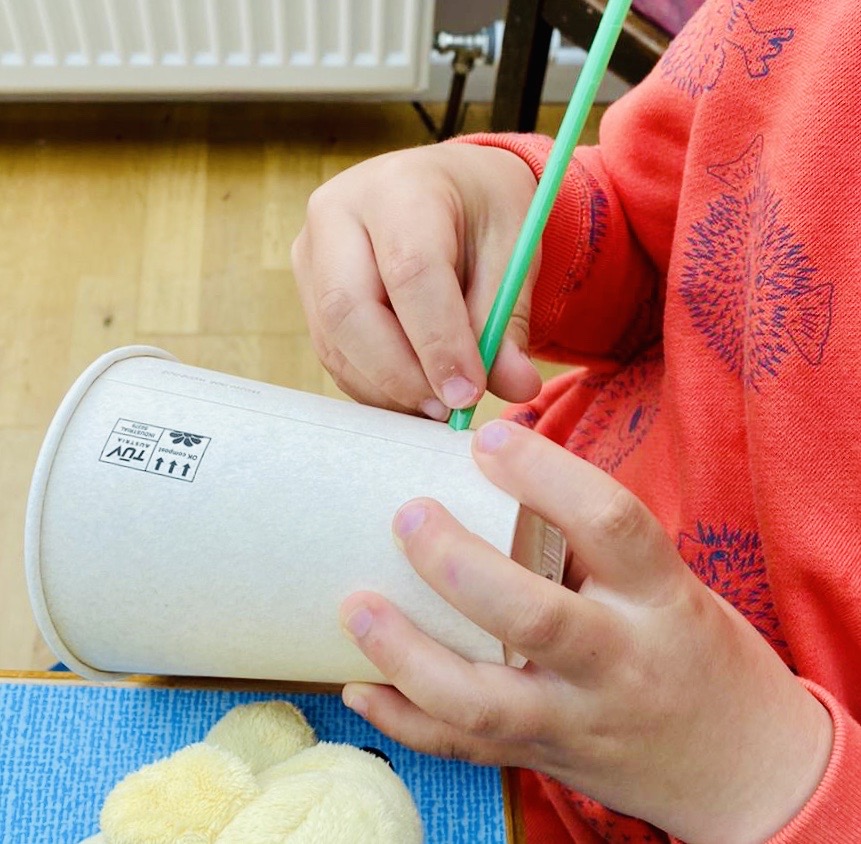
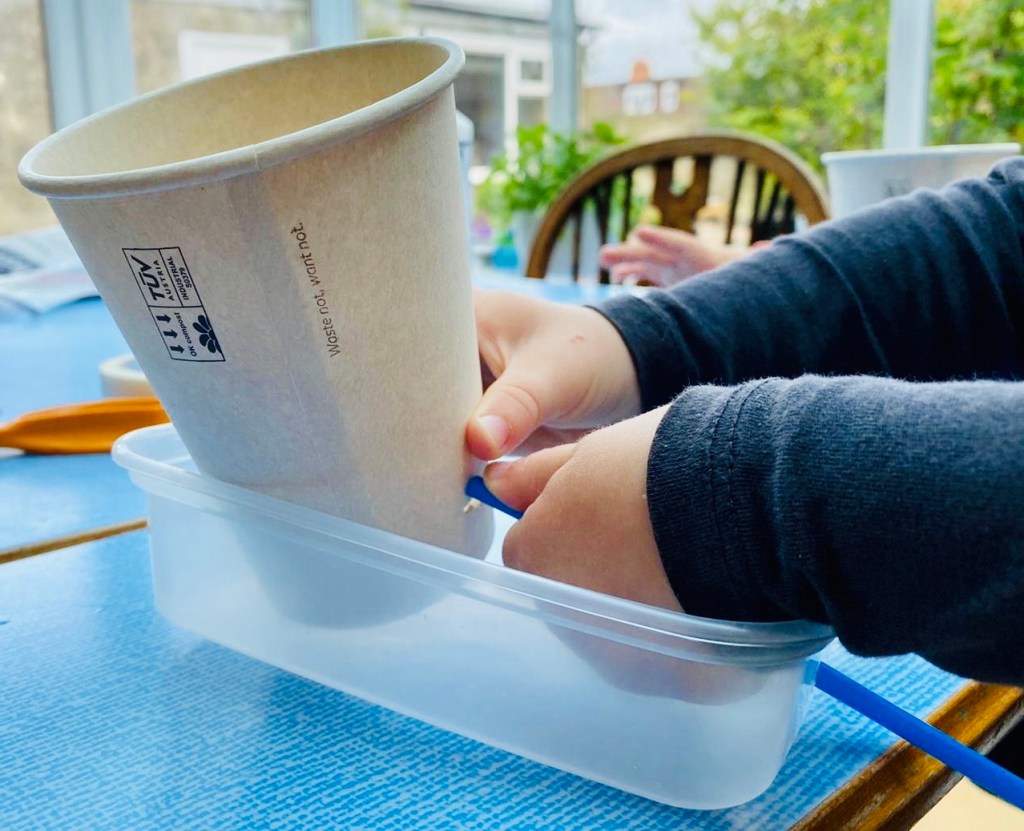
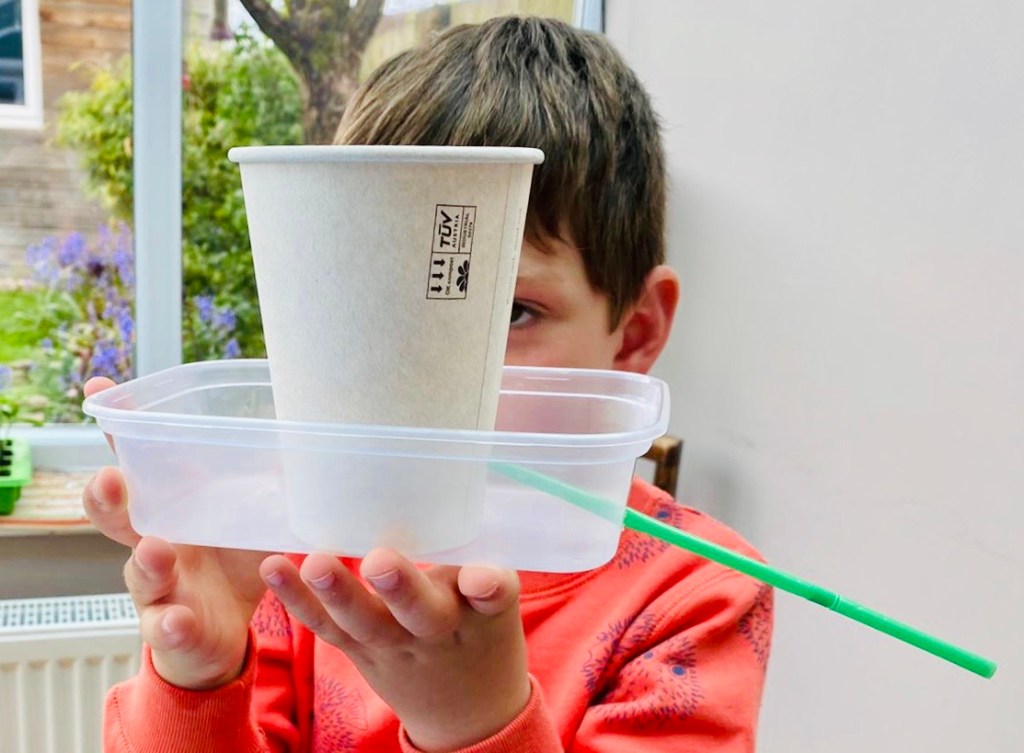
Activity 6
Water Powered Boat
Use water to power your own homemade boat in this fun homemade engineering challenge.
You will need:
- Paper cup
- Plastic food box (ie a takeaway tub)
- Thick straw
- Pencil & pens
- Large tub/bath
- Water
- Card & paper (optional)

Instructions
Pierce a straw-shaped hole in the side of the cup – close to the base (you want the liquid to drain out the side easily). Now glue the base of the cup (so it’s standing normally) in the middle of the box. Pierce the same-sized hole into the end of the box. Thread the longest part of the thick bendy straw through both holes and bend the bendy part downwards. Tape the straw in place.
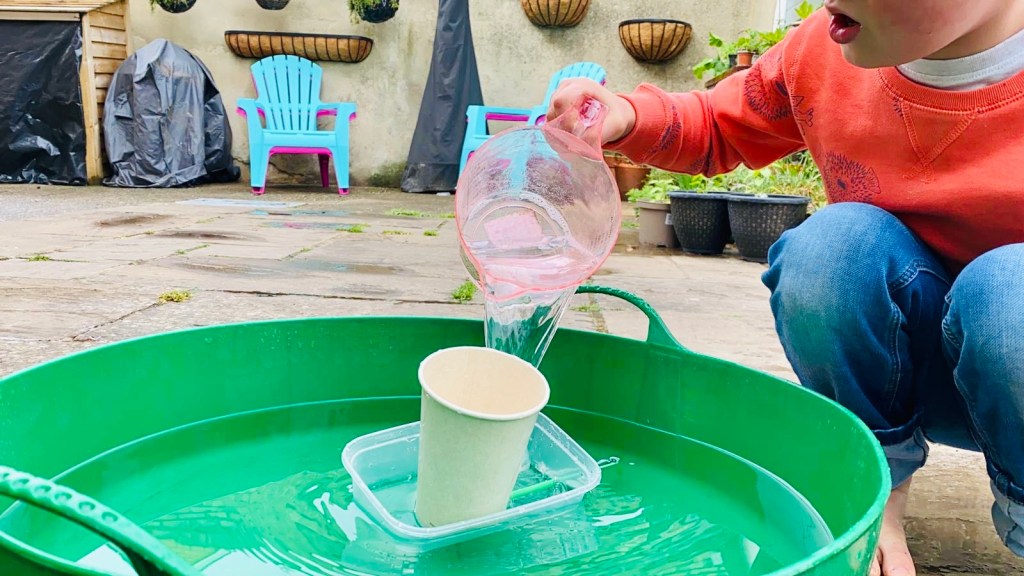
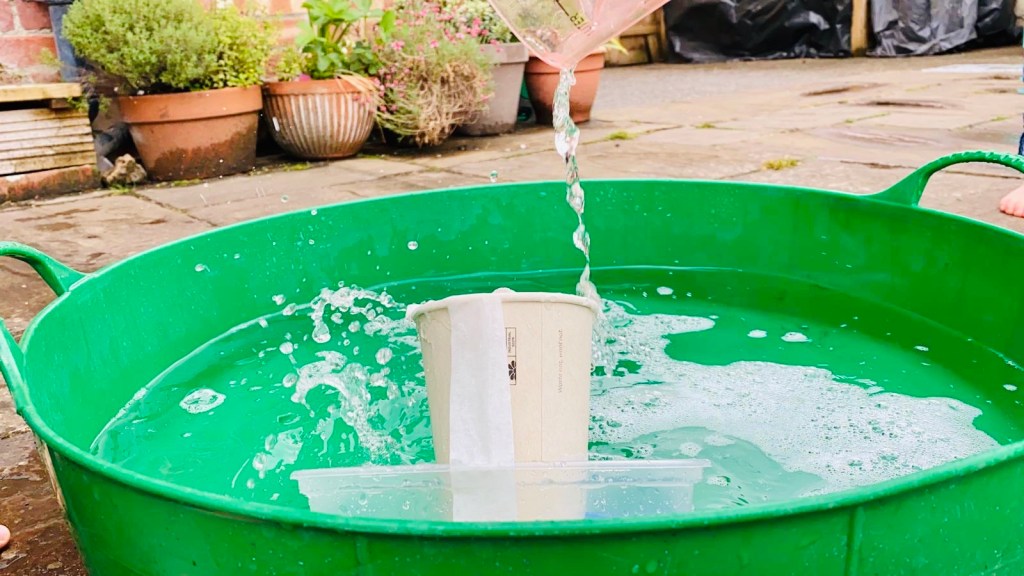
Place the boat into a tub of cold water, pour water into the paper cup and it should propel forwards.
You could use card to decorate the sides of your boat to look like a Viking longship (or whatever type of boat you like!).
Amber says: “I did think [the straws] were a bit narrow but it was all we could get. My eldest (age 4) thought it worked so that is what is important! And he came up with another design which he enjoyed trying so it had him thinking…”

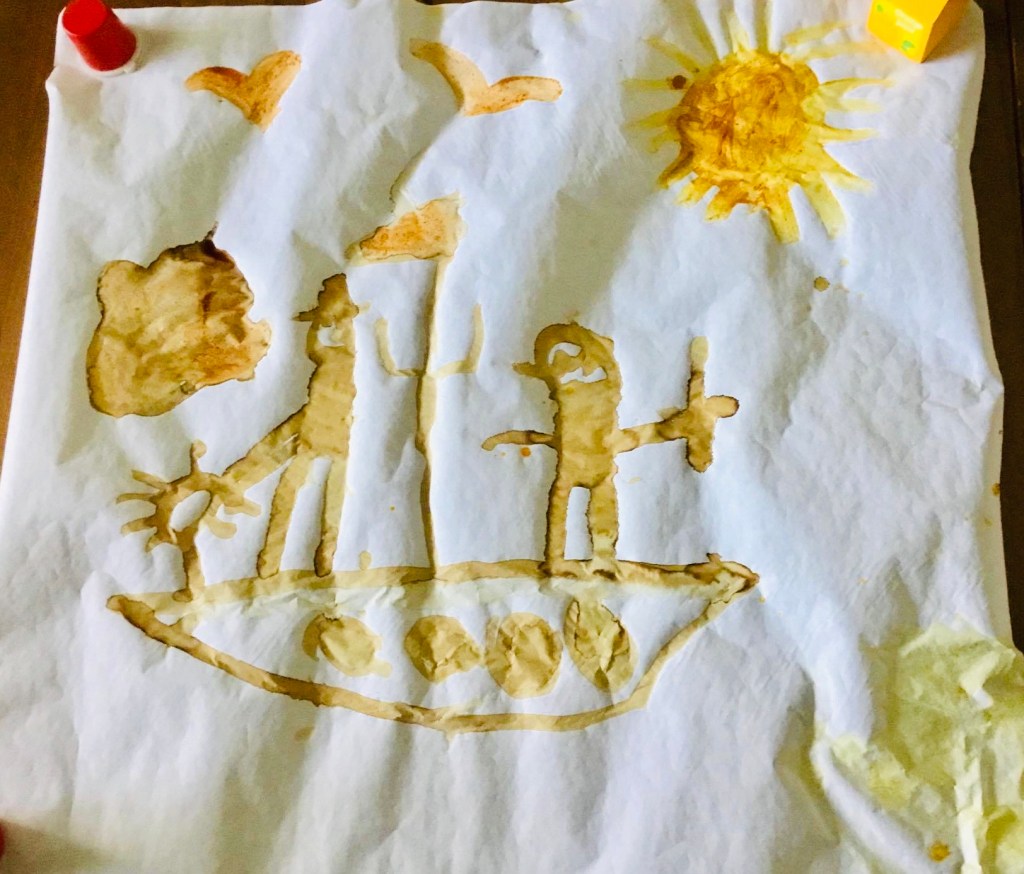
Activity 7
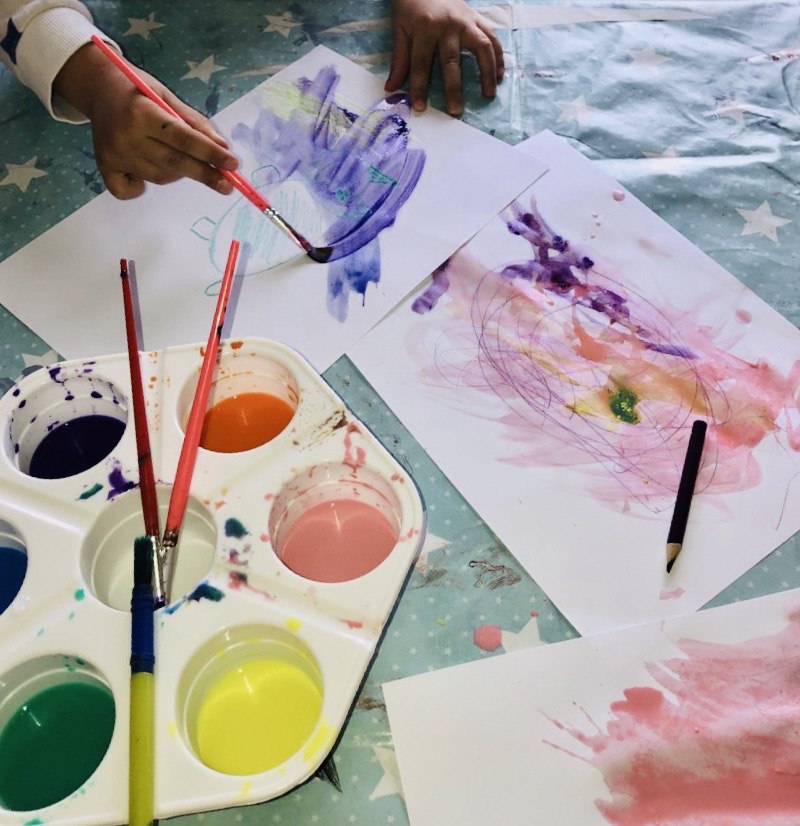
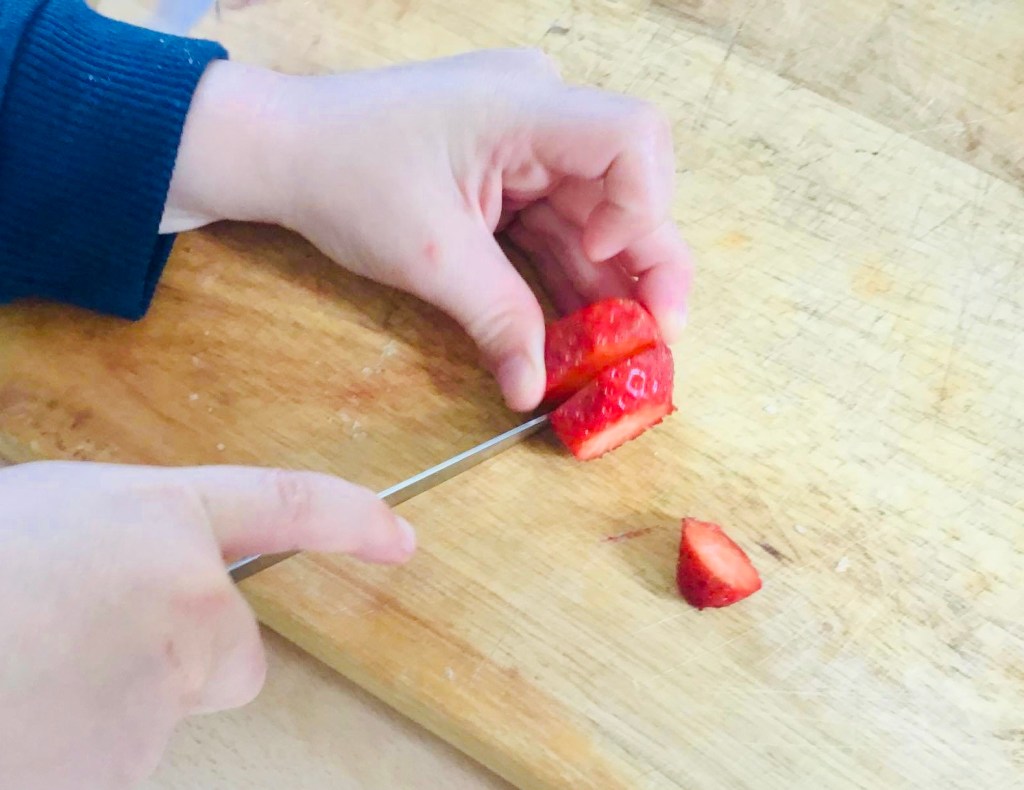
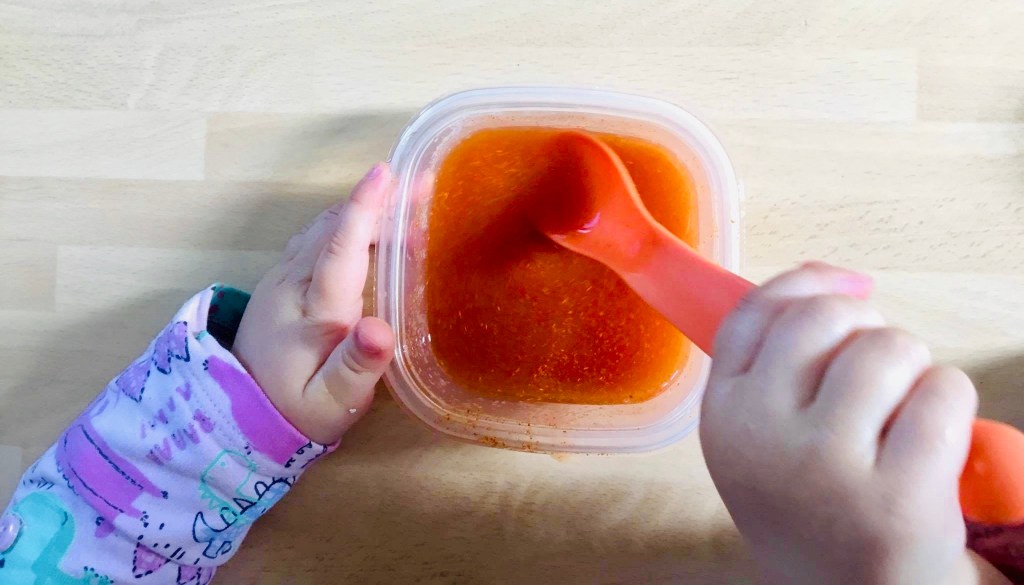
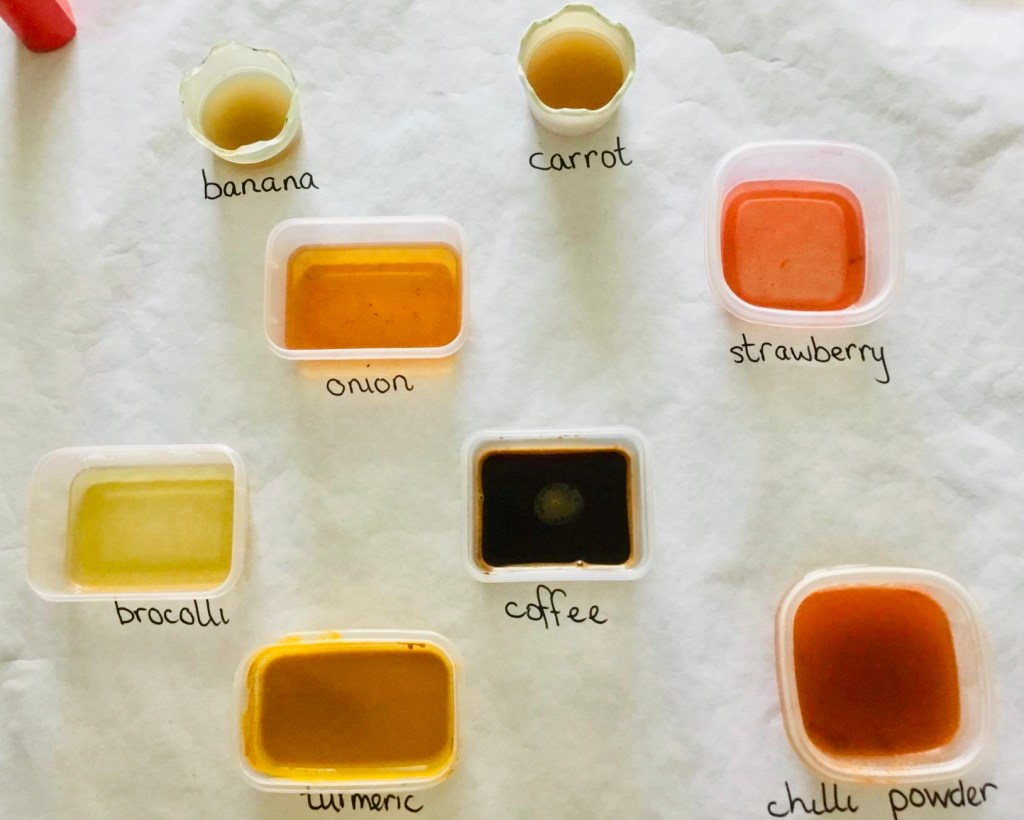
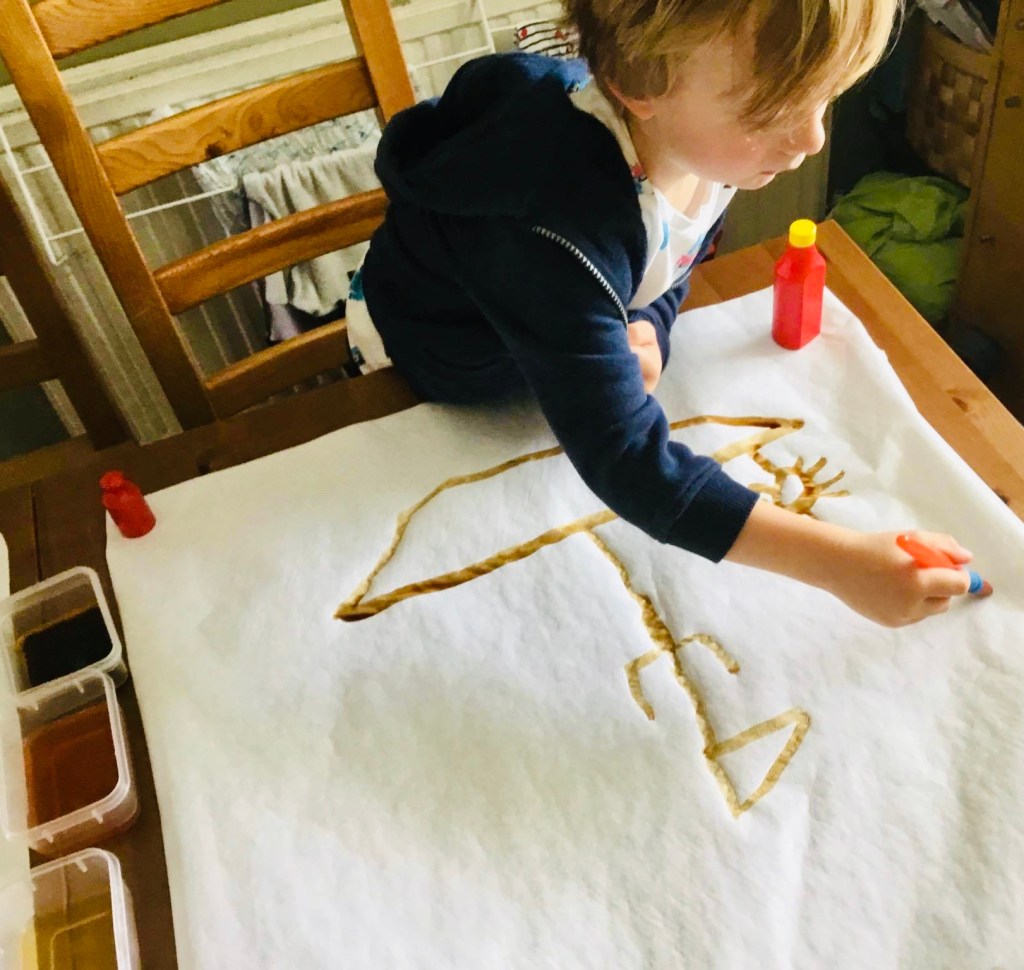
Painting With Food Scraps
What colours can you make?
You will need:
- Any vegetable remains (onions,beetroot, red cabbage are great but use what you have!)
- Grass, coffee, turmeric
- Wee pots/ikea cups
- Paintbrush
- Paper
- Blender/pots
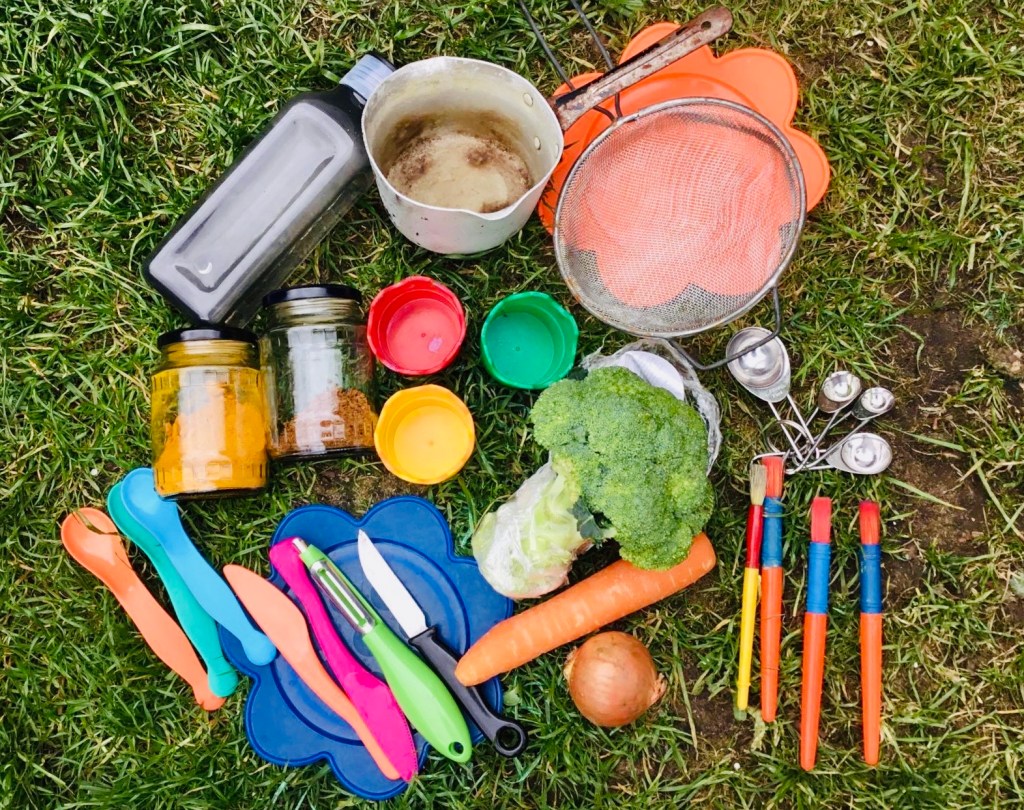
Have some family fun finely chopping and/or blending whatever scraps you have. Add a tiny amount of water and boil most things for around 10 mins before straining them, leave them to cool and enjoy using the new colours to paint.
For a twist – try reheating the red cabbage paint in the microwave for 30 secs! (Please do not go out and buy a red cabbage just for this!).
Emily says: “It was sooo messy! We did have fun but I think their favourite part was mixing all the colours into a potion at the end!”


Thanks again to all of the lovely weeSTEMs families for taking part in this week’s activities! Let us know which ones are your favourites – we can’t wait to see what you get up to!
Happy learning xx
