
Here is our first Blog Takeover – where lots of weeSTEMers have completed some weeSTEMs activities and sent their photos in to share with you!
And let me tell you – the quality and fun that’s come across in the photos has blown me away! I’m so proud and honoured to be surrounded by such dedicated and inspirational parents and families – who also want to share their learning with you.
Not only did families follow the instructions of their activity – so many took the learning further and explored more concepts. Thank you to each and every one of you who not only learned and explored the concept with your child/children but also for dashing about taking photos during the activity so that it could be shared with everyone here.
I hope you enjoy doing these experiments as much all the behind-the-scenes weeSTEMers have!
To start us off on our first of two-parts, we’re going to explore Water. Something that (water-pipe allowing) you will have access to – so I thought it would be the perfect main resource for a group of activities for us all to participate in.
This week try using water to explore and create your own experiments – let your kids lead the learning and invent their own ideas and test their hypotheses. And let me know how you get on and any fascinating facts you come up with!
Water Facts
- The Atlantic Ocean is saltier than the Pacific Ocean
- A newborn baby is 78% water (adults are 55%-60% water)
- Almost all of Earth’s water is in the Oceans
- When looking for life on other planets, astrobiologists search for signs of water (as water makes all life possible)
- Most of the freshwater on Earth is ice
- Water is made up of two elements – hydrogen & oxygen (thus its chemical formula is H2O)
- Pure water has no taste and no smell
- A jellyfish and a cucumber are made up of 95% water
- 70% of the human brain is water
- Through exhaling (breathing out) we lose about 1 cup of water a day
- Buying a bottle of water from a shop in equivalent in cost to filling that same-size bottle of water 1,742 times from your tap
- It takes more than twice the amount of water to produce coffee than it does tea
Videos About Water
Activity 1
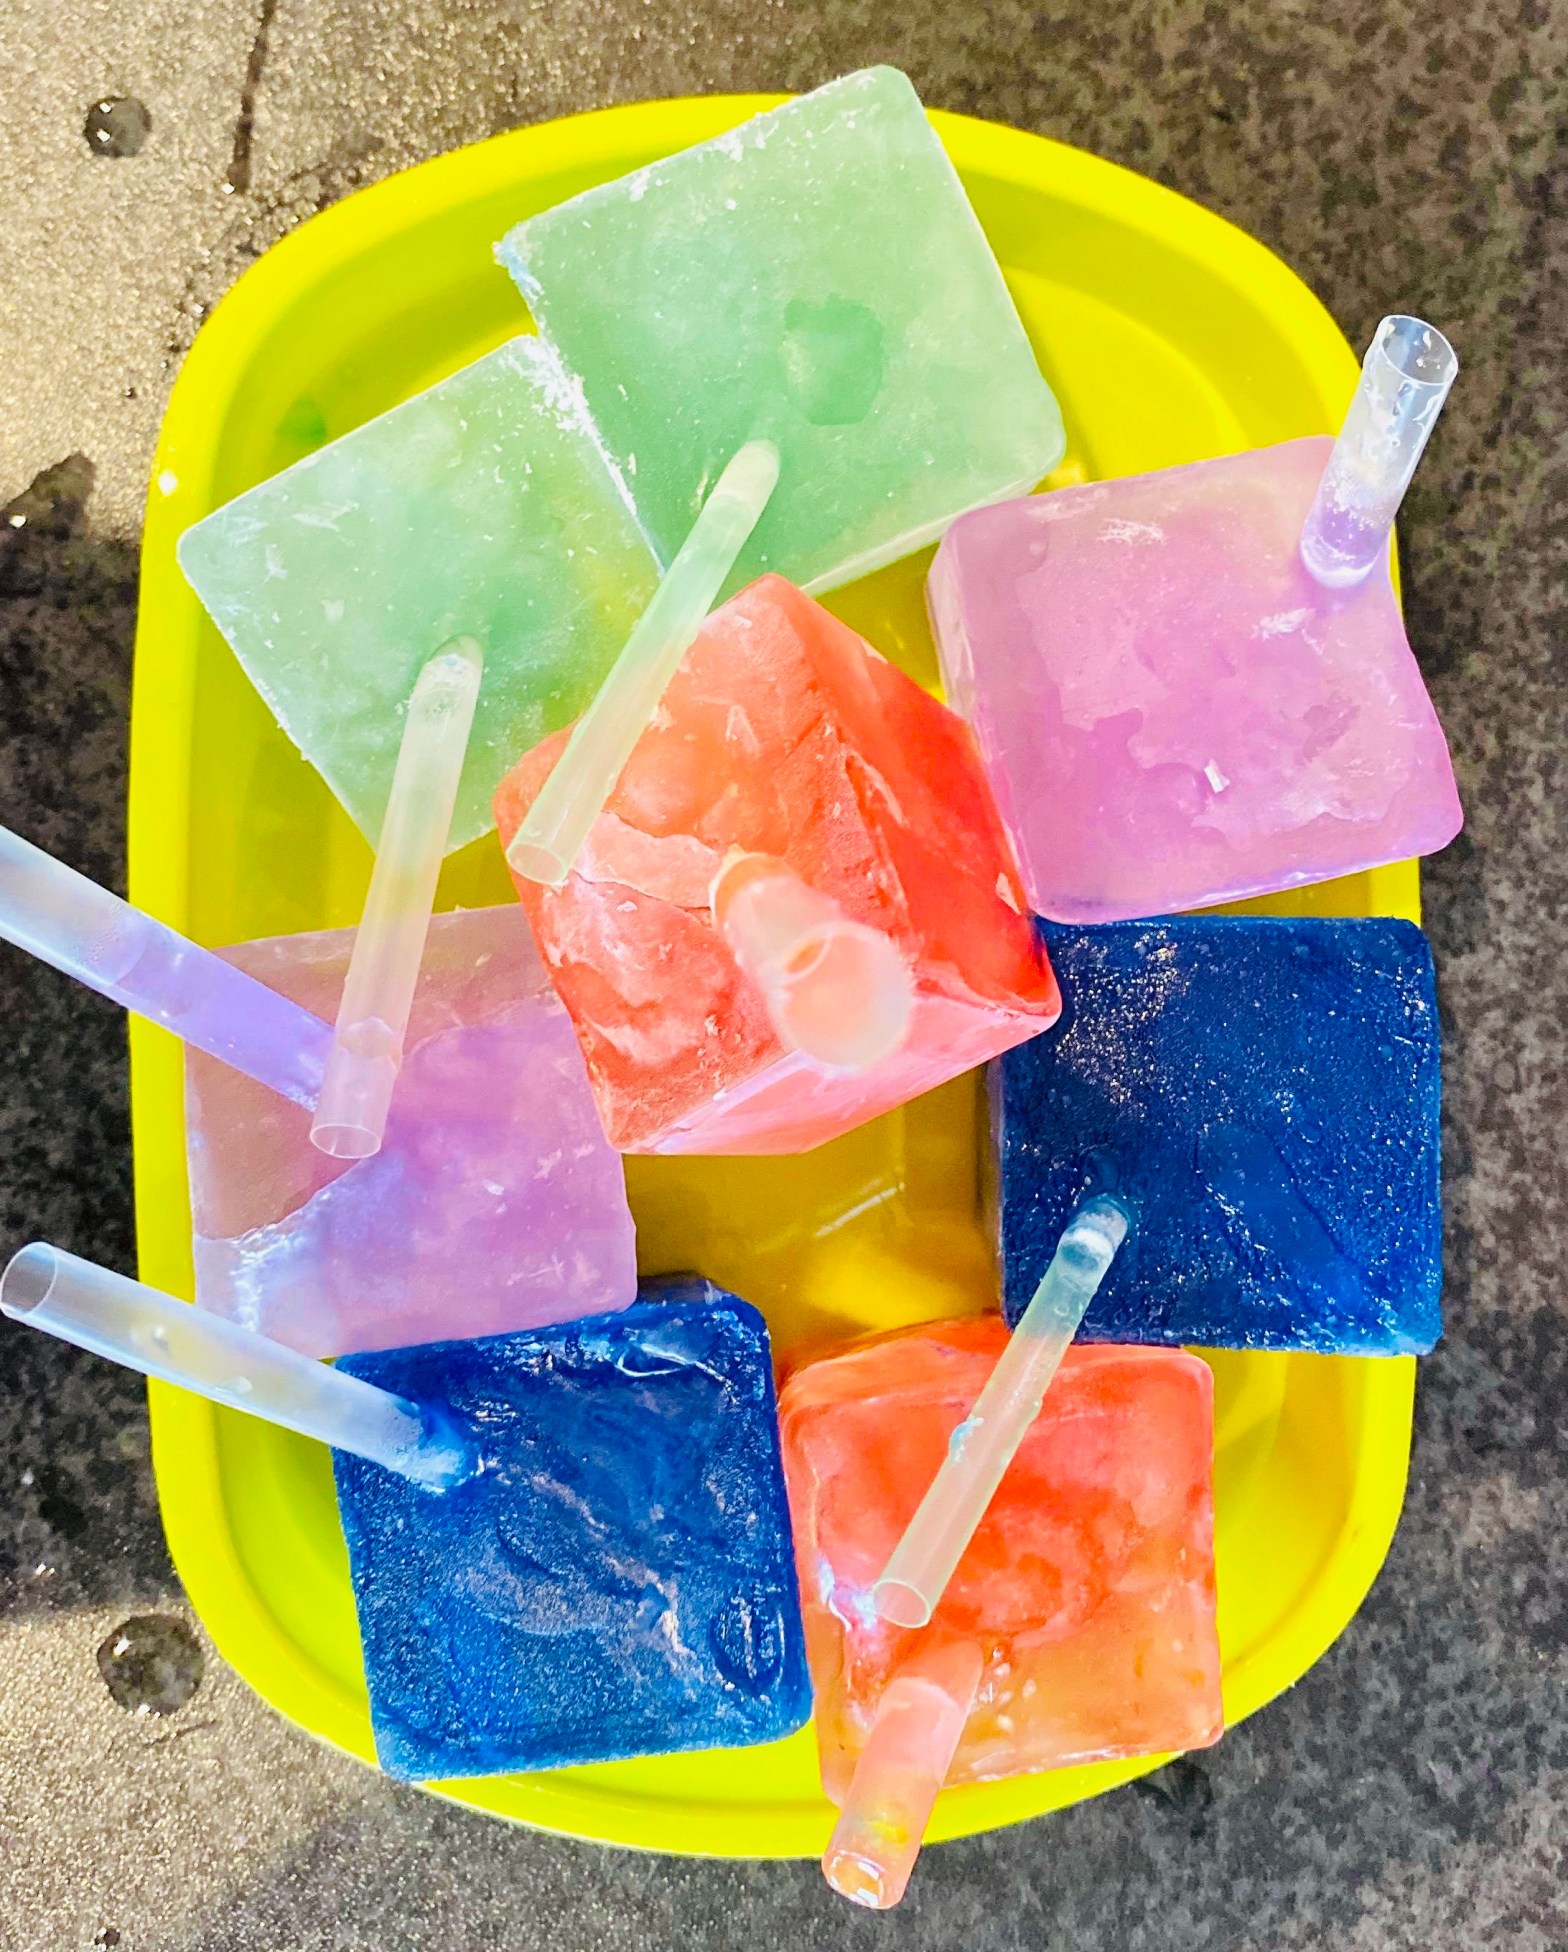
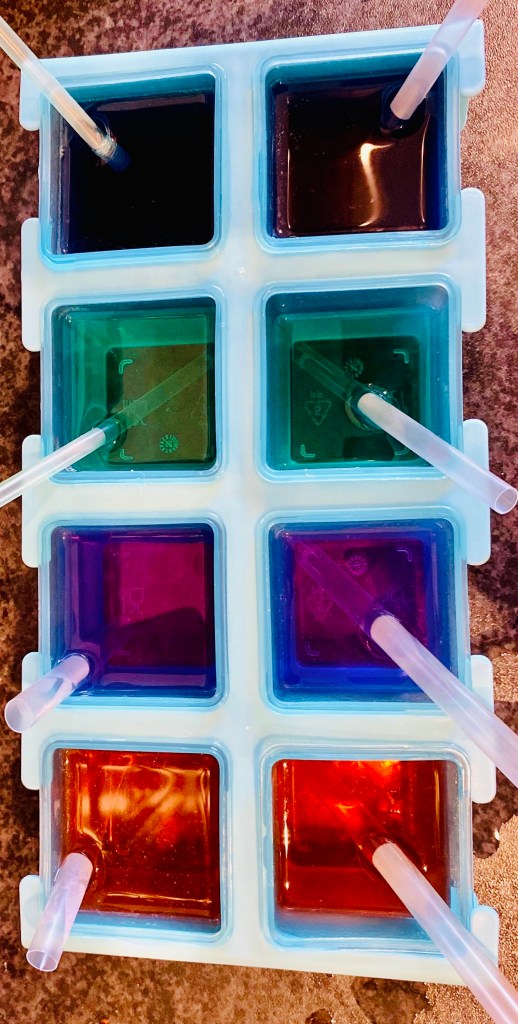
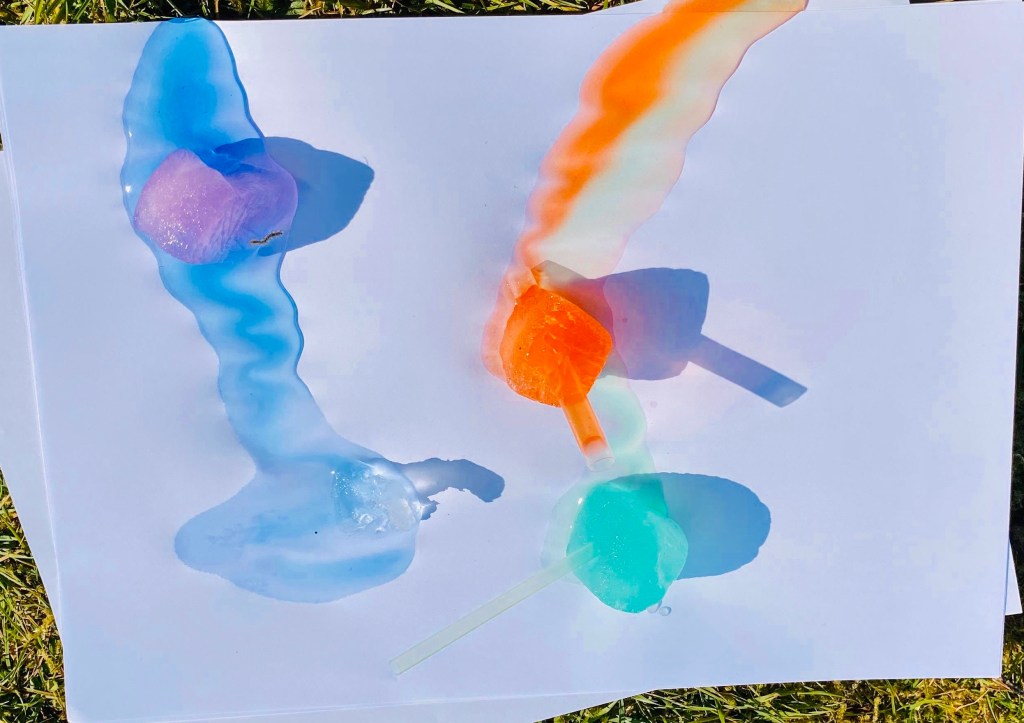
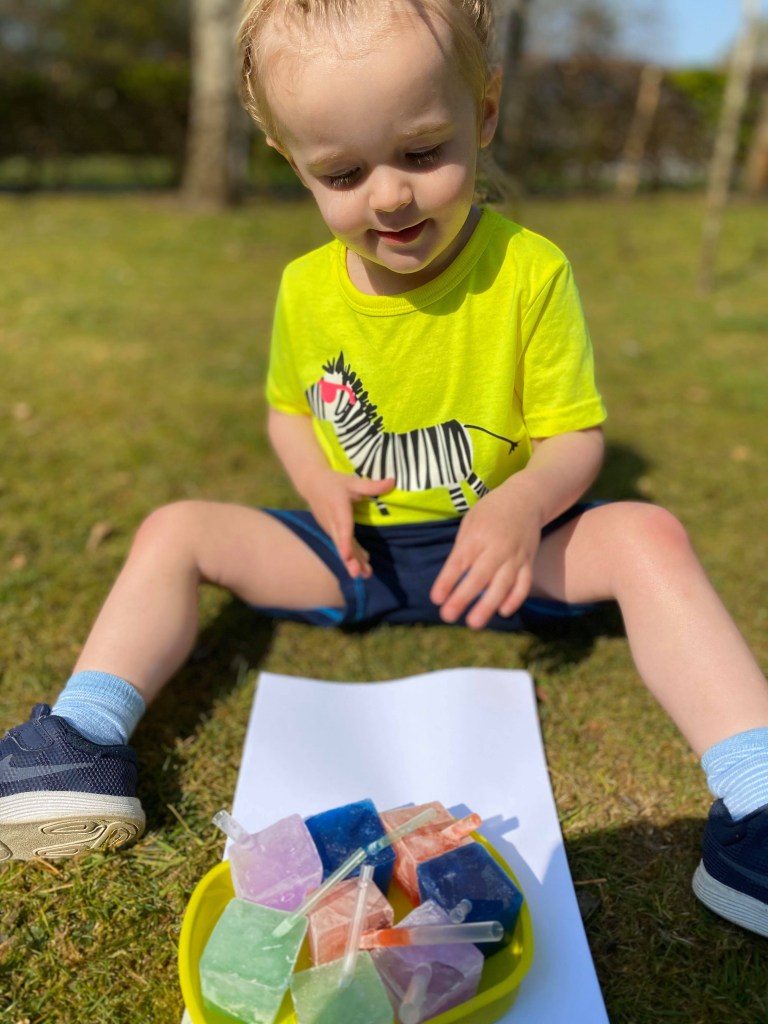
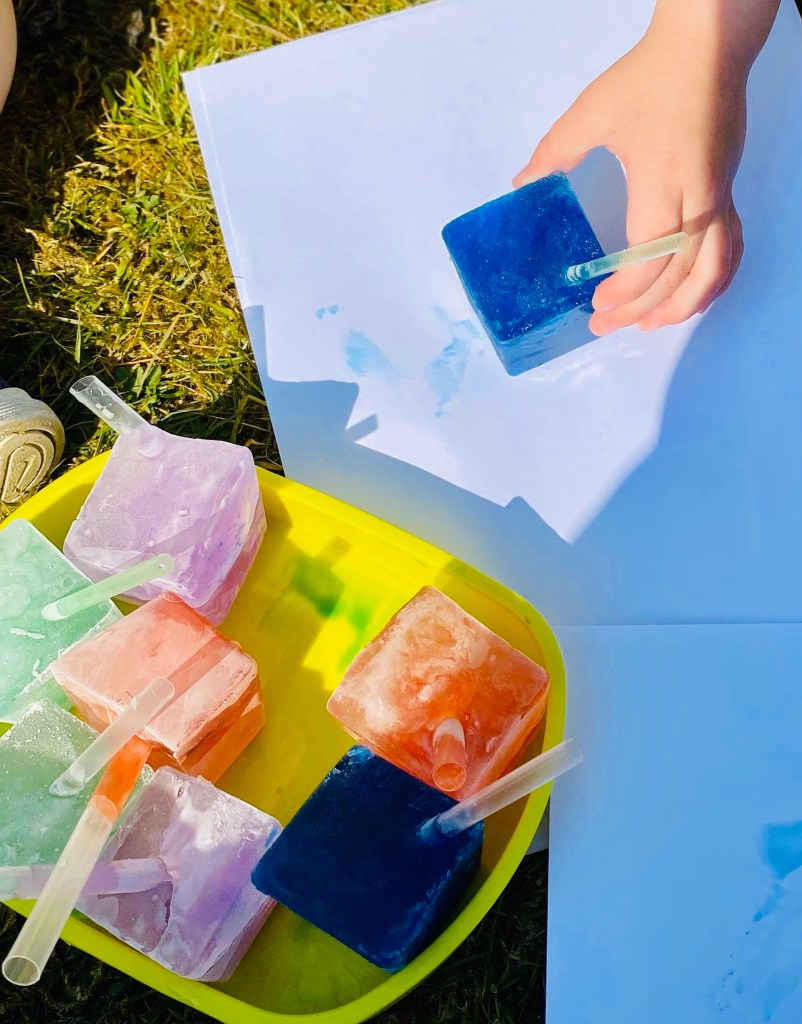
Painting with Ice Cubes
A great wee sensory activity for little hands.
You will need:
- Ice-cube tray/small bowls
- Lollipop sticks/straws (optional)
- Water
- Food-dye
- Freezer
- Paper
Instructions
Fill the tray/bowls with different coloured water and add lollipop sticks (they will become the handles but aren’t necessarily required – you could even use small sticks).
Freeze the ice cubes and once they’re frozen have some fun! You could paint paper with them, paint your driveway, time how much faster one that you play with/paint with melts than one that you don’t touch.
Zoe says: “Thank you so much for our lovely activity, we have had great fun this afternoon exploring and experimenting. We only had blue food colouring so we improvised with tissue paper and hot water to create our colours. It was interesting to note that the one with food colouring melted a lot quicker than the tissue paper ice-cubes. First, we just had a wee explore with the cubes and the colours then had some fun filling some shapes with the icy water as it melted. We also coloured in our letter and enjoyed having a little taste of the blue ice cubes. When we were done painting, we left the ice on some paper in the sun and when we came back we found some lovely colourful puddles. We also tried mixing some colours which was fun. Was a really good opportunity to learn some new words like ‘melting’ and learning some more about ‘hot’ and ‘cold’ and ‘dry’ and ‘wet’. Thanks again!”


Activity 2
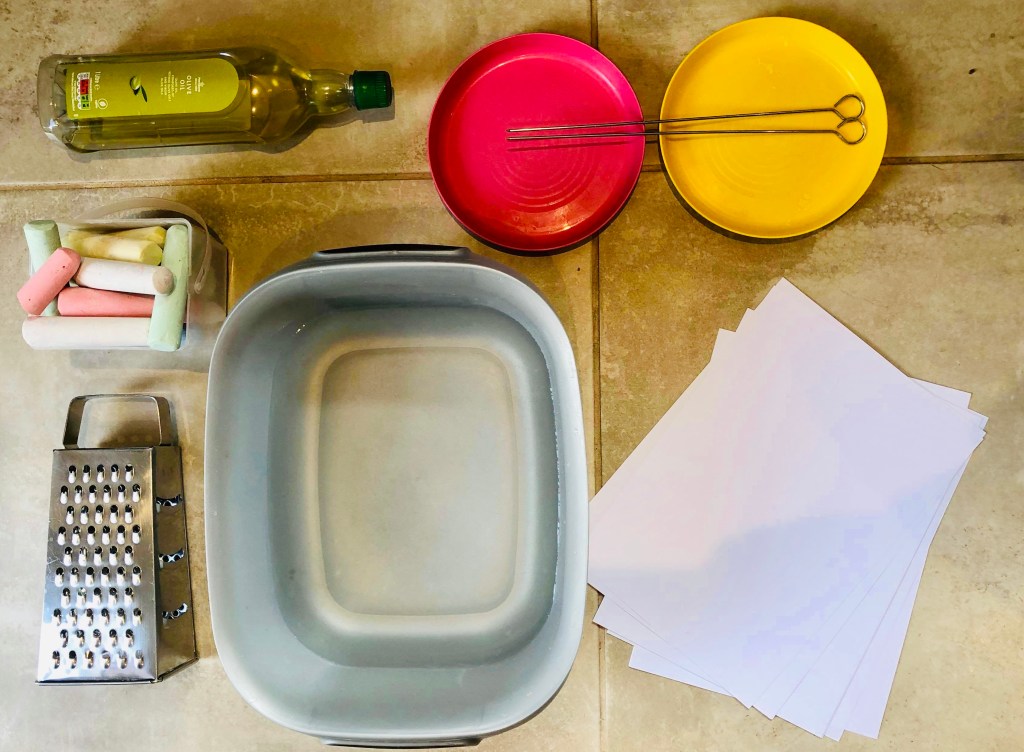
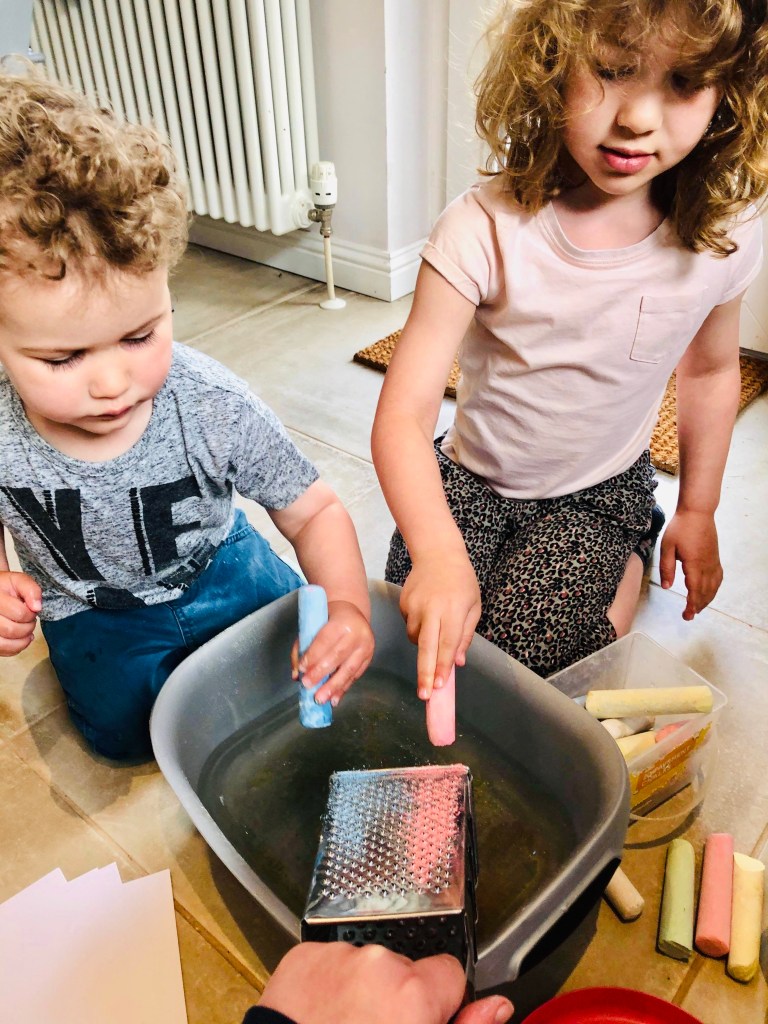
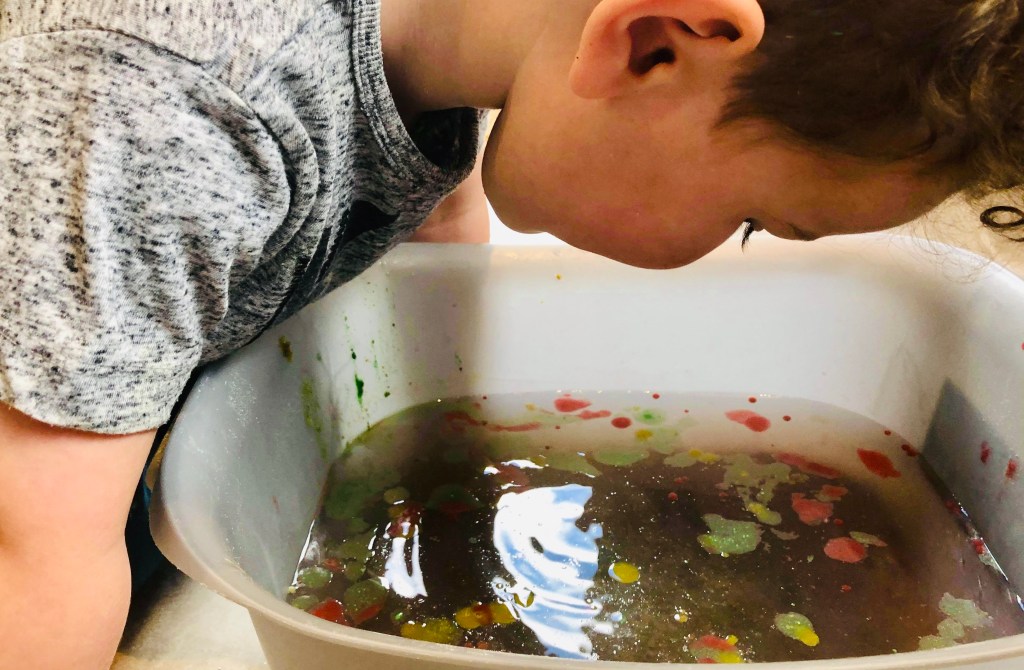
Surface Tension Art
Explore surface tension through this creative art activity.
You will need:
- Chalk
- Grater
- Tray/Basin
- Water
- Cocktail stick/skewer
- Vegetable oil
- Nail varnish
- Paper
Instructions
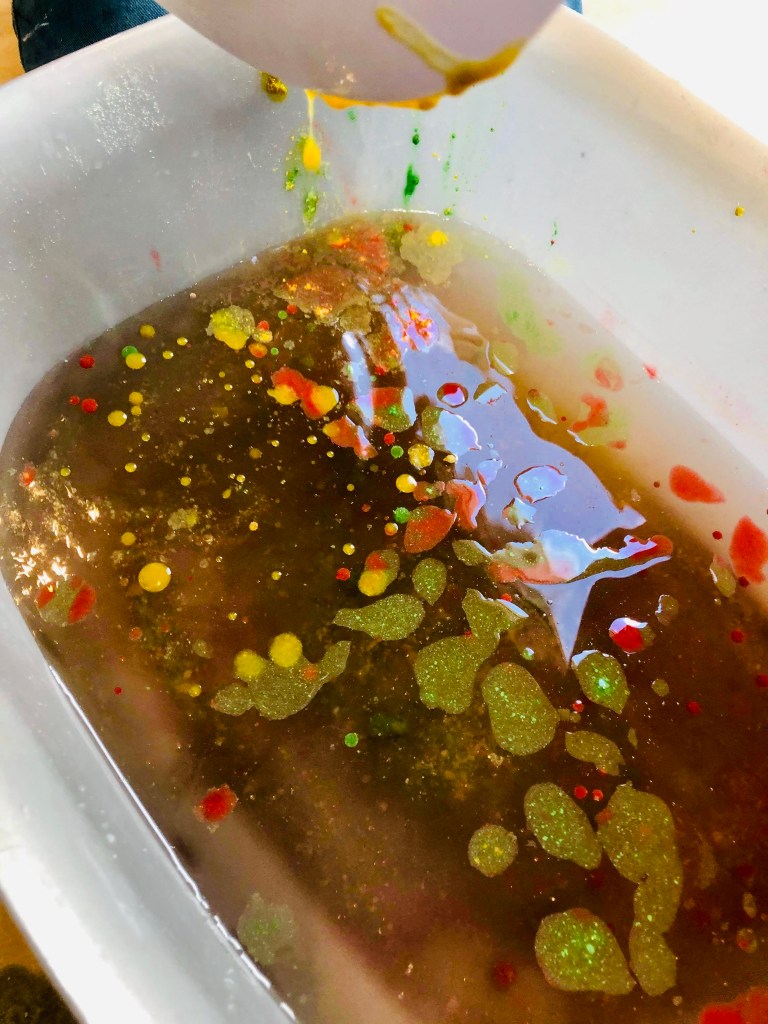
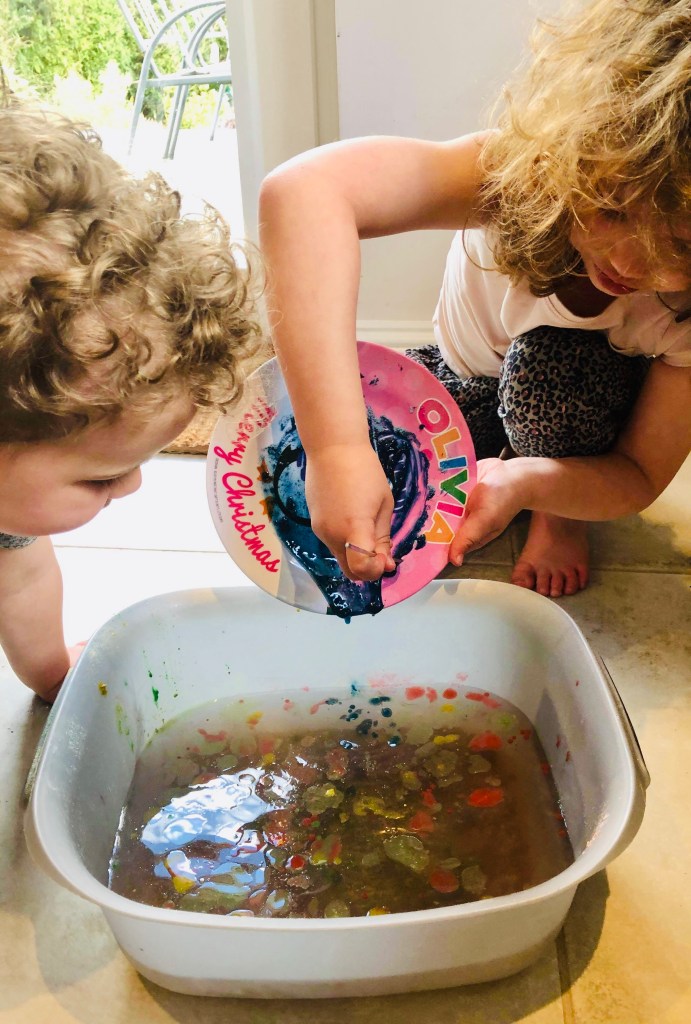
Don’t worry about doing all of these – simply choose any that you fancy. You could watch the above video on Surface Tension before or after the activity.
Fill the tray with water and carefully grate chalk onto the top of it. If you’ve used different colours use a cocktail stick to swirl and mix them a bit. Carefully lay some paper onto the top of the water, leave a few seconds, remove and allow to dry.
You could repeat this experiment but replace the chalk with nail varnish.
Another way to explore surface tension, would be to mix some grated chalk with a taspoon of vegetable oil (in a bowl) and then drip the mixture onto a tray of water and place paper on top. Remove and leave to dry.
Jane says: “We loved it! My wee one especially – muck and water is a win win!”


Activity 3
Water Bugs
A fun and simple way to explore surface tension
You will need:
- Card (thick paper)
- Pens
- Scissors
- Tray/bathtub
- Water
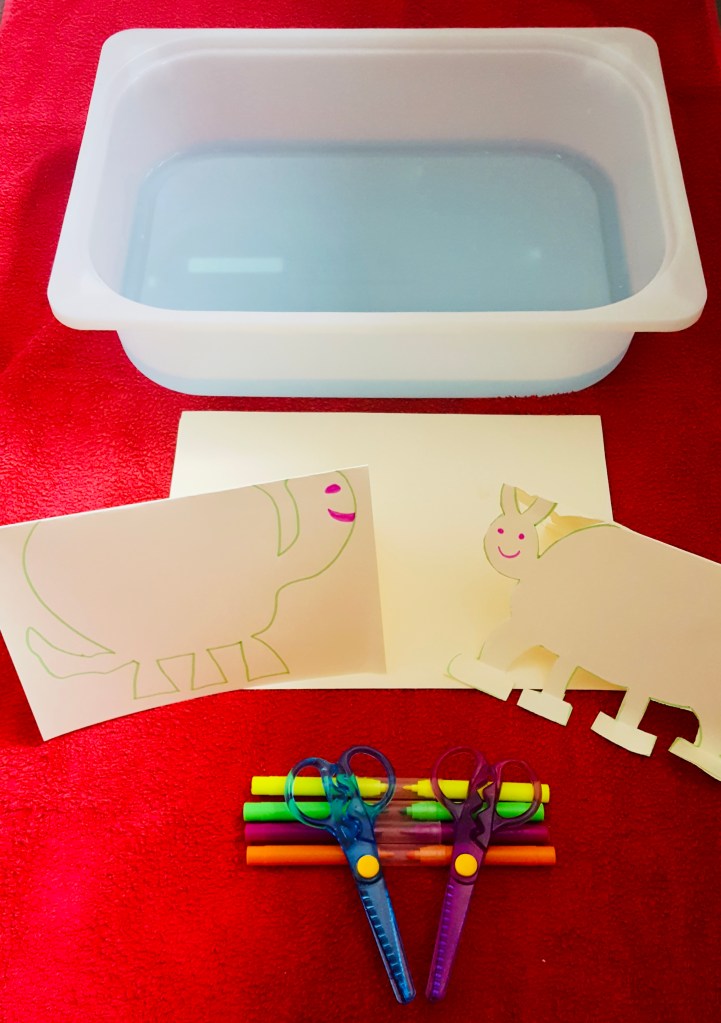
Have a watch of the video on Surface Tension before completing this activity.
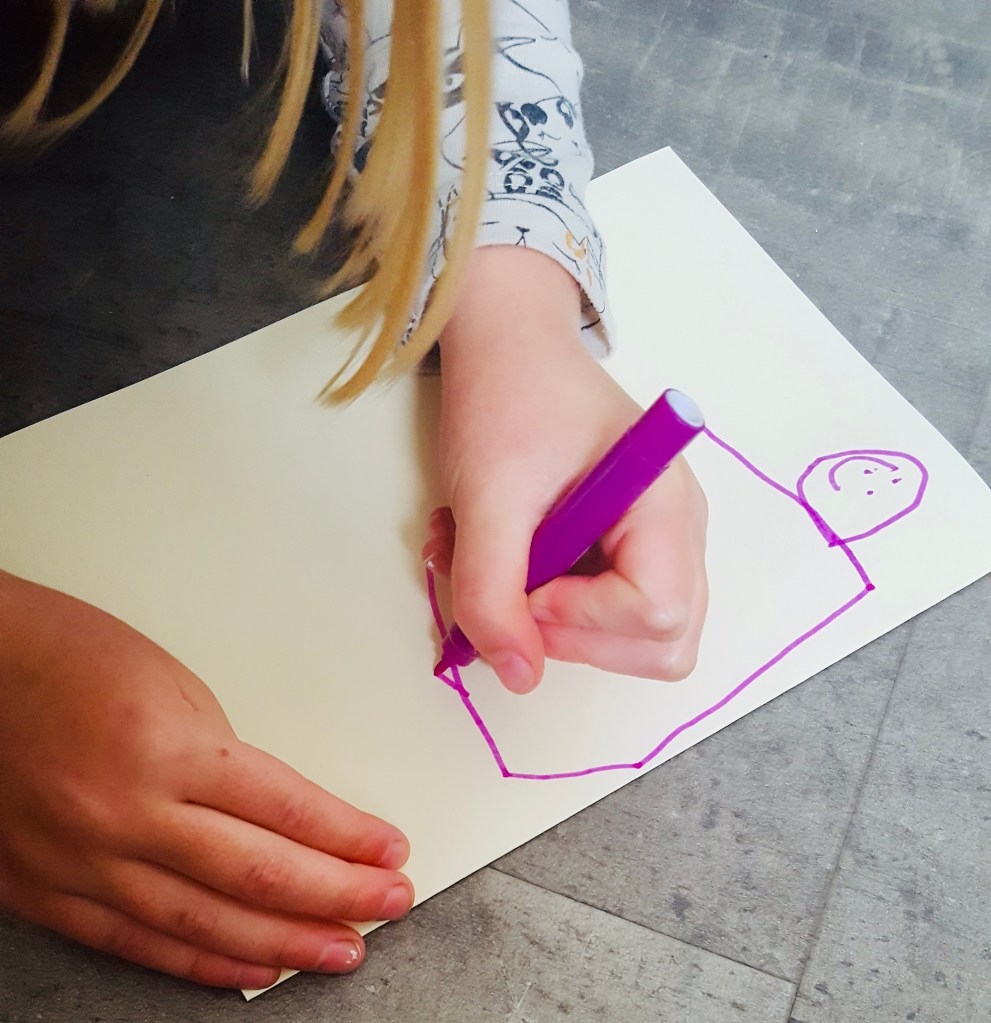
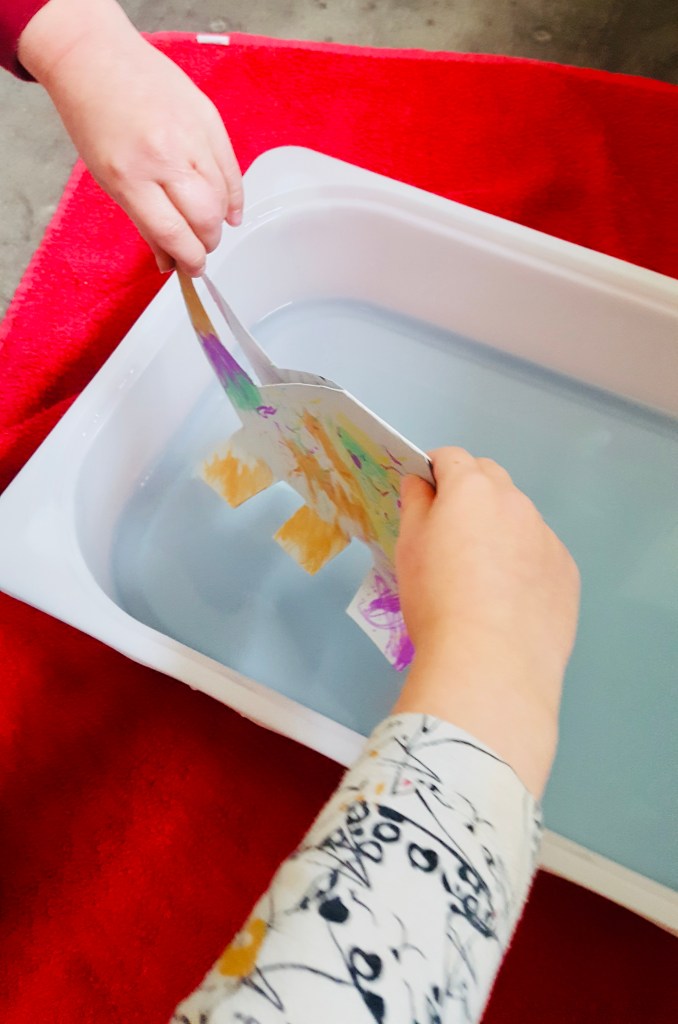
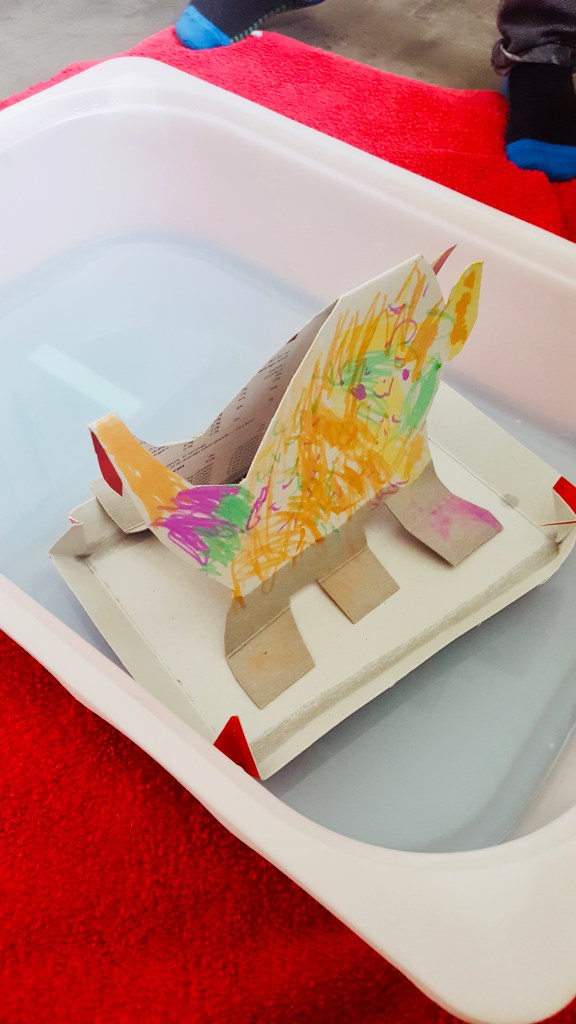
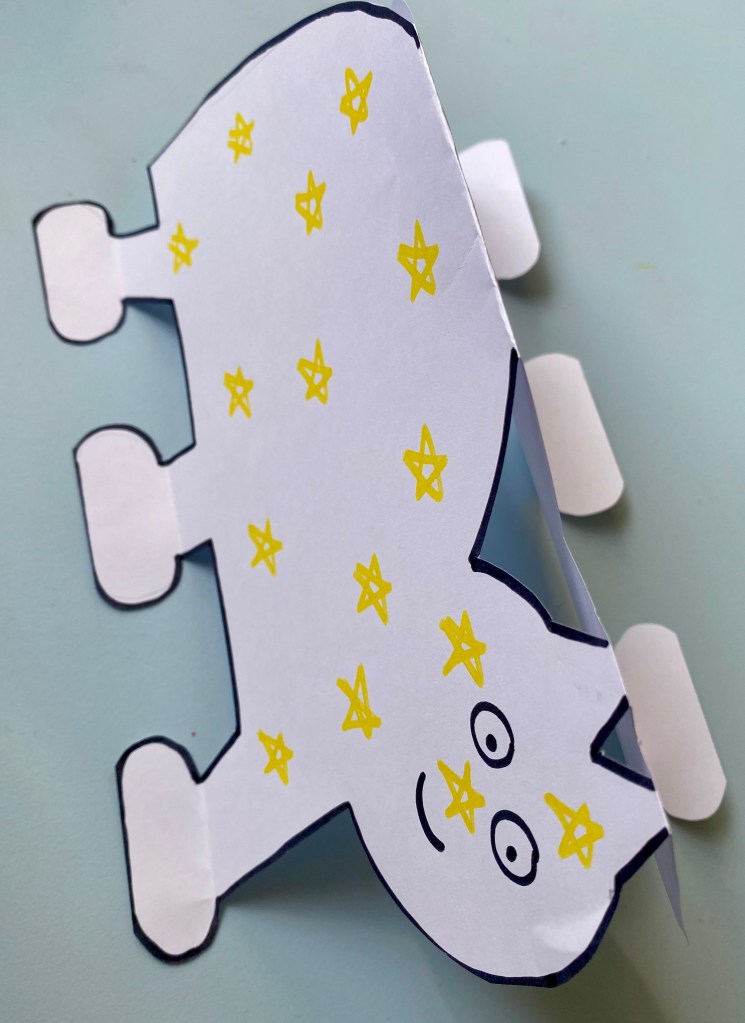
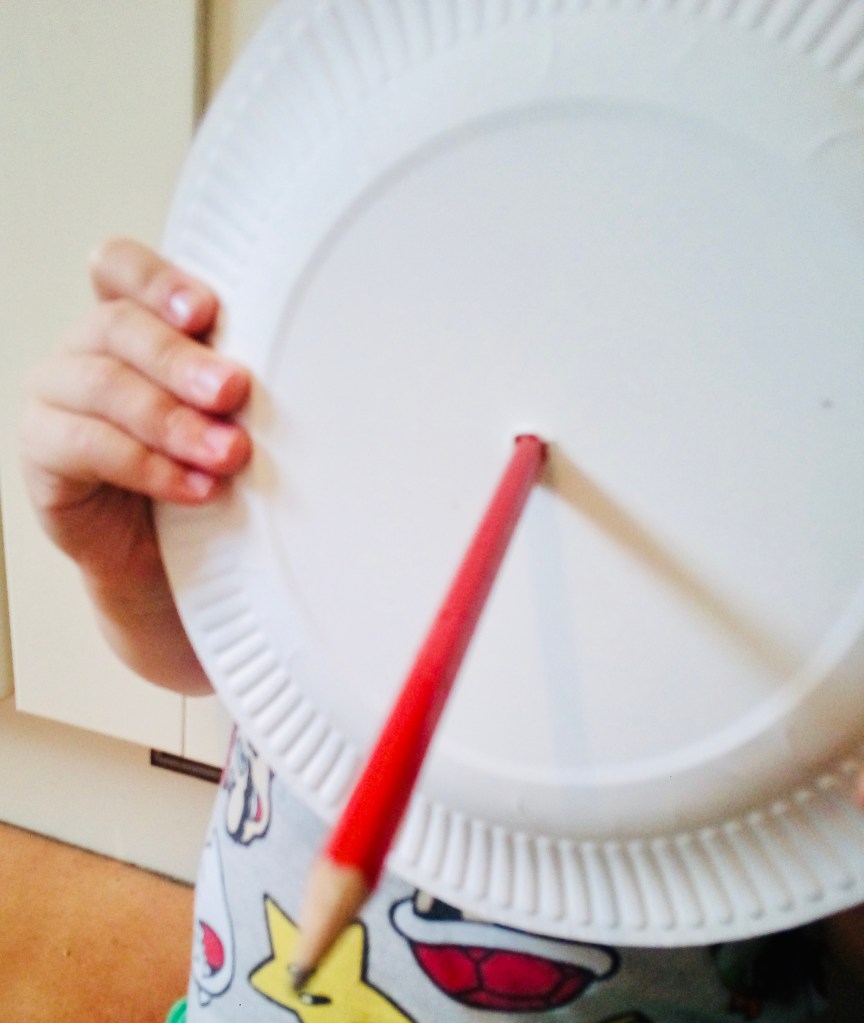
Fold your card in half and draw a bug shape onto it – with 3 big goofy clown feet (it’ll need these to balance on the water).
Make sure the top of the bug touches the top of the card.
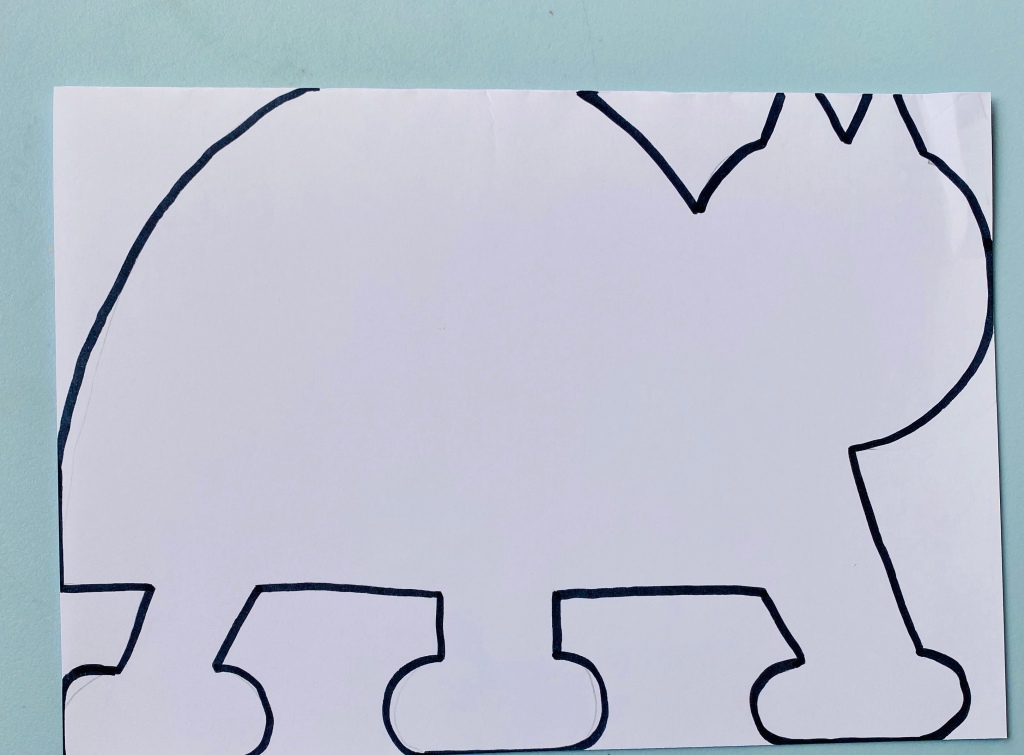
Cut out your bug – but leave the top of it joined (so that it remains a double-sided bug). Fold its feet out so it can stand flat. Decorate your bug. Can you make it balance on water? Do bugs with bigger or smaller feet float better? Can you design different shaped bugs?
Louise from Small Steps Childminding in Lincolnshire says:
“This week we had a great activity sent to us by weeSTEMS called ‘Water Bugs’ to see if we could create some bugs out if card and make them float. We got our resources together and designed our bugs. Two five year olds and a 35 year old took part in our experiment and we each spoke about our hypothesis (new word for our STEMkids). Our first design of bugs didn’t do very well at floating and we spoke about why. We realised the card had got very soggy and absorbed the water. So we found thicker card using an empty cereal box. This still absorbed the water and didn’t float. We reviewed our experiment and decided our bugs were too heavy to float. Our new hypotheses were to make something lighter so we tried a whole new design where the card was spread out on the water, not as tall and therefore not as heavy and what weight there was, was spread out. (A great introduction to pressure and surface area). Our new design floated for a while but soon soaked up the water and started to sink. One 5 year old decided the only way to get our bug to float would be to build a curve to keep the water from getting on top of our creations and weighing it down. There was a lot of discussion between the 5 year olds as I took a step back and they decided they needed a boat over a raft because it has sides. Our final part of the experiment, our bug was technically floating but helped along by our little boat.
The kids and I had so much fun with this. And I honestly think the experiment was better because it didn’t work how we expected it to. It made us think about what went wrong and how we can start improving our approach. It helped instill that not everything goes as planned and we can work together to try and make it work, changing our strategies and ideas each time.
We ticked off so many development points within the EYFS from communication, understanding the world and mathematics and also included lots of exploring and critical thinking. A fantastic activity. Thank you weeSTEMS!!”

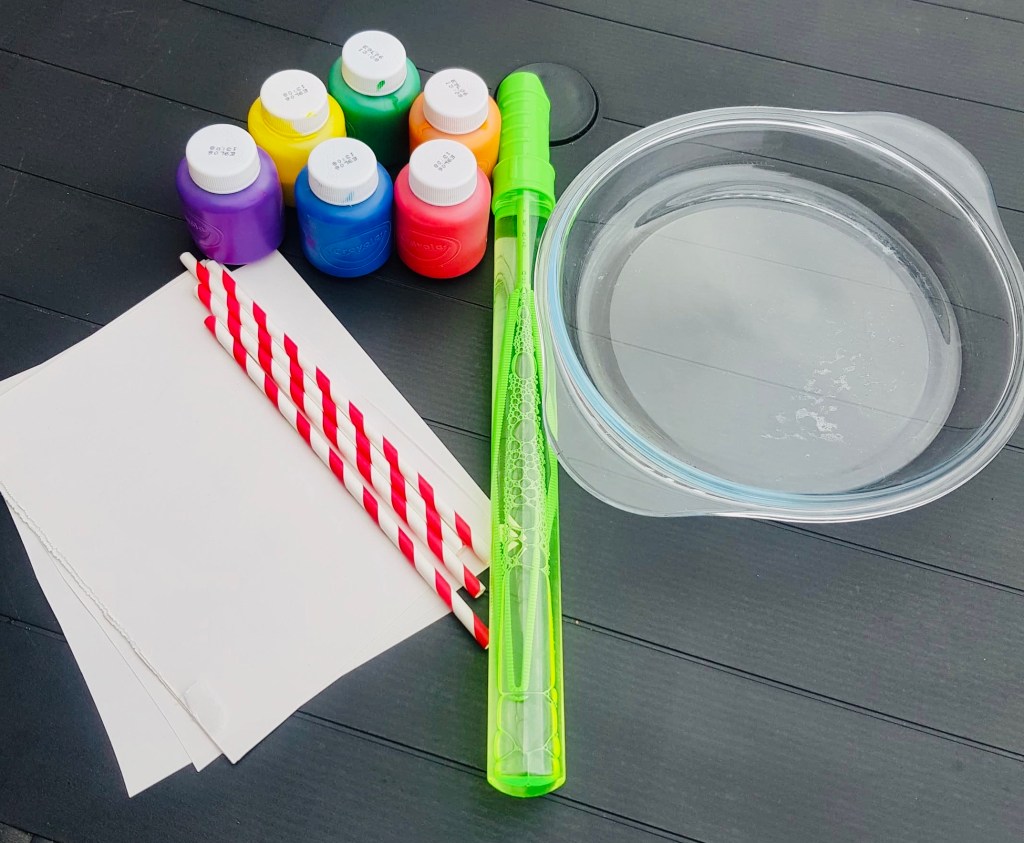
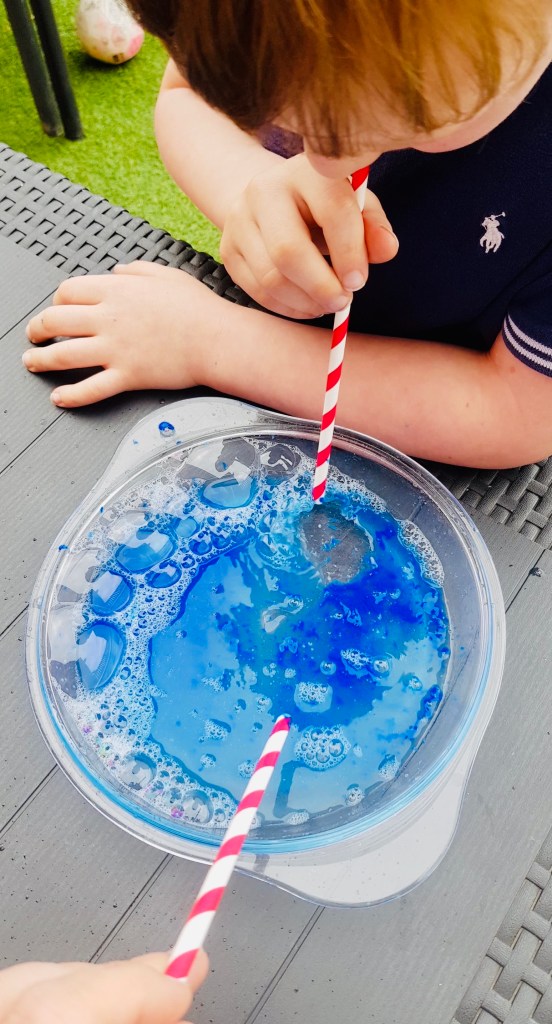
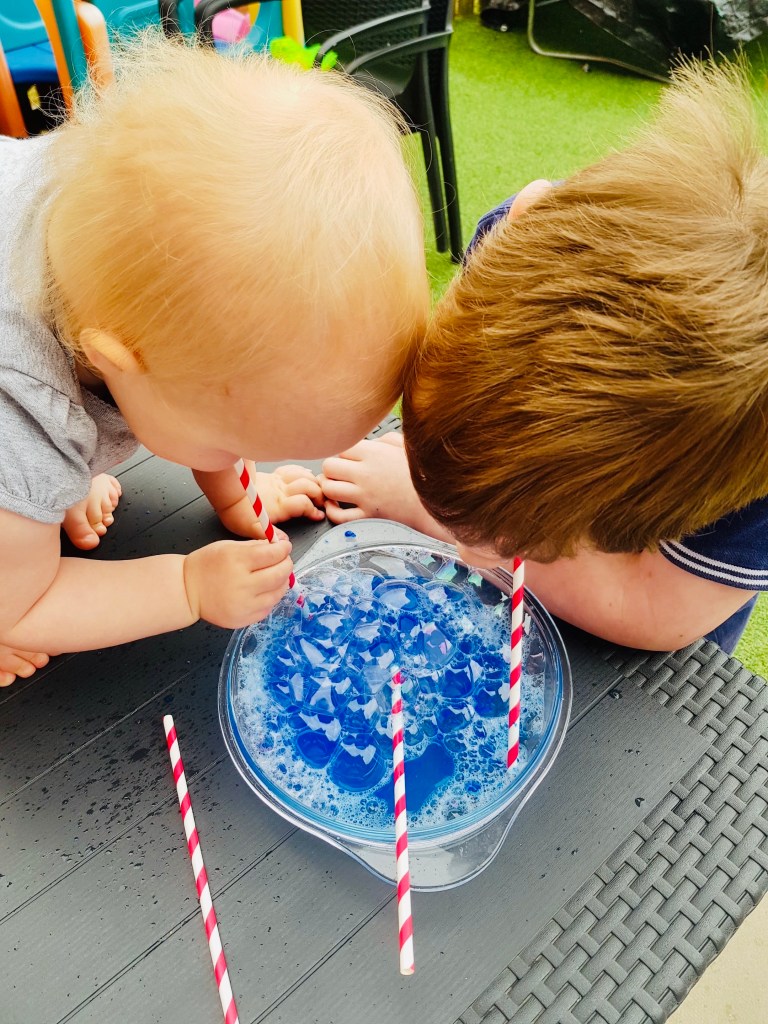
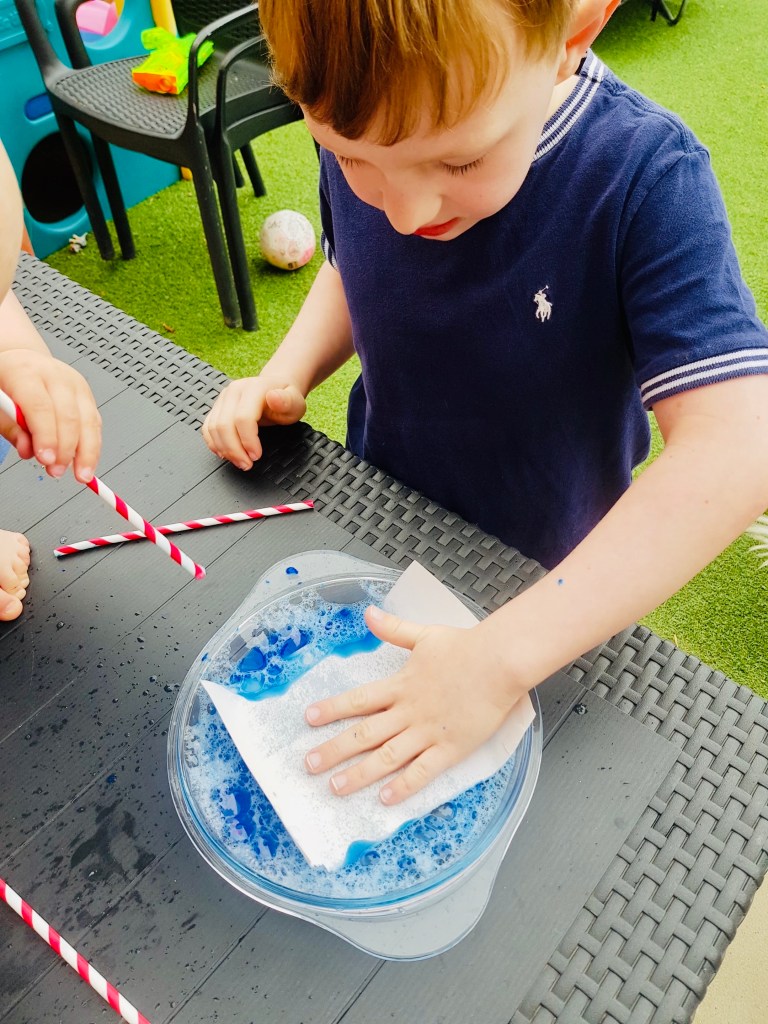
Activity 4
Bubbles
Design some fabulous artwork with this science activity
You will need:
- Bubble mix
- Paint
- Tray/basin
- Straw
- Paper
Mix the bubble mix and a wee bit of paint together in the tray.
Use a straw to blow into the mix in the tray (forming frothing bubbles).
Place a piece of paper onto the mix then peel it off and look at the different shapes you’ve created.
Can you do it with different colours? Can you make a rainbow? What happens if you add water to the solution?


Activity 5
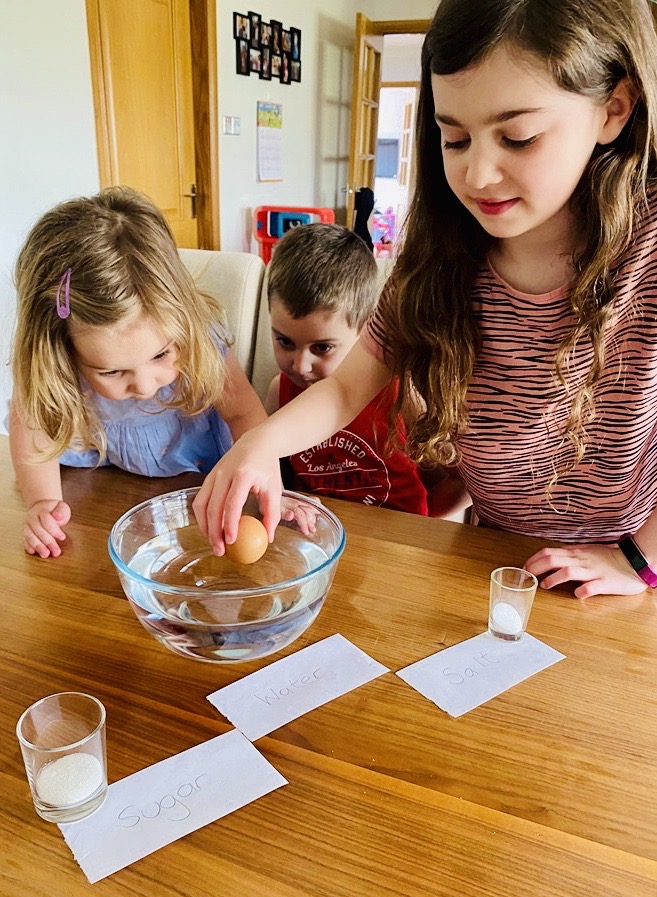
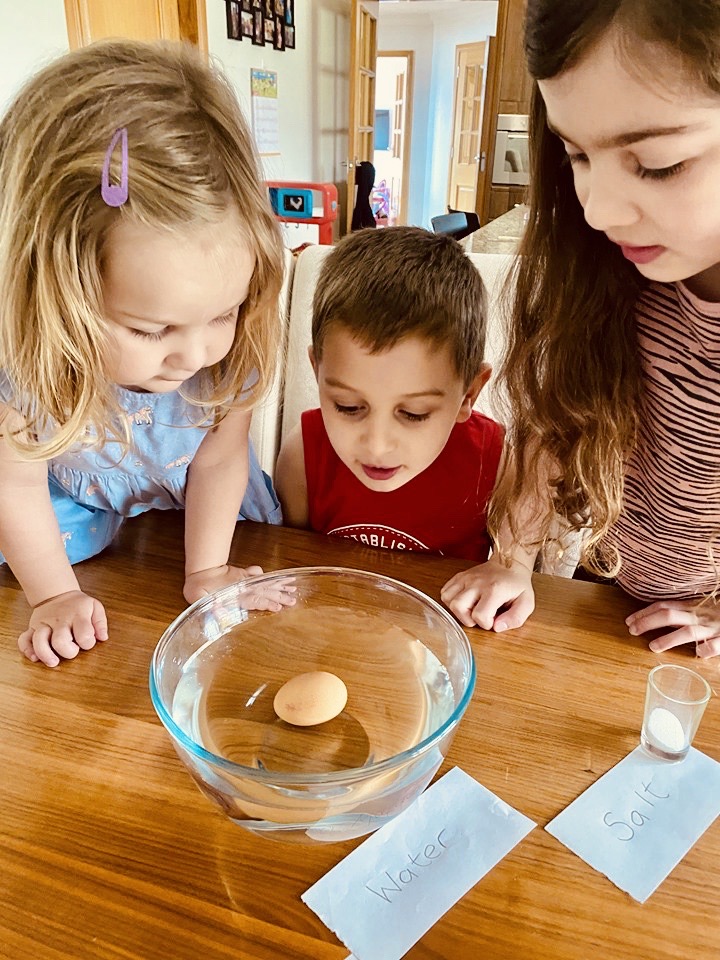
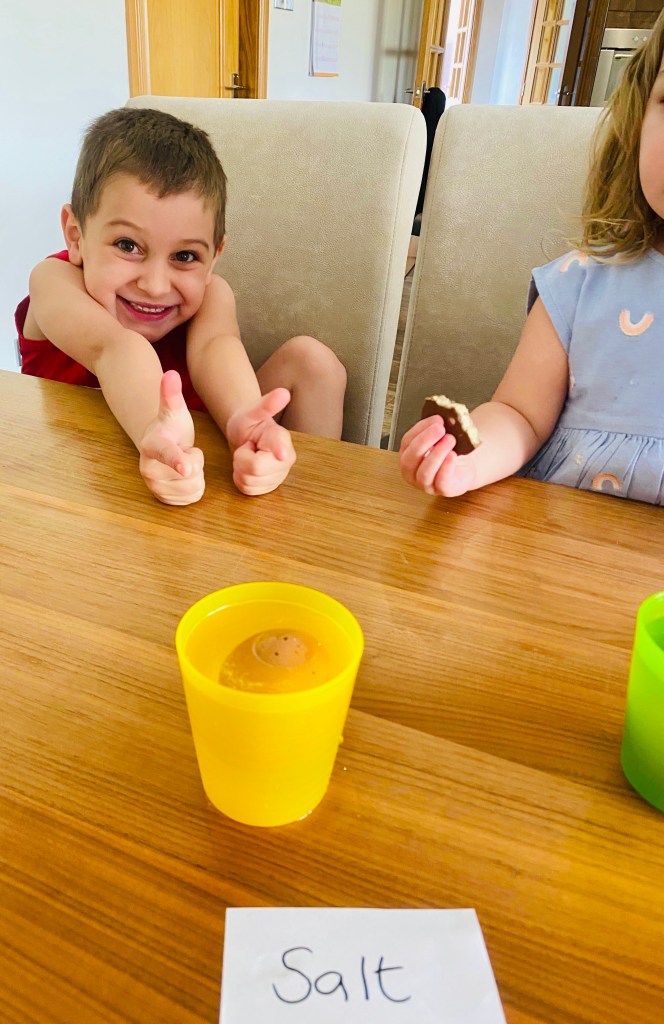
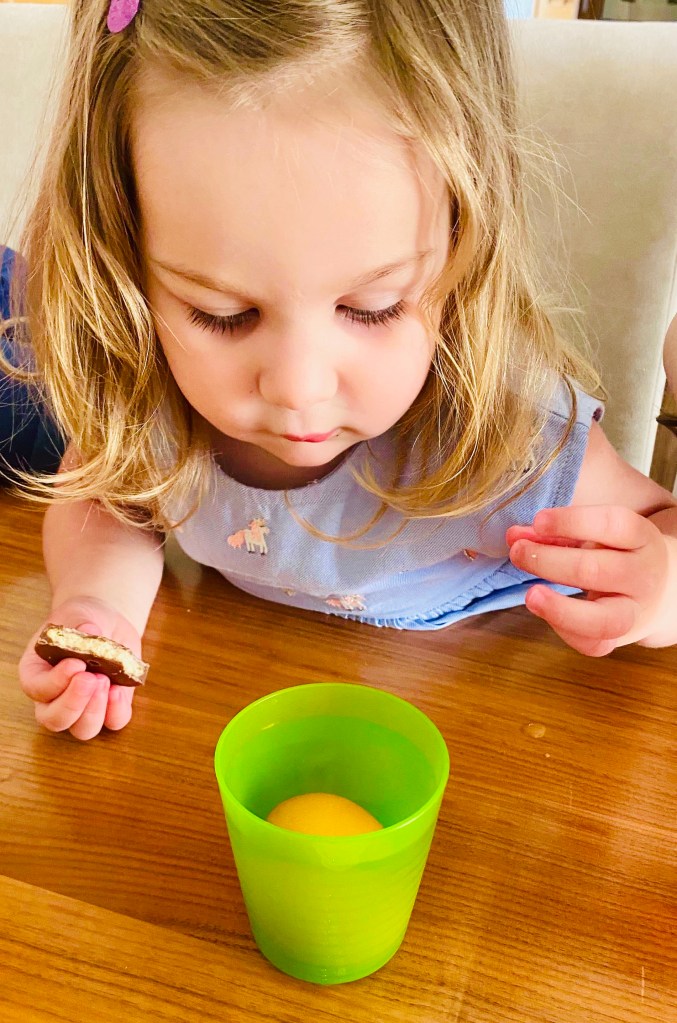
Salty Water versus Sugar Water
Why is it easier to float in the sea than in a pool?
You will need:
- Small bowl/cup
- Salt
- Sugar
- Egg
- Water
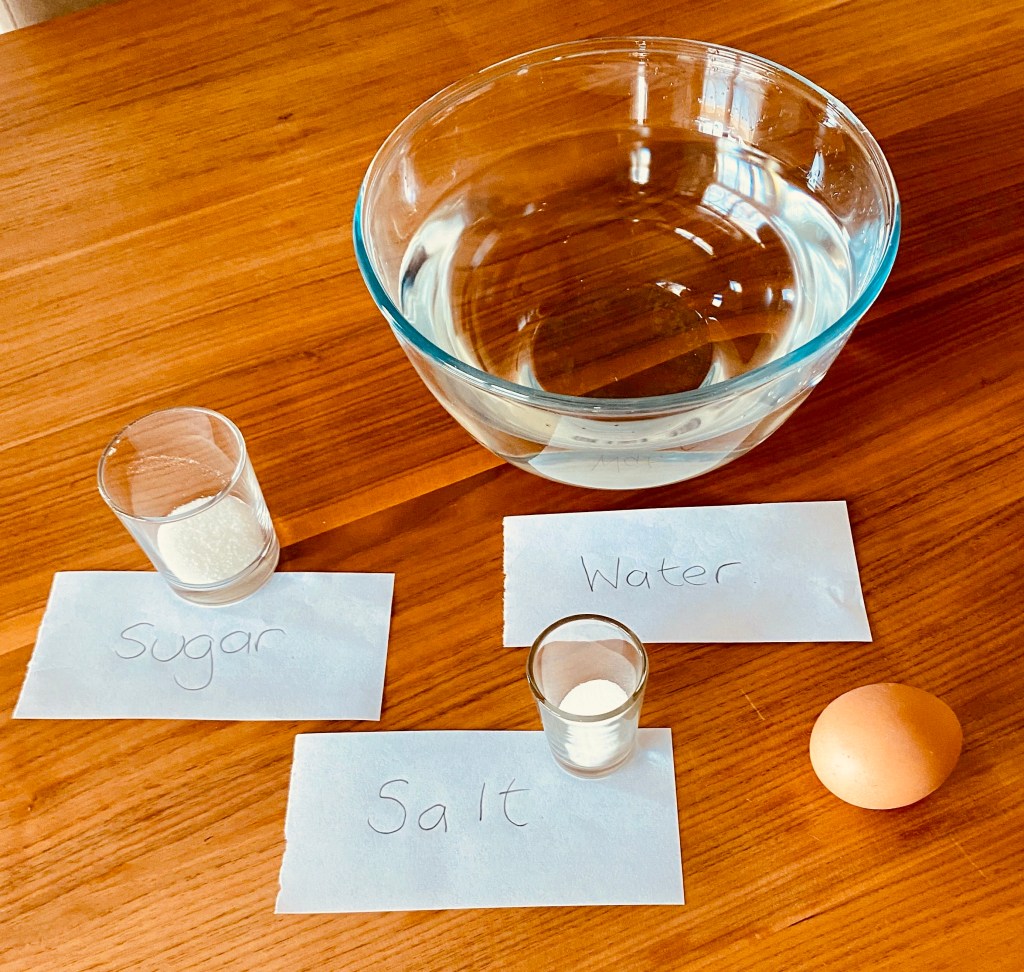
Fill the bowl/cup with water. Carefully lower an egg into the bowl and observe what happens. Remove the egg and stir in 3 heaped teaspoons of salt. Place the egg back in and observe what happens. Repeat with sugar. What differences are there? What conclusions can you draw? Are there other mixtures you can add to experiment with (eg does mud make a difference?).
Teaching point: Salt water weighs more than fresh water, so it exerts a greater upward force on a submerged object.
Sarah tried the salt versus sugar experiment however originally the egg didn’t float in the salt – and everyone decided it could have been due to the size of the bow. Next the weeSTEMers tried the same experiment but in a smaller beaker and the egg floated!
Sarah says “The kids really enjoyed it – so I’ll need to look out some more activities.”


Activity 6
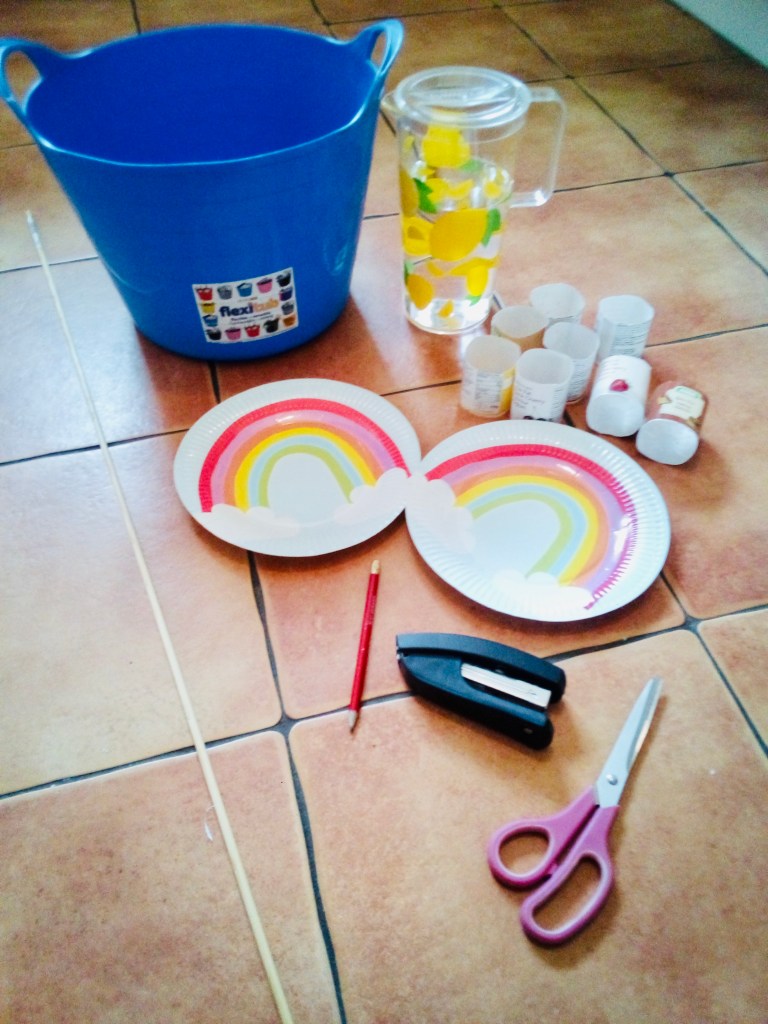
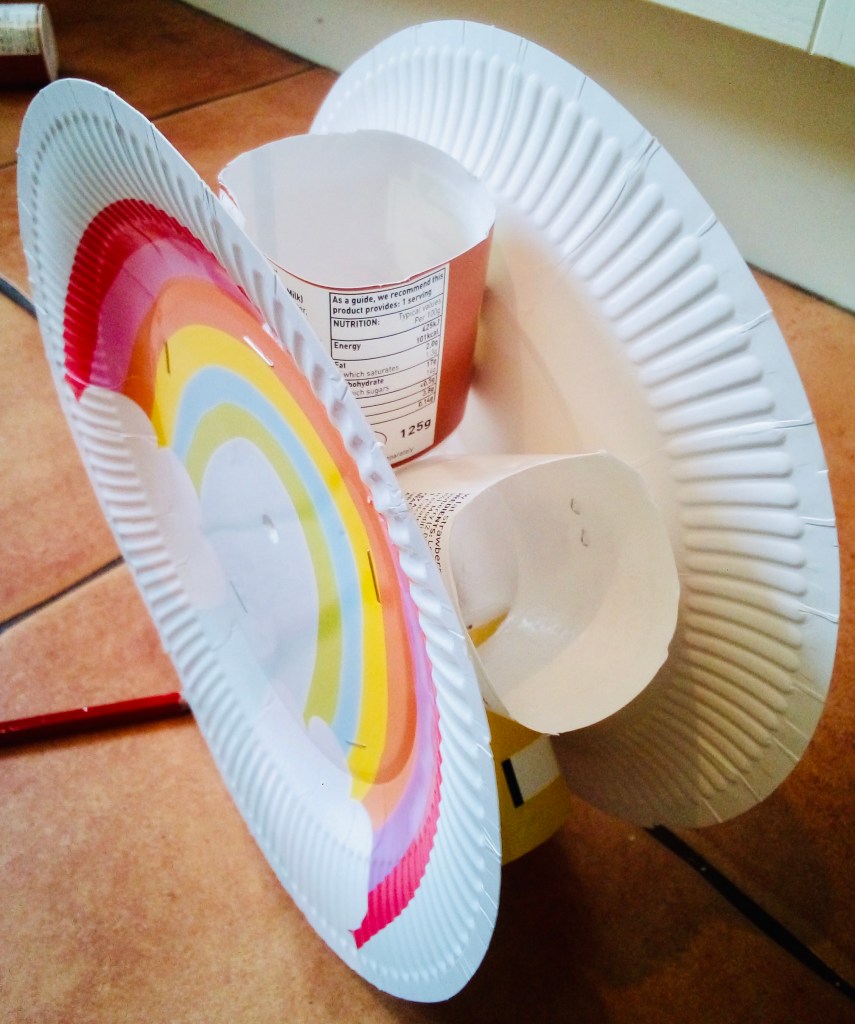
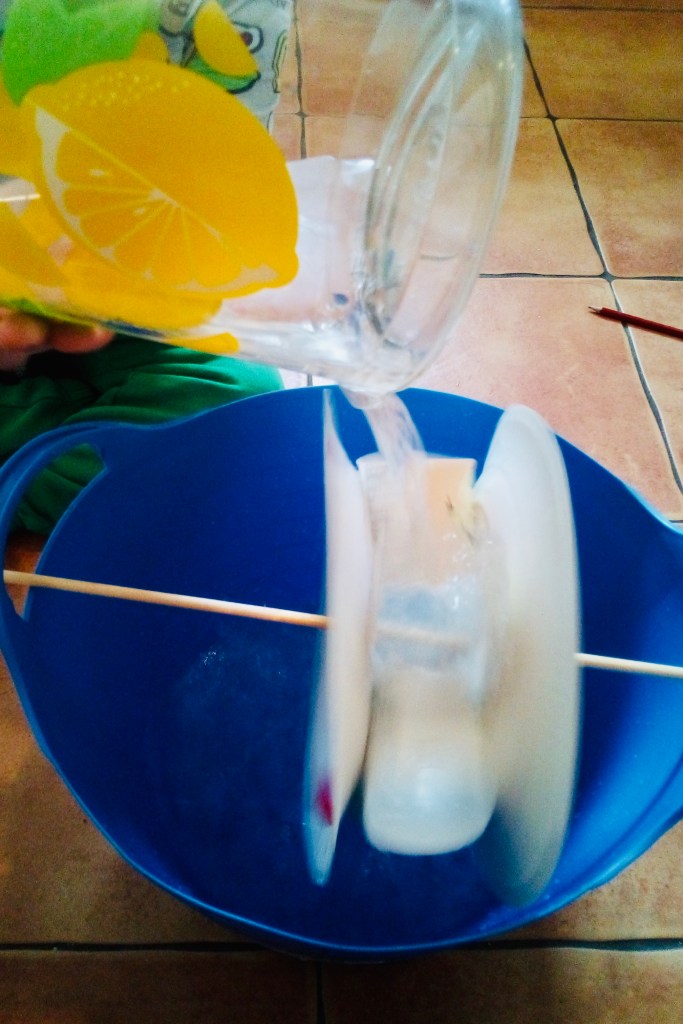
Water Wheel
Use the power of water to power this basic machine.
You will need:
- Empty yoghurt pots x 8
- Paper plates/card x 2
- Stapler
- Kebab stick
- Bucket
- Jug
- Water
Place one pot (open end out) lined-up with the outer-edge of the paper plate (or card cut to the shape of a plate). Staple on. Repeat all the way around.
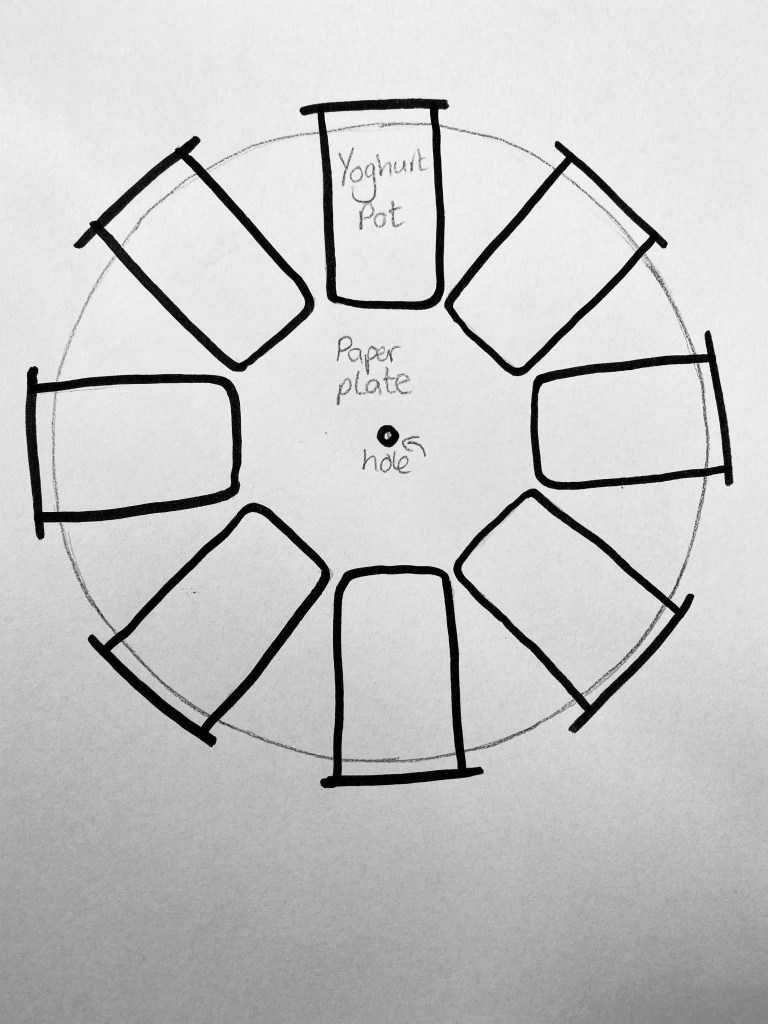
Pierce a hole in the centre of the plate, staple on the other plate to the other side and pierce a hole through its centre. Poke the kebab stick through the holes and balance the waterwheel on the bucket. Use the jug to pour water into the edge of the yoghurt tubs and watch it spin. Can you make it spin the other way?
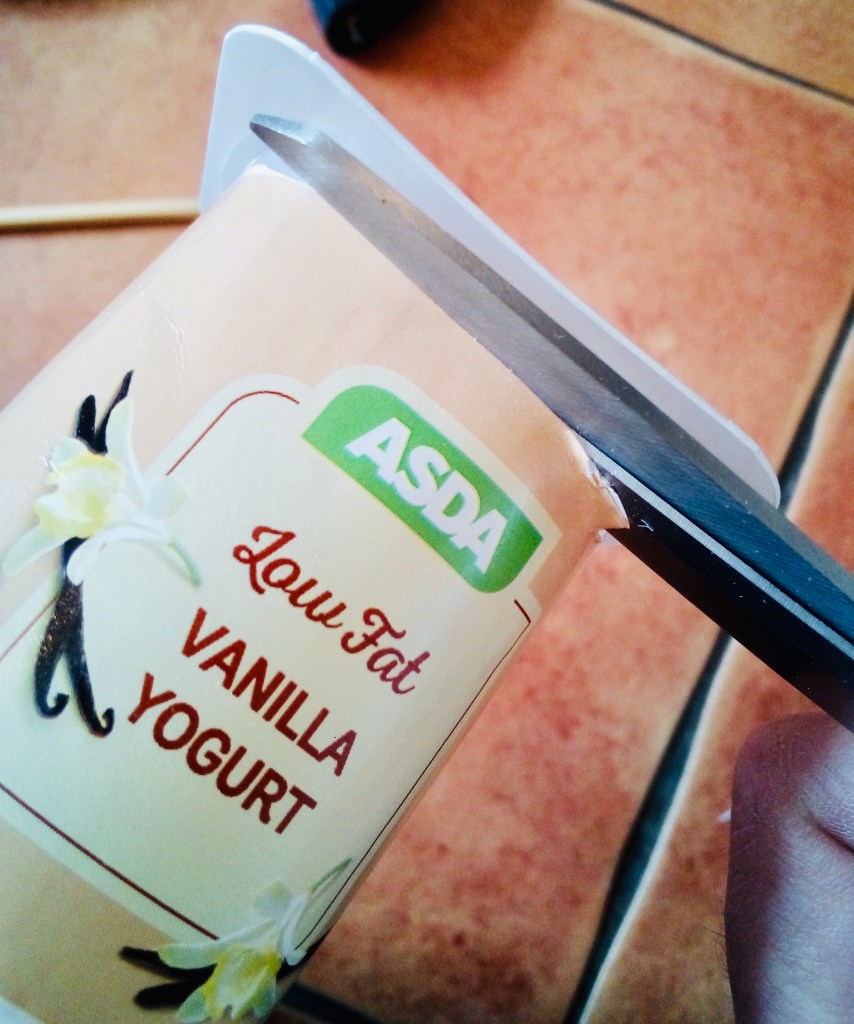
Mhairi says “Thanks for letting us take part in your blog. The water wheel activity was fun and we are looking forward to trying your make your own blood experiment too.
We used a large bucket and a wooden rod we had lying around the house. My son pushed a pencil through the middle of each paper plate to make a hole. We found that the stapler did not work with the lip on the yoghurt tub so we had to cut the lip of each yoghurt tub off first. Then my son stapled each yoghurt tub onto a paper plate and the second paper plate was stapled to the other side. The wooden rod was pushed through each hole in the paper plates and then through the handles of our bucket. My son then poured water onto the water wheel to make it turn. He was excited to fill the bucket with enough water for the yoghurt tubs to lift water round to the other side like a real water wheel. It was lots of fun and my son loved it.”


Family Learning Challenge
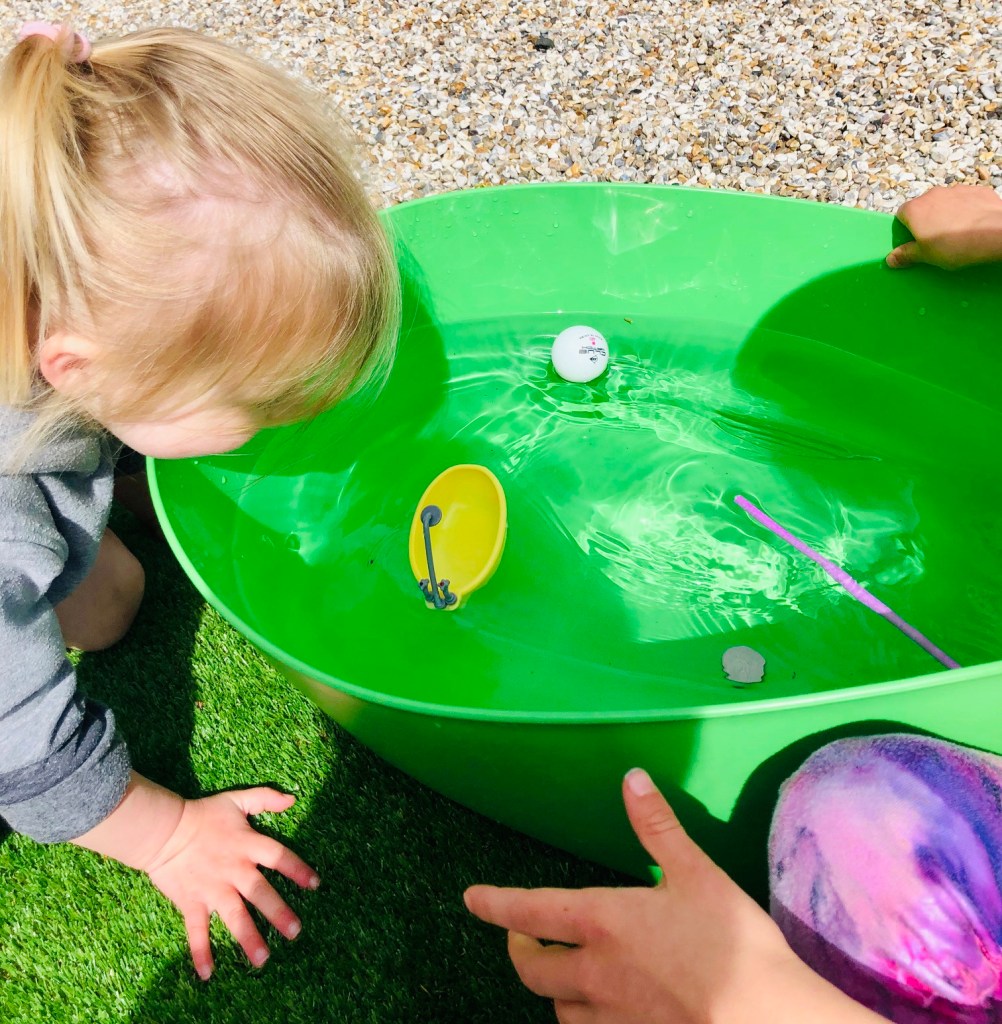
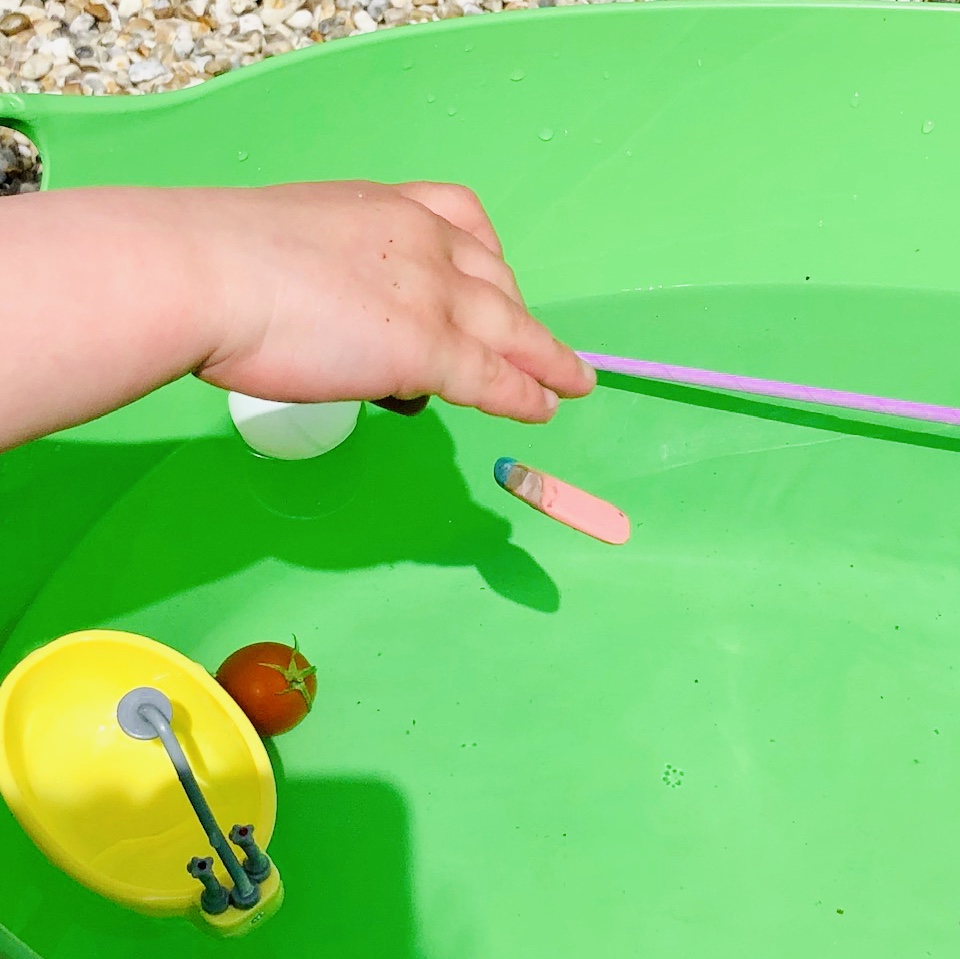
Floating or Sinking
A great challenge for all the family – who can get the most right?!
You will need:
- Large tub/bath tub
- Water
- Range of random items (the stranger the better – e.g.toy car, apple, sponge, pine cone, stick, dice, ice)
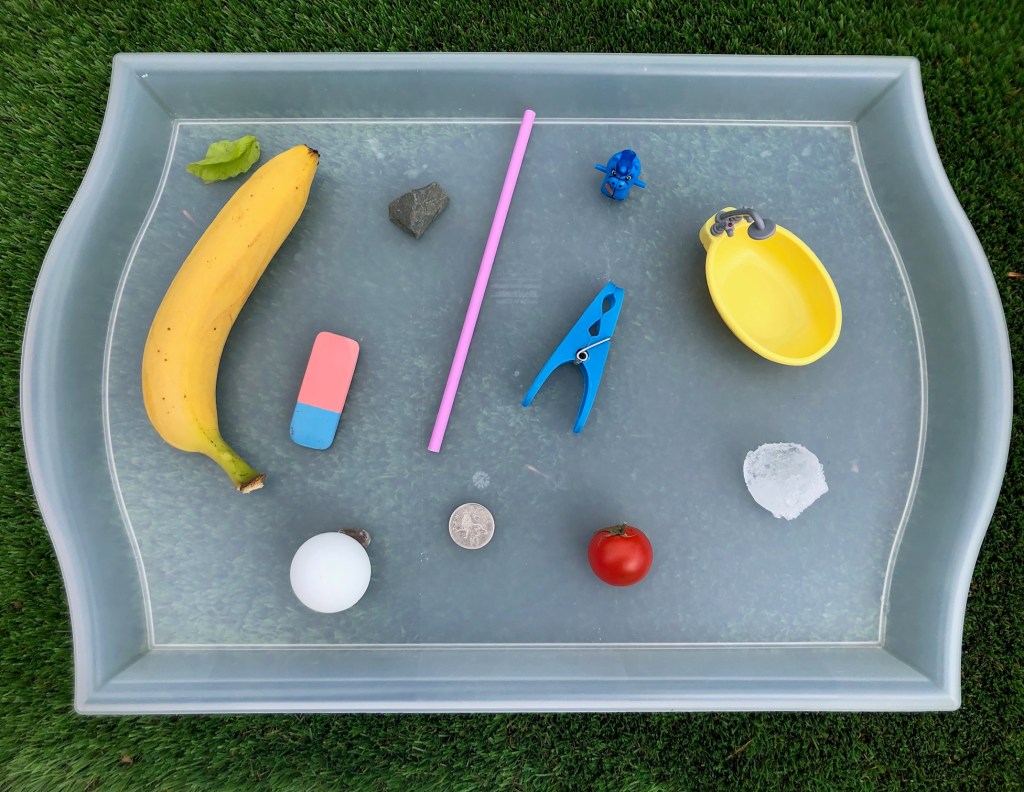
Fill the tub with water and then hypothesize (guess & discuss) if an object will float or sink. On the sheet, you could fill in the items and tick if you think it will float or sink and then once you’ve tested the object tick whether you’re correct or not.
Jennifer says: “My girls both really enjoyed the Floating & Sinking activity, it’s great that it suited both ages, although my youngest was so eager to throw everything in before she had guessed!
My eldest said “I liked how the banana floated, and then I ate it”
The girls had great fun!”

Thank you SO much to all the families who shared their pictures and stories with weeSTEMs this week! They are fabulous and I hoped you managed to enjoy some learning along the way.
Do keep sharing all of your experiments with weeSTEMs on Facebook!
I hope you all have a fabulous week, whatever you get up to. xx
