I have always been extremely squeamish – and I HATE it. It’s had a horrible negative effect on me throughout my life and it drives me crazy that I can’t cope in certain situations.
Because of this, I’ve made a concerted effort to not only hide my dislike of blood from my kids – but I try really hard to look at it scientifically which makes it easier for me to cope with whilst hopefully starting a lifelong interest for my children so that they’re always interested in the power of blood (rather than passing out!).
So far, most of the kids I’ve taught about blood start the lesson saying ‘eeeuuwww’ – because society has taught them to say that – however by the end EVERY SINGLE CHILD is fascinated and much more knowledgeable about its magical properties. And that’s what I hope you get from this week.
Please please please make this mini-topic exciting and interesting and not ‘eeeuuuwww’ for your kids. I promise you it’ll help them throughout life!
Blood Facts
- If you laid every single one of your blood vessels end-to-end, they’d wrap around the Earth nearly 2 and a half times
- Your cornea doesn’t have a blood supply – it gets oxygen directly from the air
- When you blush, the inside of your stomach does too
- For every White Blood Cell there are 700 Red Blood Cells in our body
- Red Blood Cells survive for about 120 days
- Blood makes up 7% of your weight
- Blood plasma is made up of 90% water
- Blood not only takes nutrients around the body, it also takes waste products away
- Your left lung is 10% smaller than your right lung
- There are currently around 30 recognised blood types
- Blood cells are made in the bone marrow and spleen
Videos about blood
Activity 1
Your Blood
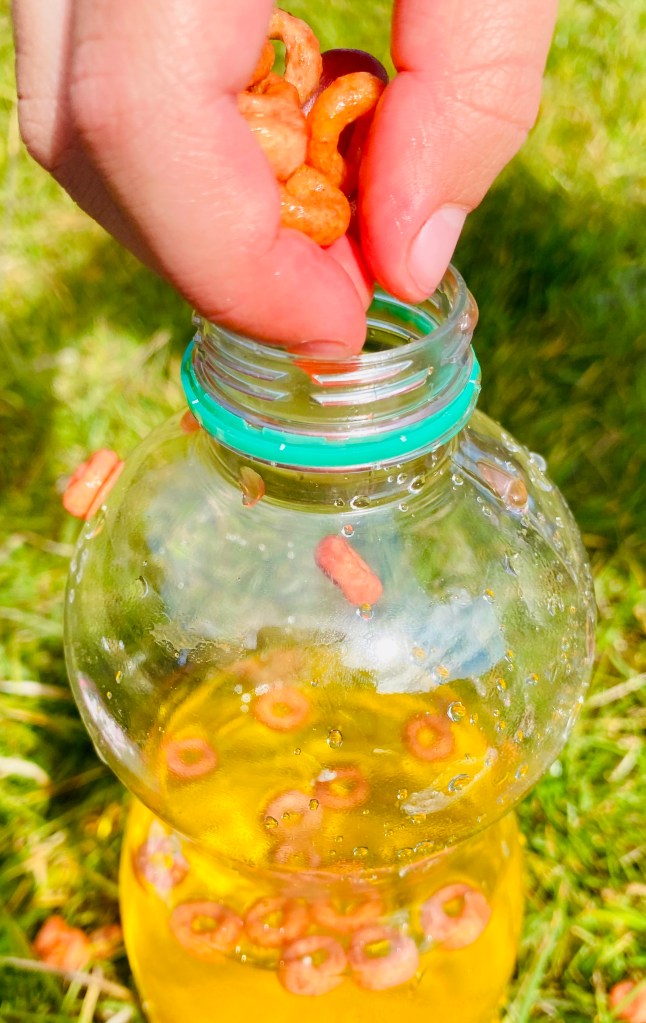
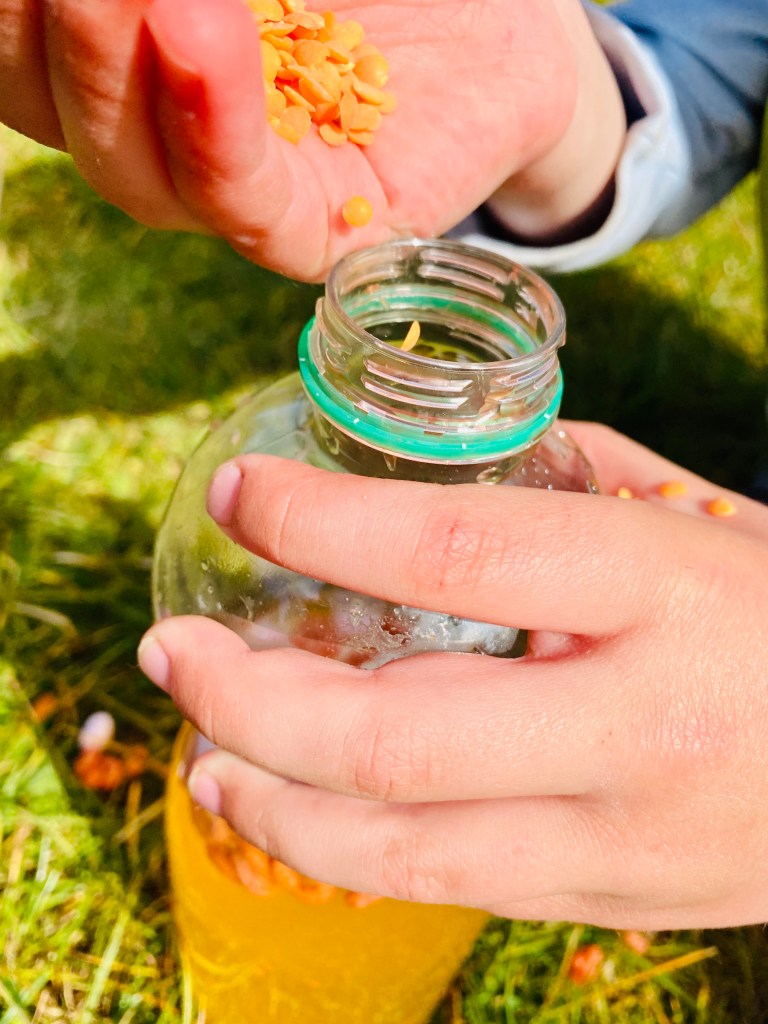
Blood is made of several different components – and in this fun and sensory activity (suitable for all ages) we explore what components make blood and in what quantities.
You will need:
- Bottle/bowl
- Cheerios
- Mini-marshmallows/butter beans
- Lentils/rice
- Salt
- Red food-dye/paint
- Yellow food-dye/paint
- Water
- Bowl/ziploc bag
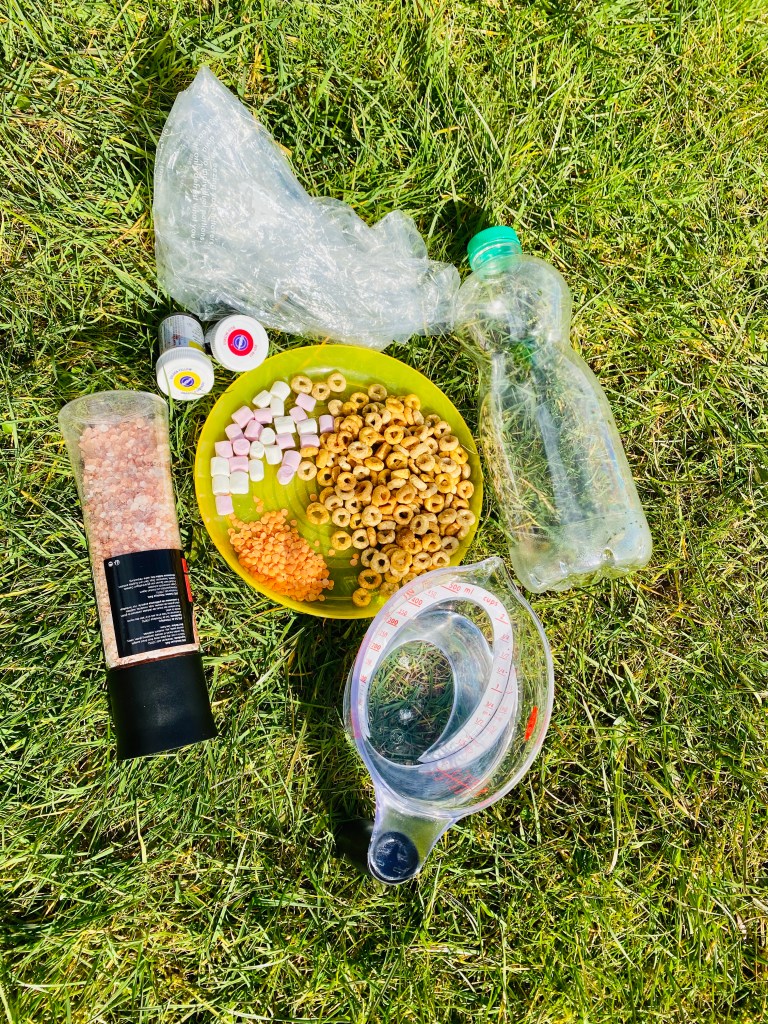
Instructions
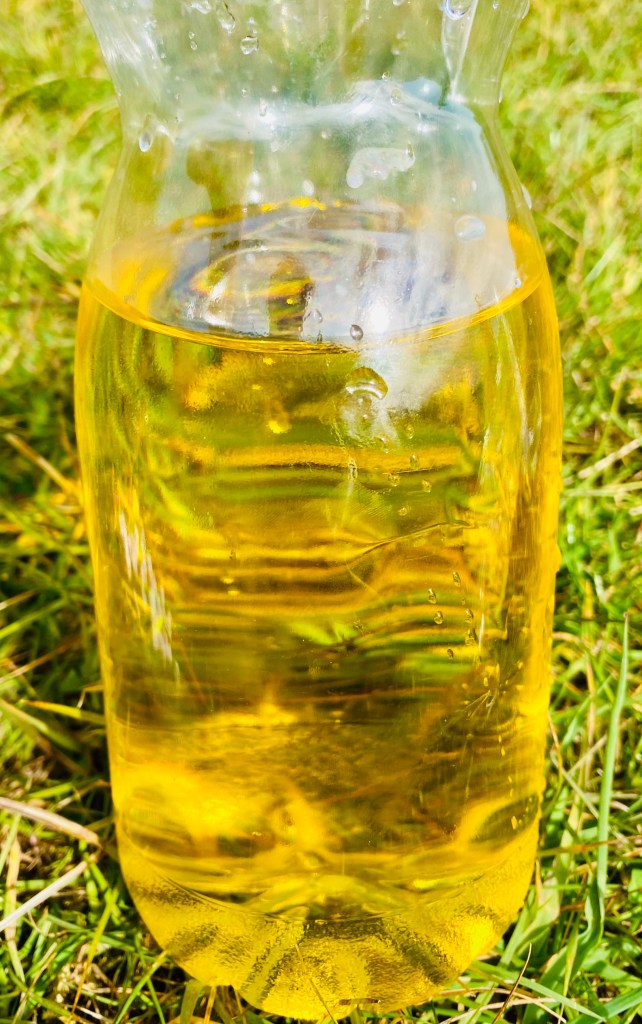
Fill the bottle/bowl 2/3 full of water and sprinkle in a few drops of yellow food-dye/paint. This is your plasma.
Next, sprinkle in a tiny bit of salt – this represents the minerals and chemicals in your blood.
In your ziploc bag/another bowl add lots of cheerios and a wee bit of water and red food-dye/paint. These are your red blood cells. Place lots of them into your bottle/bowl of plasma.
Now add a few mini-marshmallows/butter beans – these represent the white blood cells which make up far less of your blood. You could link back to the Germs theme from Week 1 where we looked at how our body helps to fight germs. White Blood Cells are our body’s little soldiers on the hunt for germs.
Finally, add some lentils/rice to represent the platelets in your blood (these help to form clots and stop you bleeding too much).
My kids loved shaking the bottle to turn the water more and more red – and this is the reason your blood is red too – because it has SO many red blood cells. This activity is also a great sensory experience for little hands – with loads of different textures for them to play with.


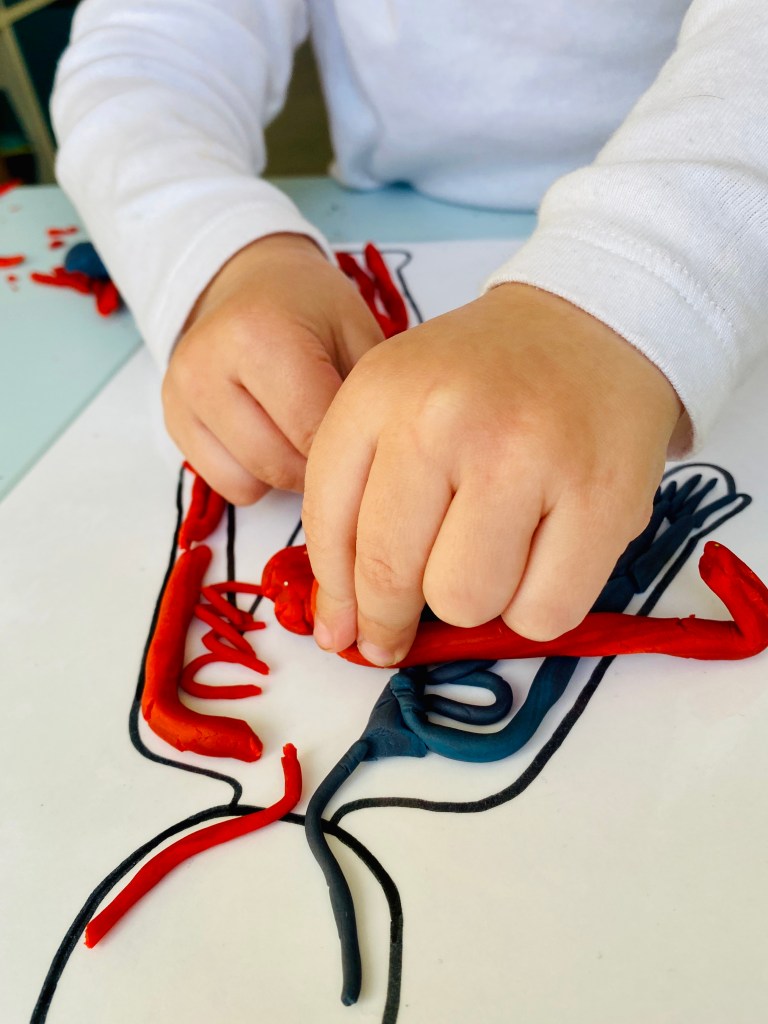
Activity 2
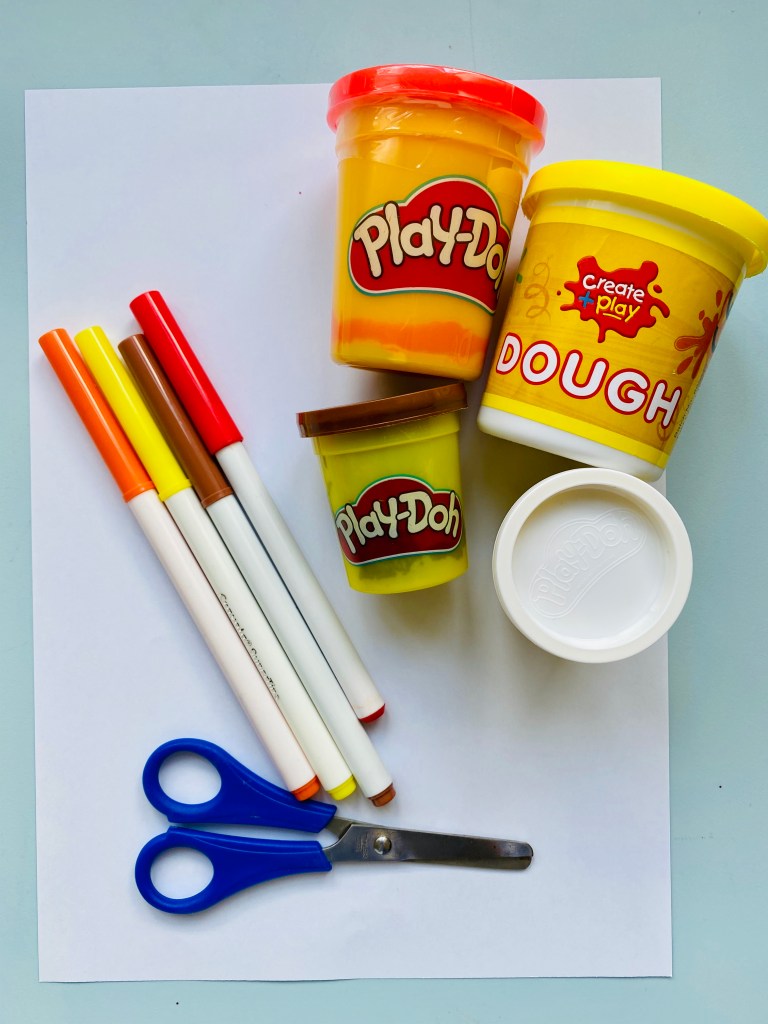
Play-dough Blood
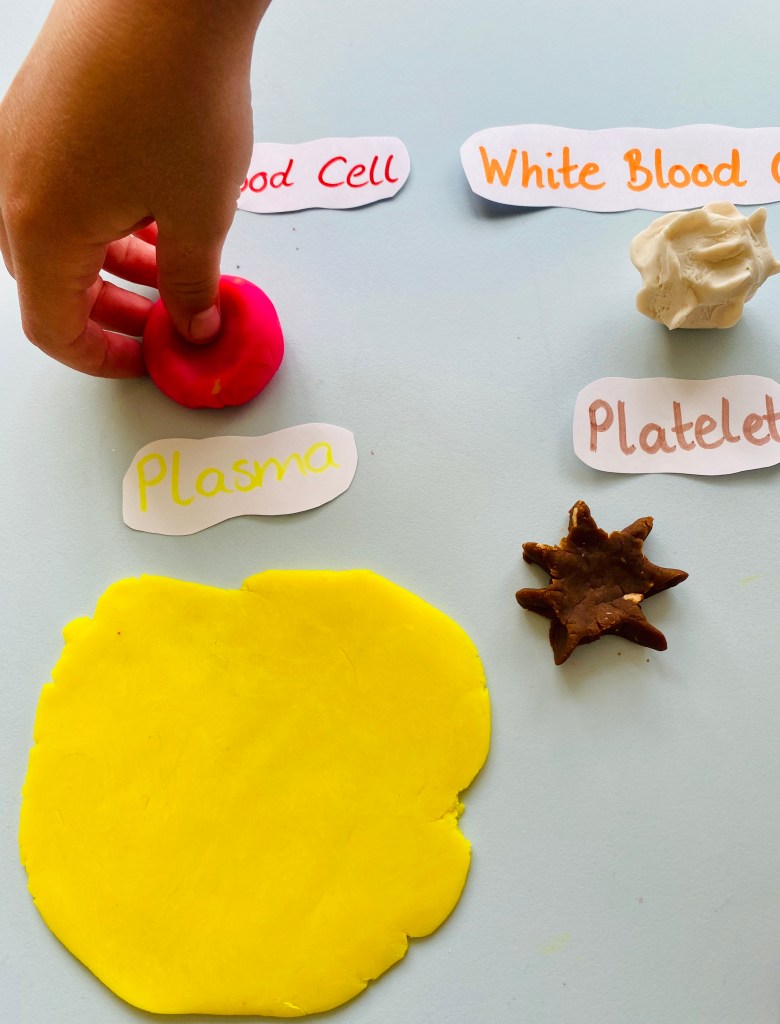
This is a fun consolidation activity to reiterate the different components of blood.
You will need:
- Play-dough
- Paper
- Pens
- Scissors
Instructions
Using this video (from above) as inspiration, use play-dough to create larger-than-life models of all the components in blood.
Red blood cells transport oxygen around the body.
White blood cells fight infection and attack things that don’t belong in the body.
Platelets help blood to clot so that you don’t lose too much of it when you get a cut.
Plasma transports the red blood cells, white blood cells, and platelets as well as hormones, proteins and nutrients around the body.


Activity 3
Red Blood Cell Membrane
Membranes and osmosis are difficult concepts to grasp – however this activity makes it nice and visual and the sensory part of it is fun too!
You will need:
- Egg
- Red food-dye
- Vinegar
- Large glass container

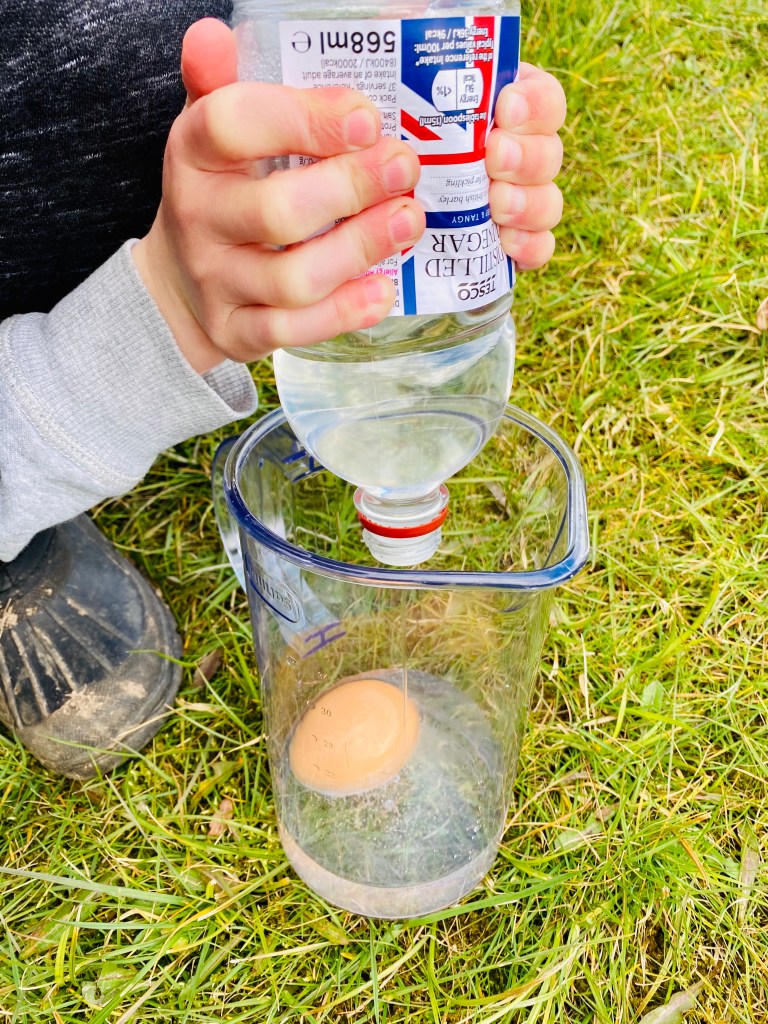
Instructions
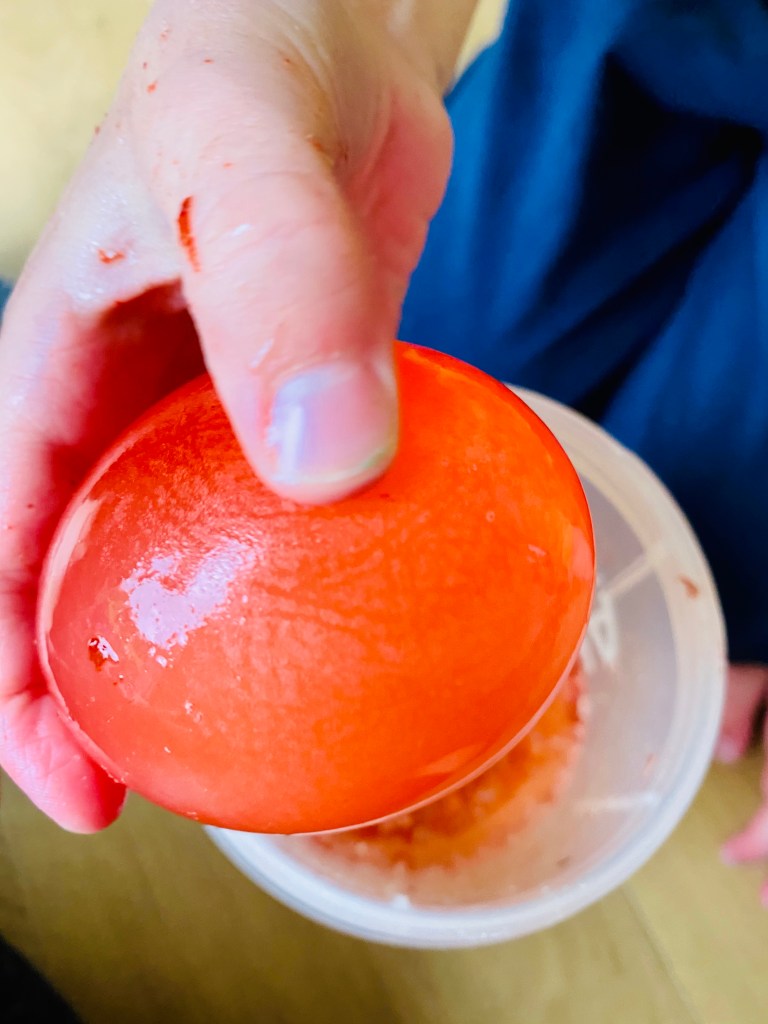
Soak your (raw) egg in 2 cups of vinegar for 48-hours. This will remove the egg’s shell (when the vinegar is bubbly and scummy you’re ready for the next stage). If there is any shell left on it you can gently rub it off with your hand.
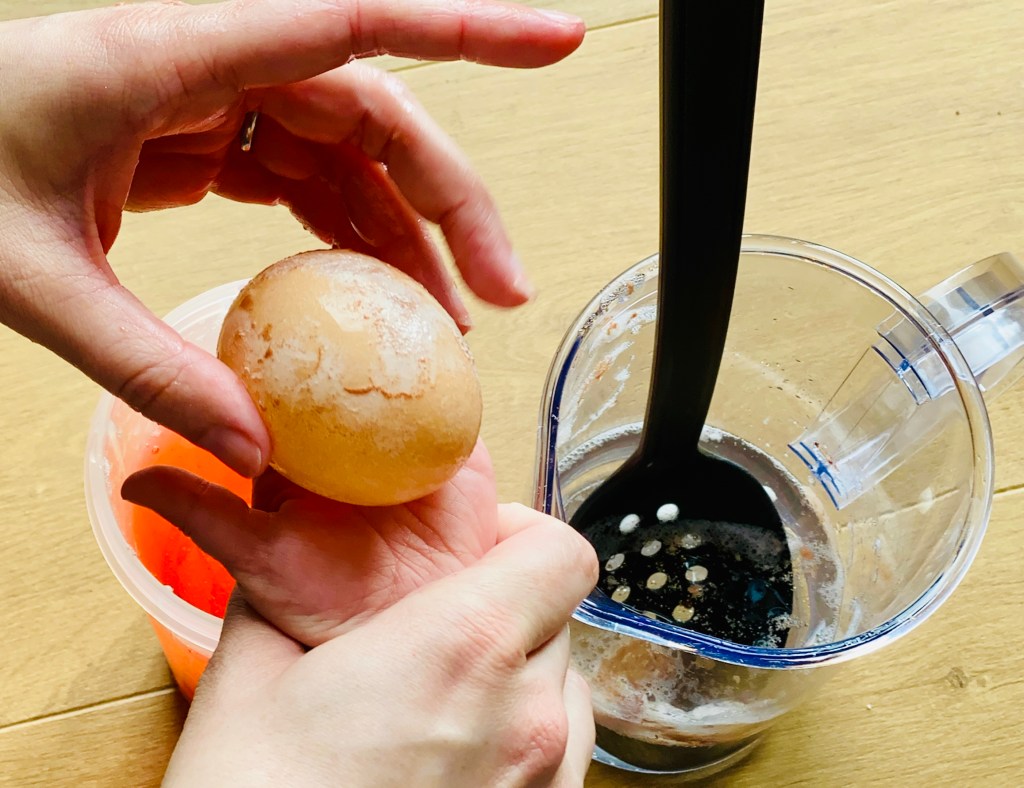
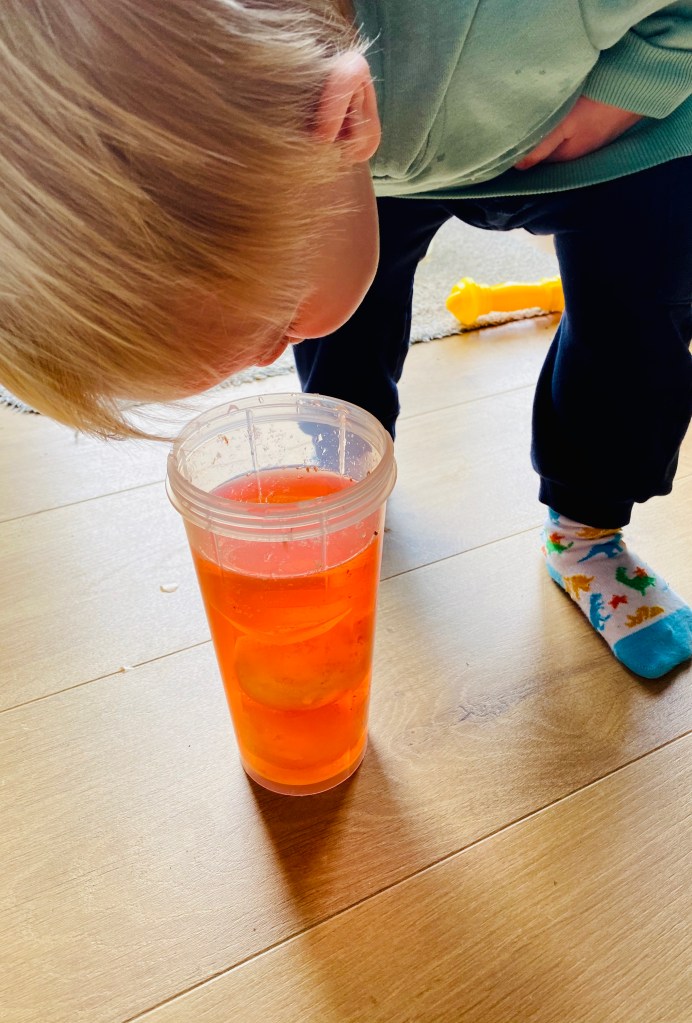
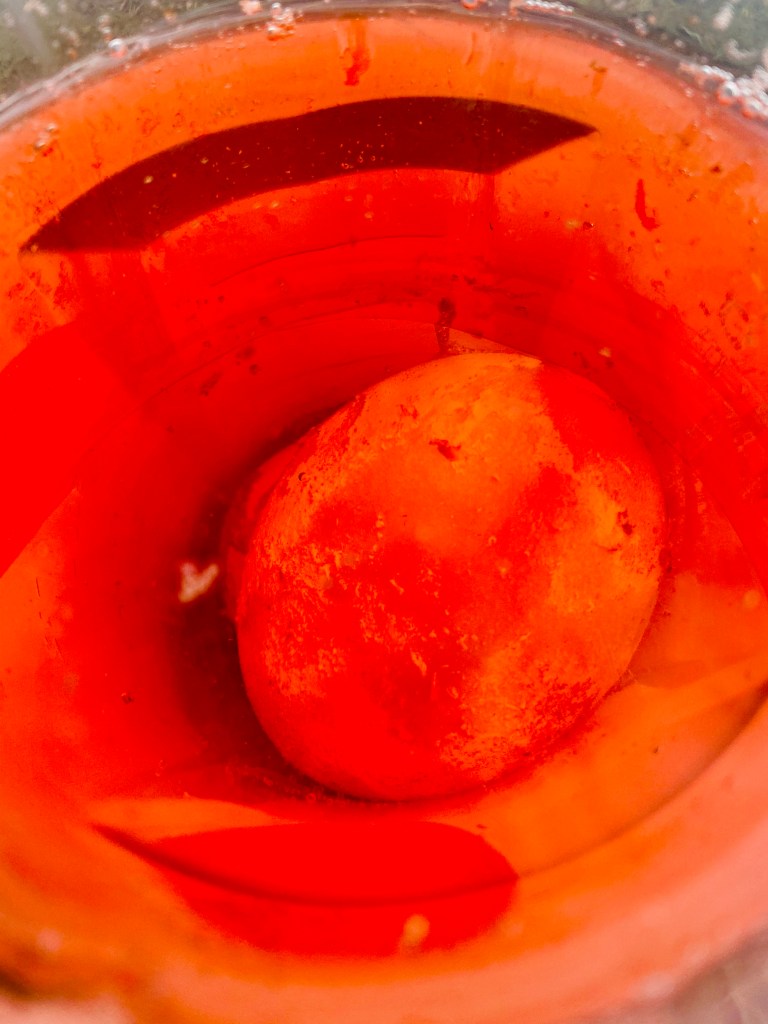
Fill a large container with water dyed with red-dye and CAREFULLY place your egg into it. Leave it in here for 24-hours.
You can now carefully remove the egg (and dab it with kitchen paper) to see that it is completely intact, although delicate. The fact that it has absorbed the red liquid whilst remaining intact is called osmosis.
If you want to, you can smash the egg – and you’ll notice the yolk hasn’t absorbed the red colour as it doesn’t have a semi-permeable membrane.
Your red blood cells bind with oxygen molecules in your lungs and carry it around your body distributing it anywhere your body needs it. So whilst it’s not strictly the process of osmosis, I thought this was a great way to demonstrate a similar process of how two things bind together (and also start to explore osmosis!). And now you’ve got a larger-than-life red blood cell to play with.

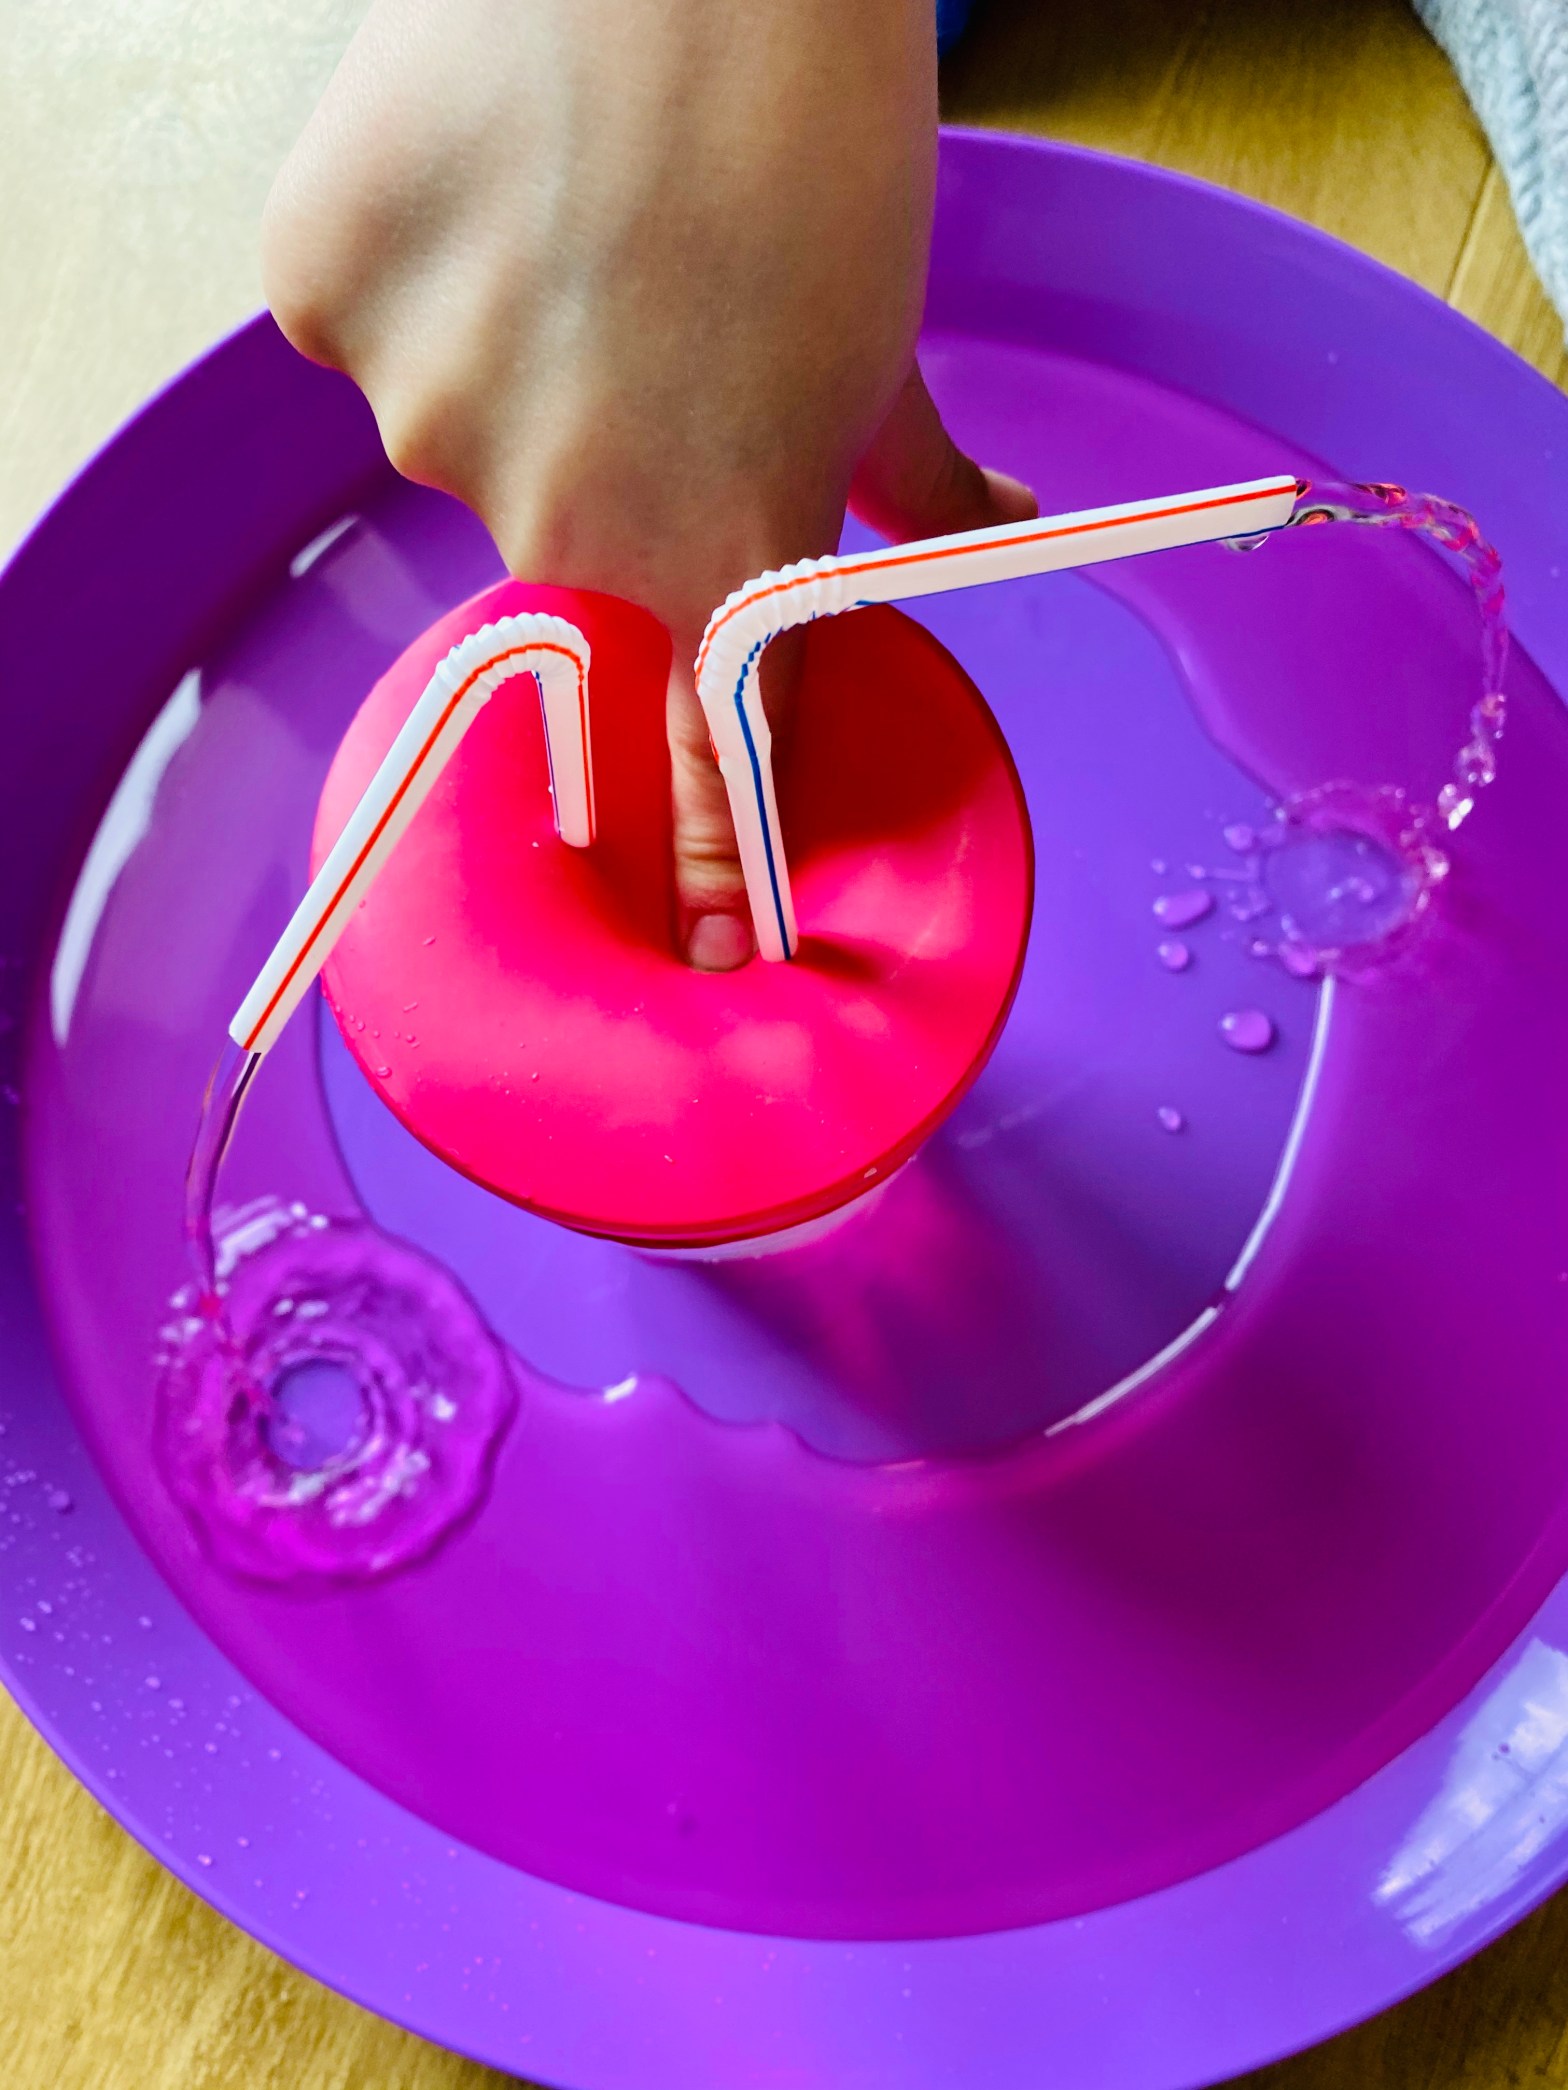
Activity 4
Your Heart
Your heart is pretty incredible at pumping blood around your body all day and all night. In this simple experiment we look at how it pumps.
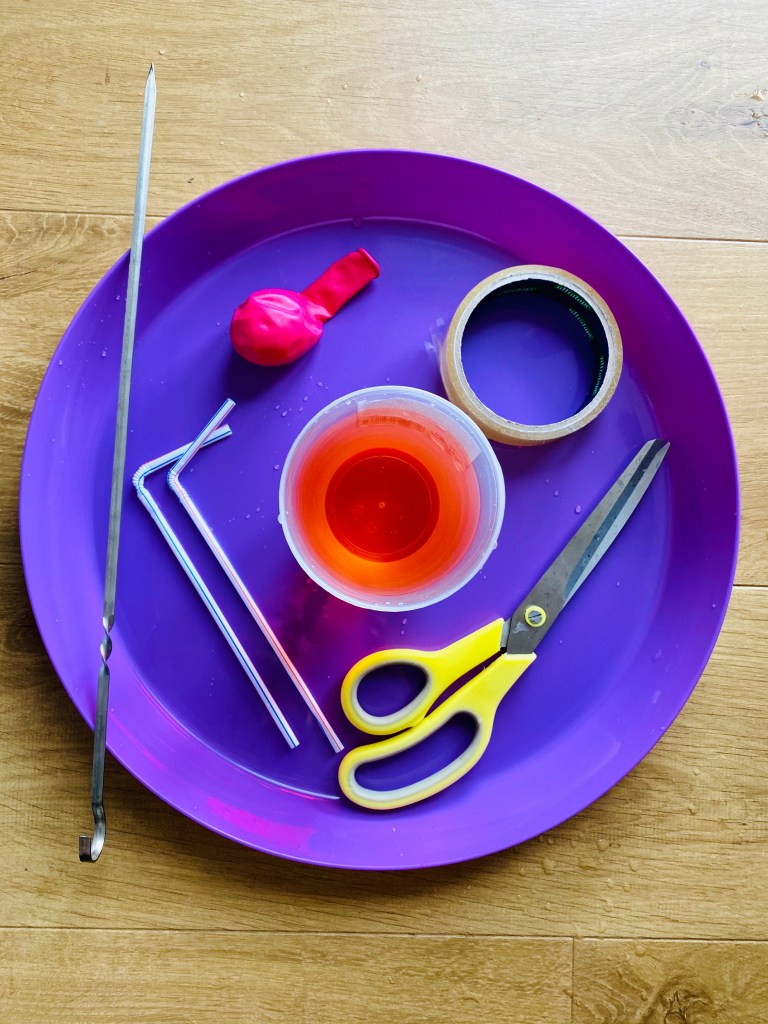
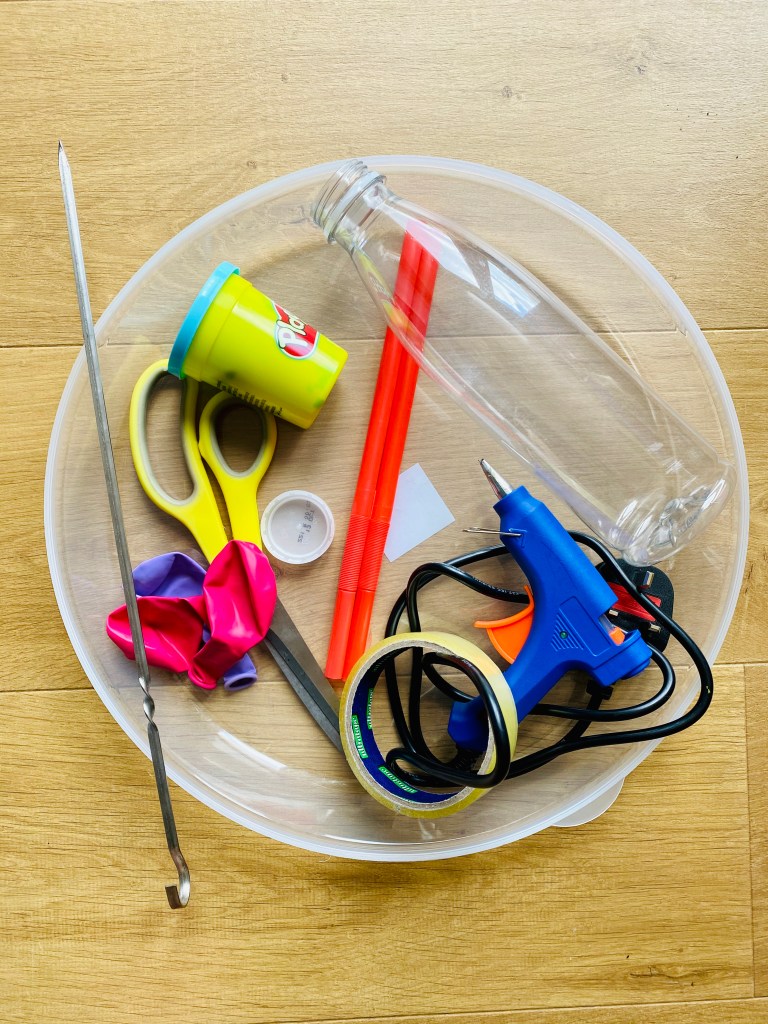
You will need:
- Balloon
- Jar
- Straws x 2
- Scissors
- Tape
- Skewer/something sharp
- Liquid (ideally red with food-dye or paint)
Instructions
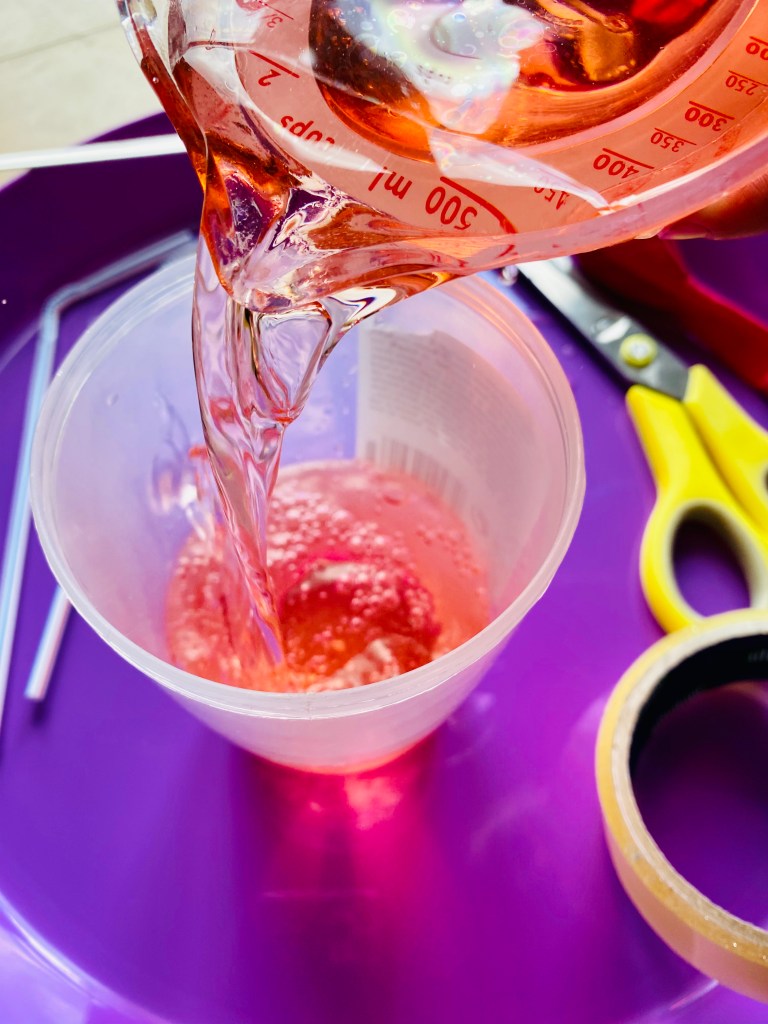
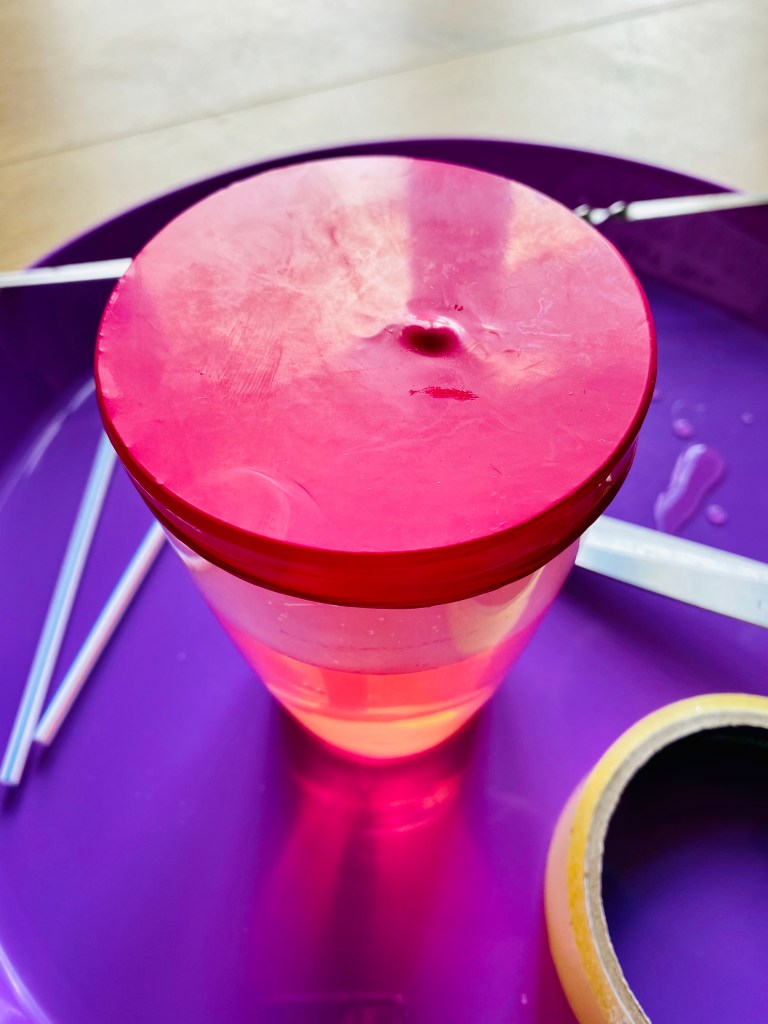
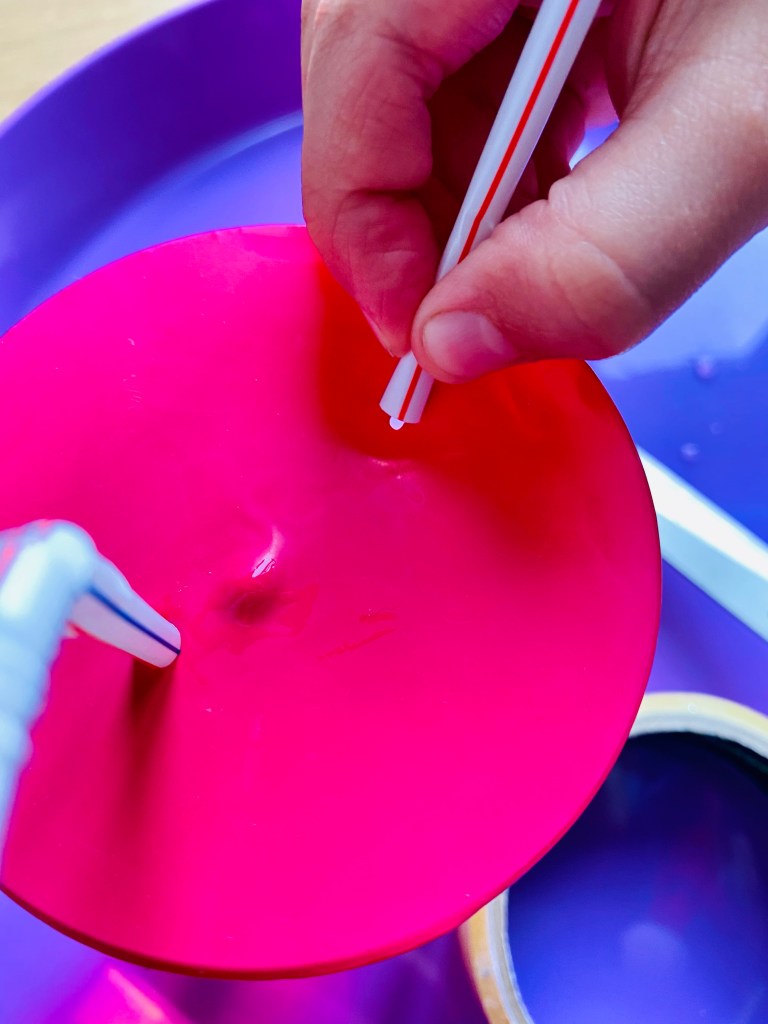
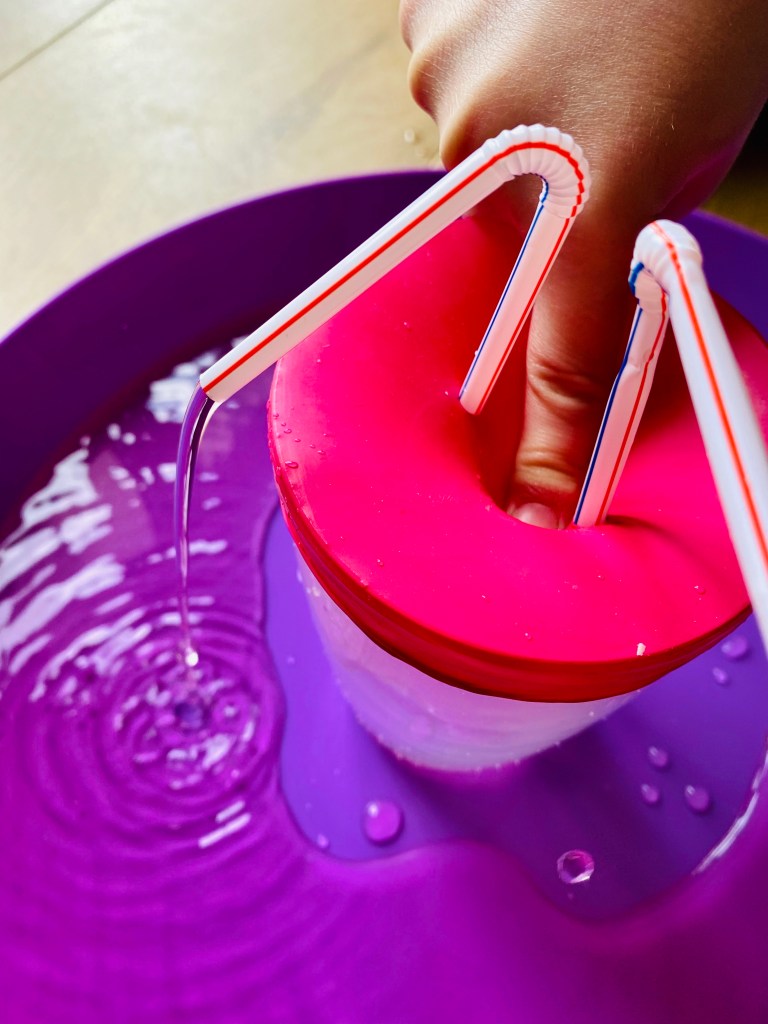
Fill your jar with red water, snip the bottom section of the balloon off (so that you have the fattest part left) and carefully stretch it tightly over the top of the jar.
Use the skewer to carefully pierce two holes (at least an inch apart) in the top of the balloon, then thread the straws into the jar.
Use the sellotape to seal the outer hole of one of the straws – this simply represents a valve in your heart (my kids eventually removed the sellotape so that more water skooshed out).
Push down on the balloon between the straws to replicate the pressure within a heart that pumps liquid (blood).

Activity 5
Your Lungs
Your lungs play an integral role in getting that all important blood around your body. This experiment shows you how your lungs inflate to get the necessary oxygen in for your blood to absorb.
You will need:
- Balloons x 3 (ideally red but you might need to get creative)
- Plastic bottle
- Scissors/stanley knife
- Sellotape
- Glue gun/play-dough
- Straws x 2
Instructions
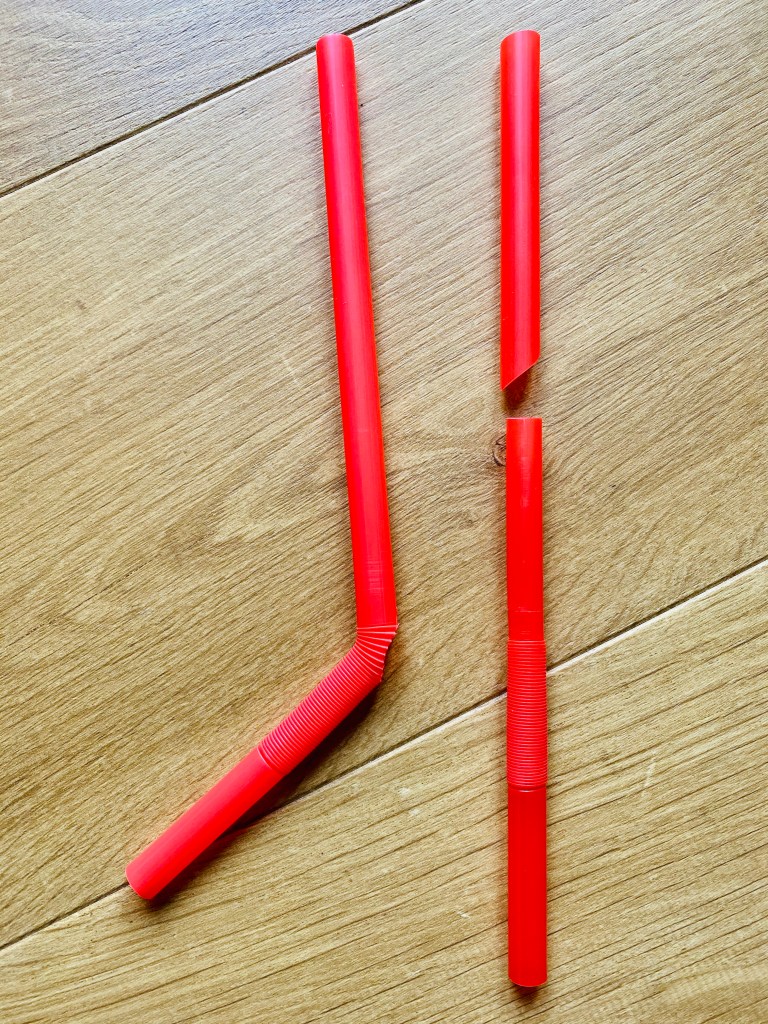
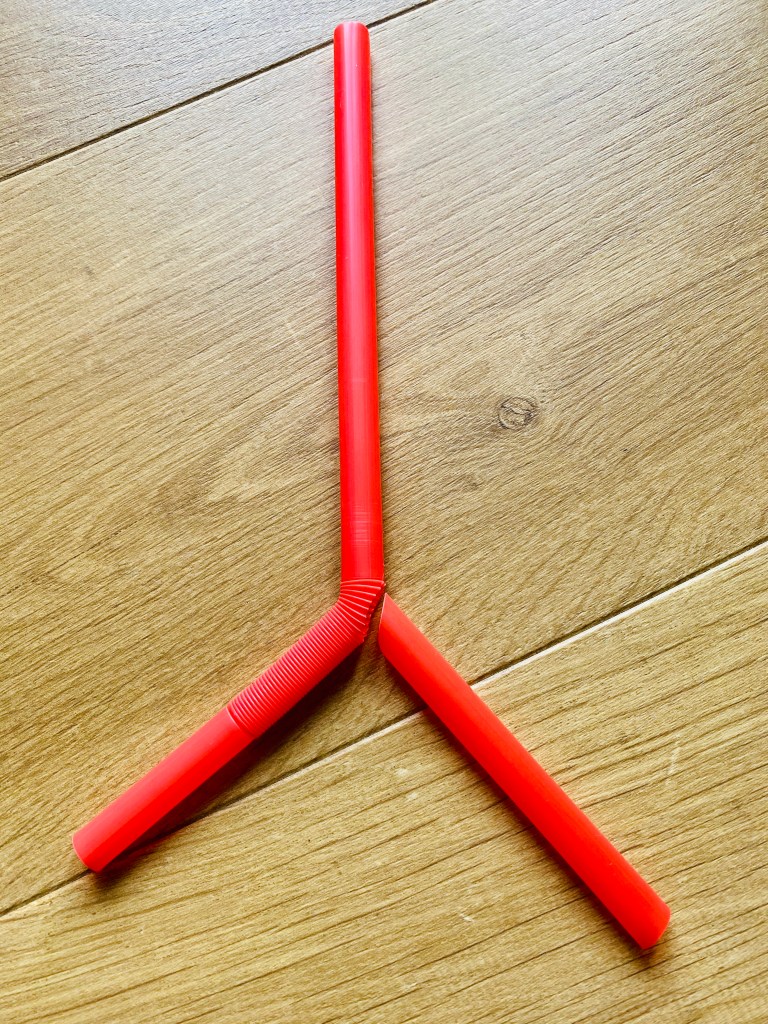
Using your scissors, cut the base off your bottle. Snip a tiny corner off the bendy part of one of the straws, and snip the leg off the other straw at an angle. Gently push the angled-straw-cutoff into the other straw’s bend (so it looks like a Y).
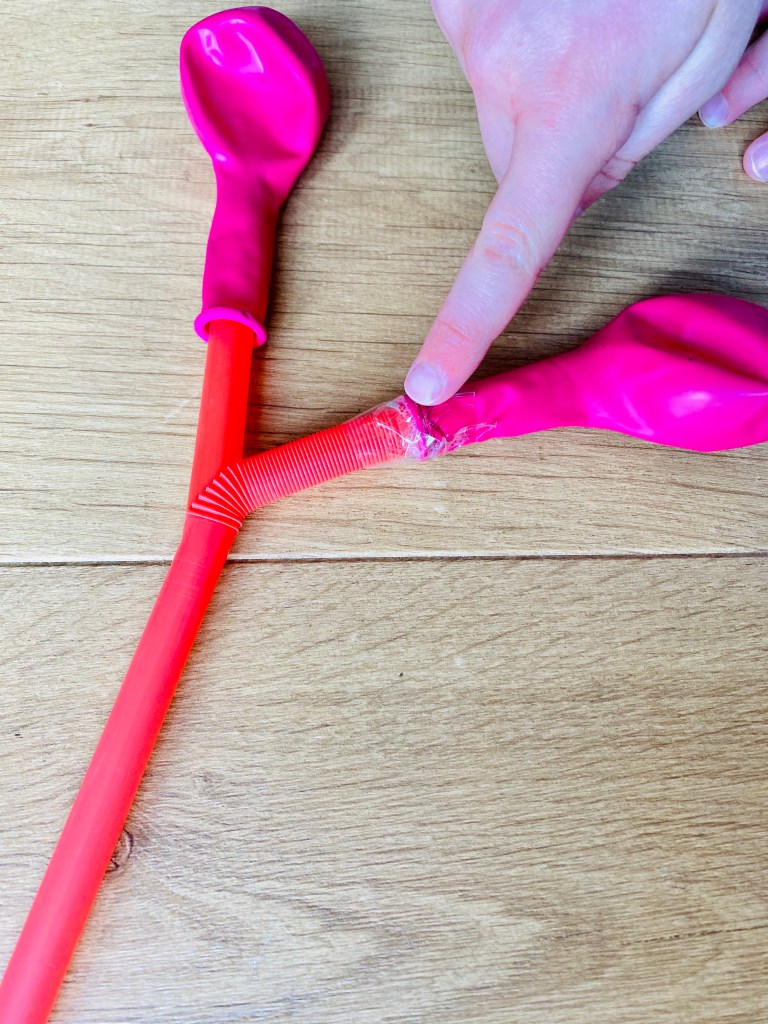
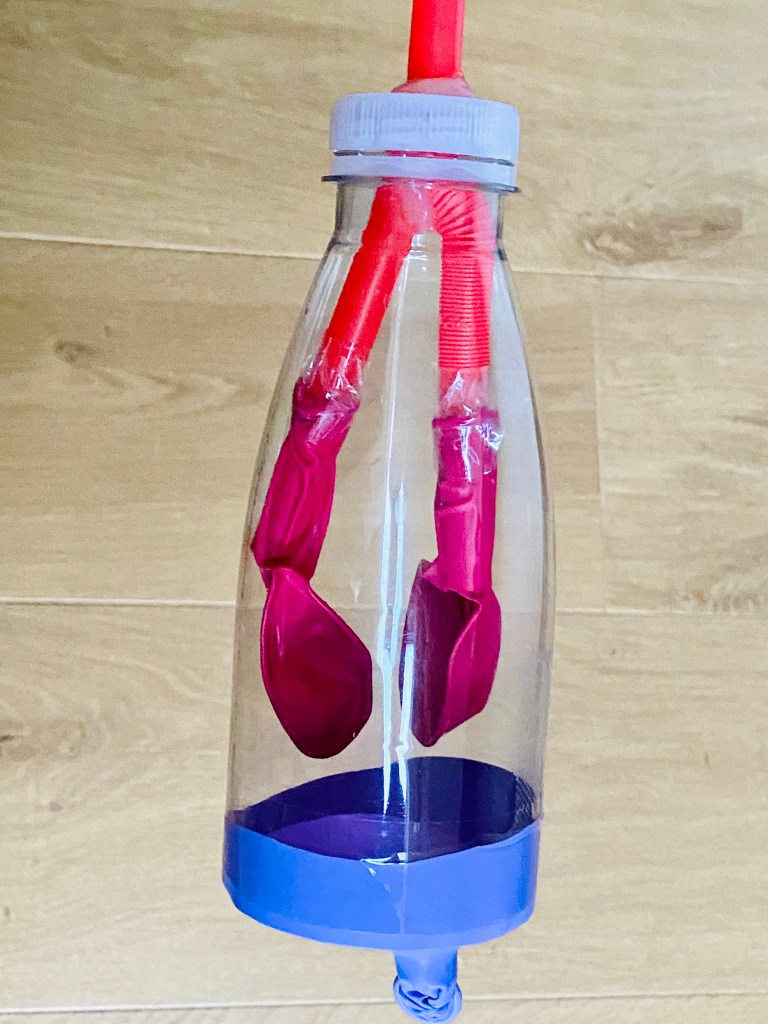
Next, thread a balloon onto each ‘Bronchi’ and secure with tape. Slip the ‘trachea & bronchi’ into the bottle.
Make a hole in the bottle’s lid (we did this easily just using a skewer) and thread the straw through. Seal it with a glue gun (although play-dough would work just as well). It just needs to be airtight.
Finally, snip the top section of the 3rd balloon off and open it up and slip it over the open base of the bottle – this represents the diaphragm. If it moves about you could tape it to the bottle.
To make your lungs inflate simply pull the diaphragm – demonstrating the pressure caused when your own diaphragm expands and contracts causing your own lungs to suck in or expel air.

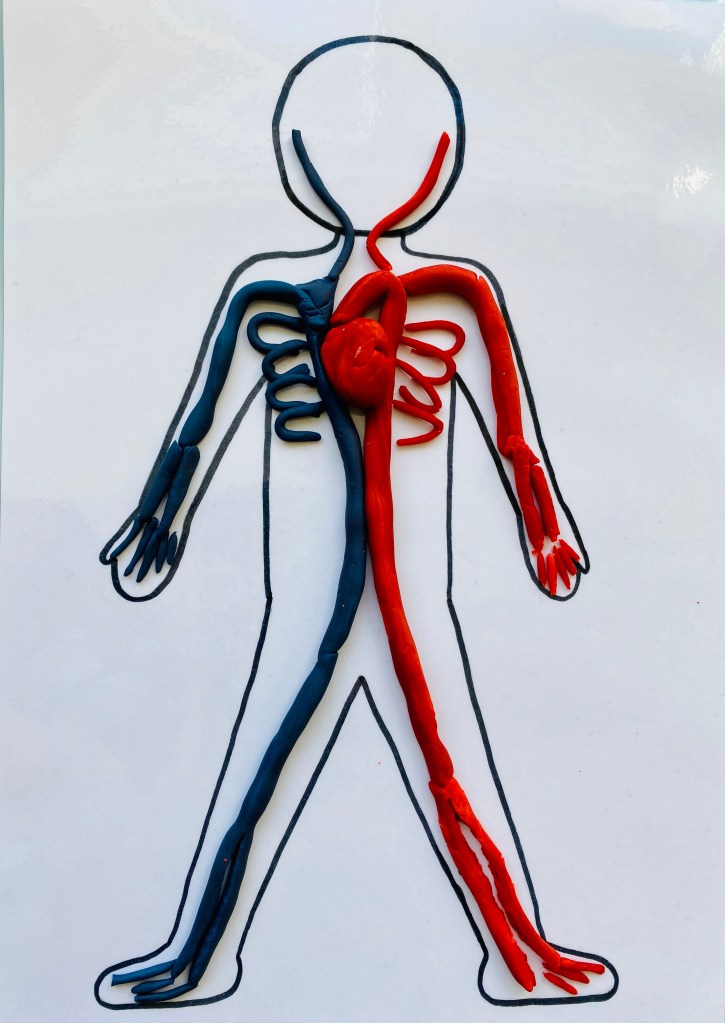
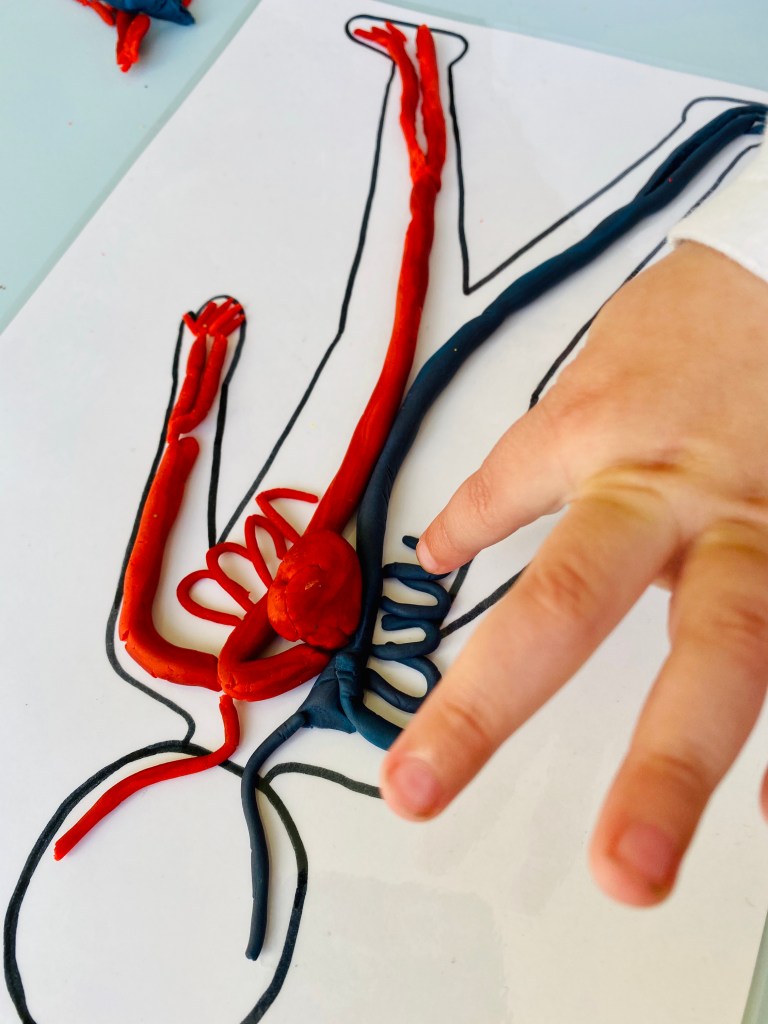
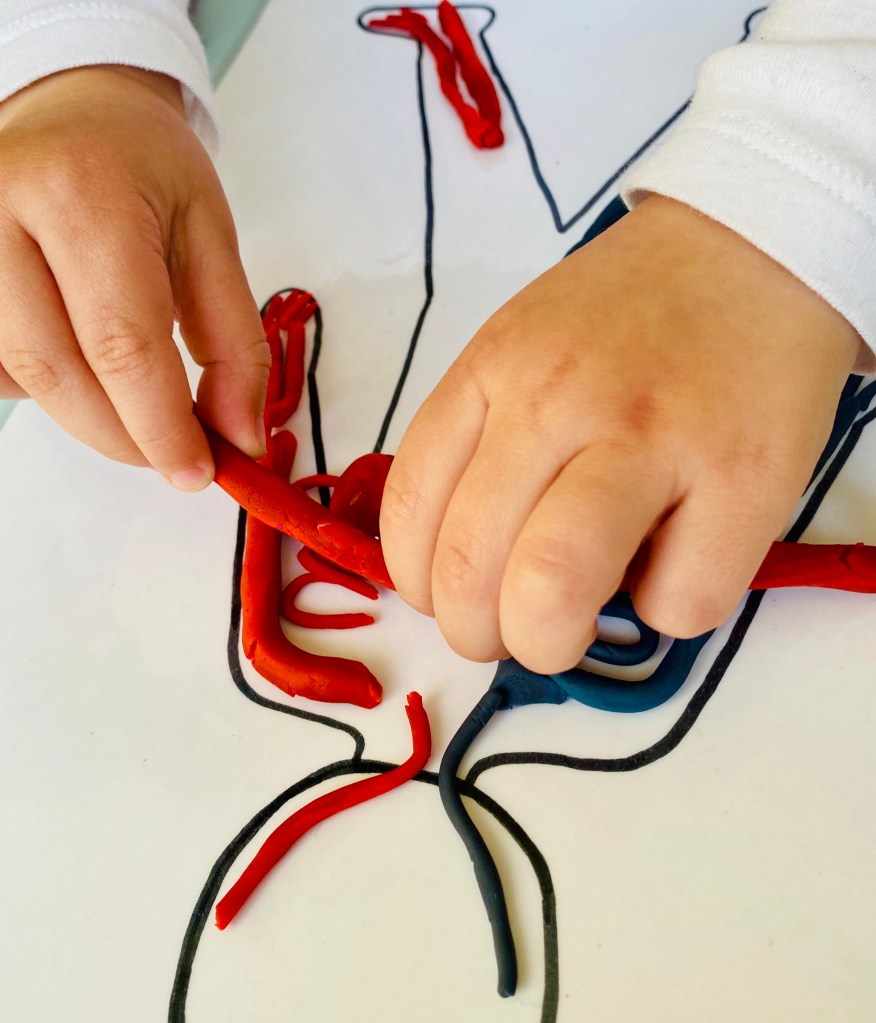
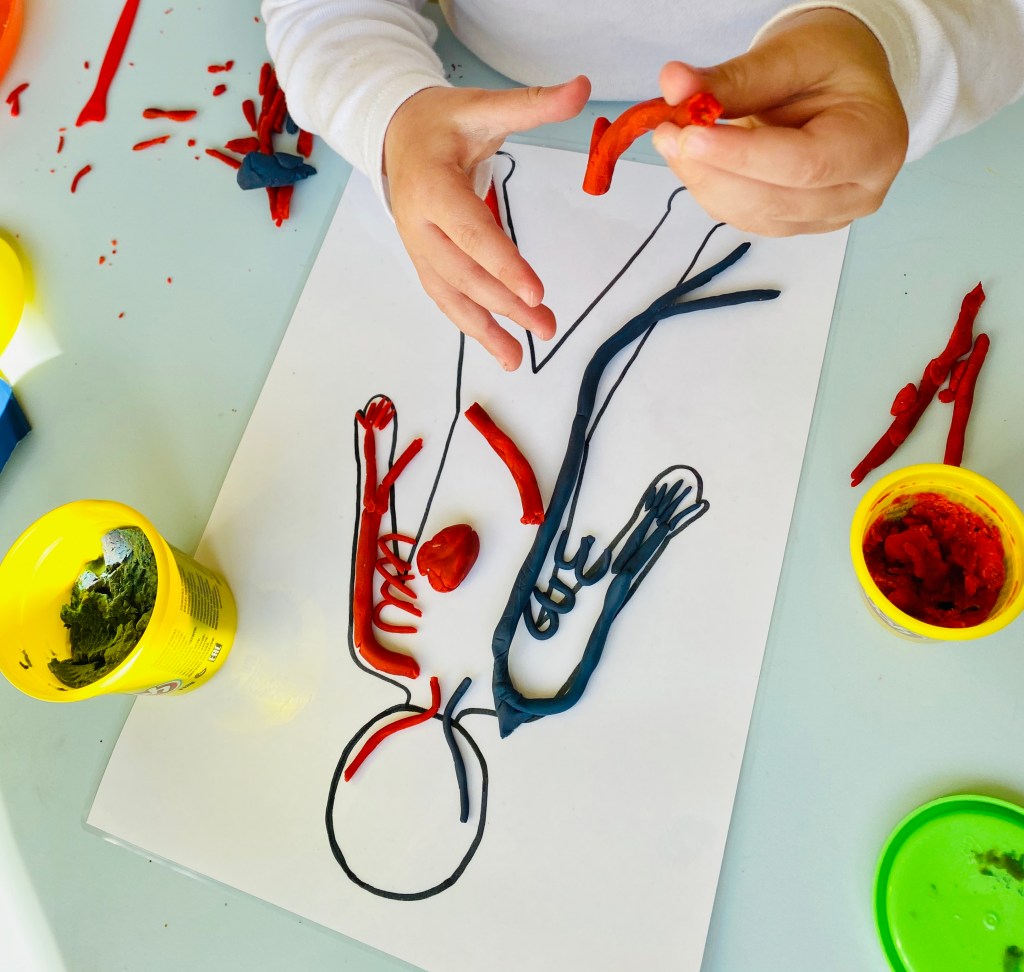
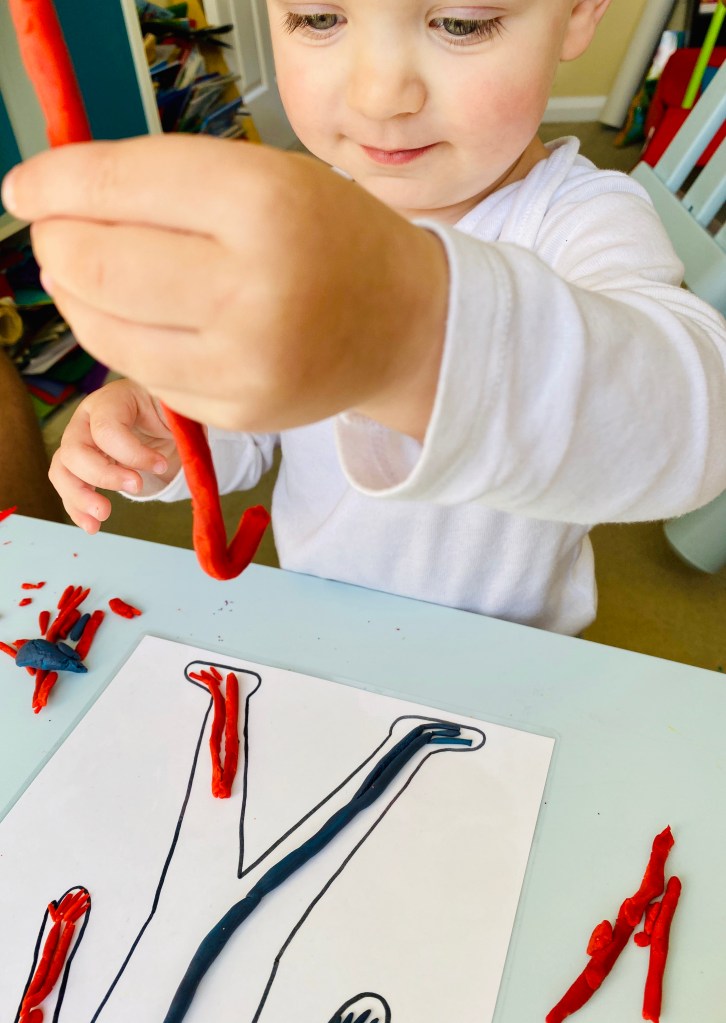
Activity 6
Arteries & Veins
A fun way to explore all the routes for blood around the body.
You will need:
- Body printout (or paper and a pen to draw your own)
- Play-dough (ideally red and blue)
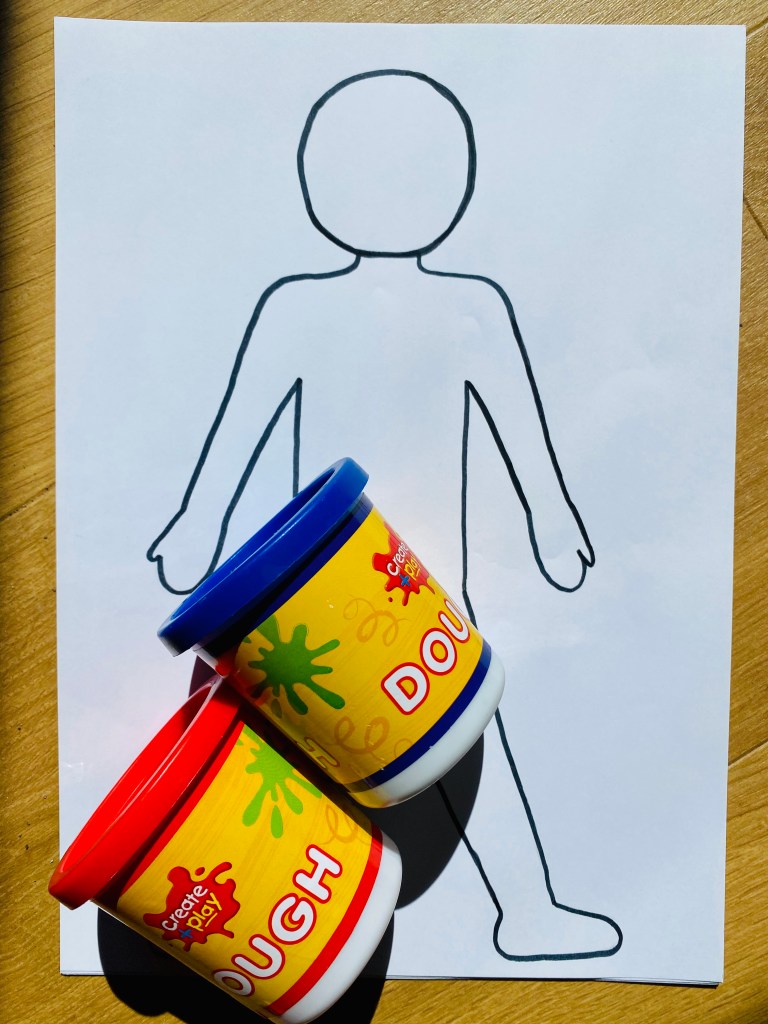
Instructions
Watch the video from above and at around 3mins 56secs there’s a nice visual of arteries & veins. You could have a go replicating the arteries and veins throughout the body.
This activity allows kids to explore the avenues that blood flows around the body in a basic way – whilst strengthening finger muscles.
Family STEM Learning
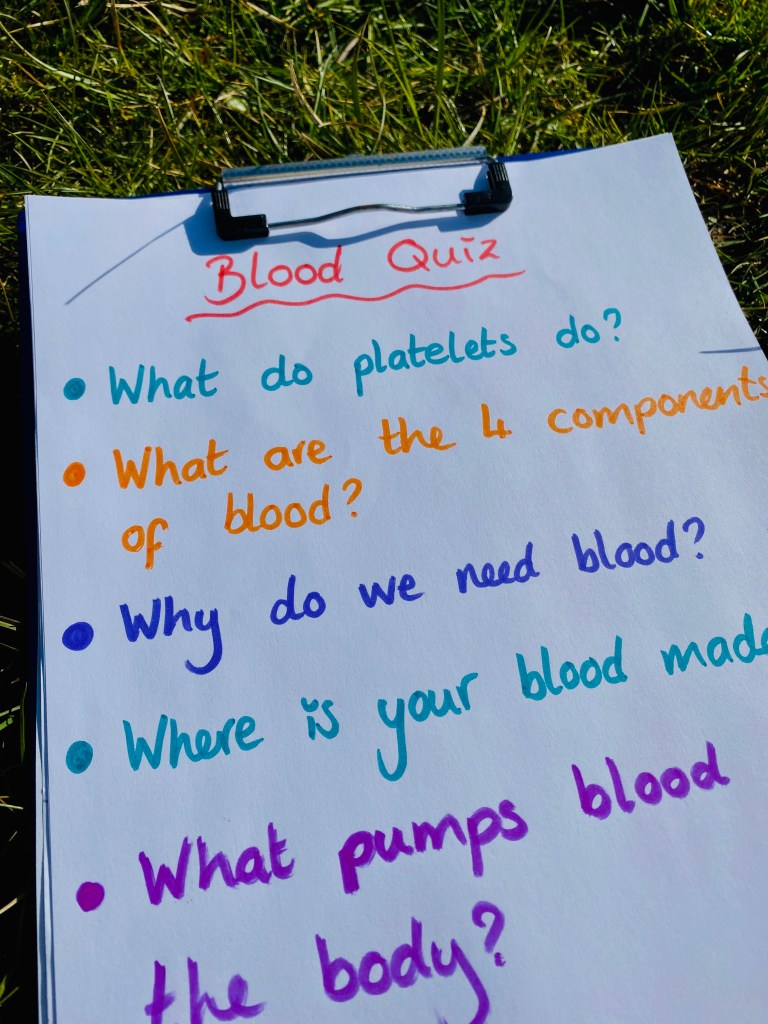
Create a quiz to test the other members of your family on blood facts – you could make it a quick-fire round for added intensity!
You will need:
- Paper
- Pen
- Clipboard (optional)
- Timer (optional)
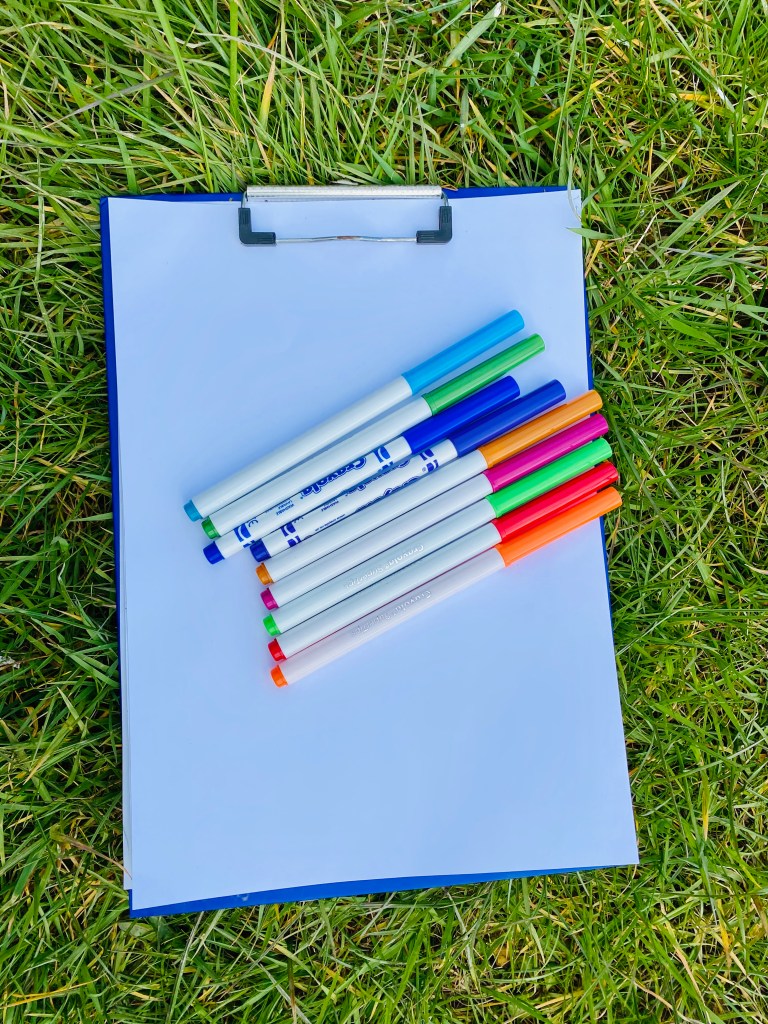
Instructions
Each member create a quiz all about blood (pre-agree on the number of questions) and decide on a prize for the person with the most correct answers (perhaps it could be any left-over marshmallows?!).
Some example questions could be:
What are the 4 components of blood?
Where is blood made?
What colour is plasma?
What is blood used for?
Perhaps you know somebody you could video-call and test their blood knowledge?
Good luck!
Don’t forget to use the STEM Bingo chart and let me know how you get on! Happy learning!